Step-by-Step Guide to Configuring Purchase and Notification Settings in Your Dashboard
5 mins read · Updated 29 Sep, 2025
STEP 1: Click on "Settings" to Access Configuration Options
- Navigate to the left sidebar of the dashboard.
- Locate and click on the "Settings" link.
- This action will direct you to the settings configuration page for further adjustments.
Note: Ensure you are logged in to access the settings.
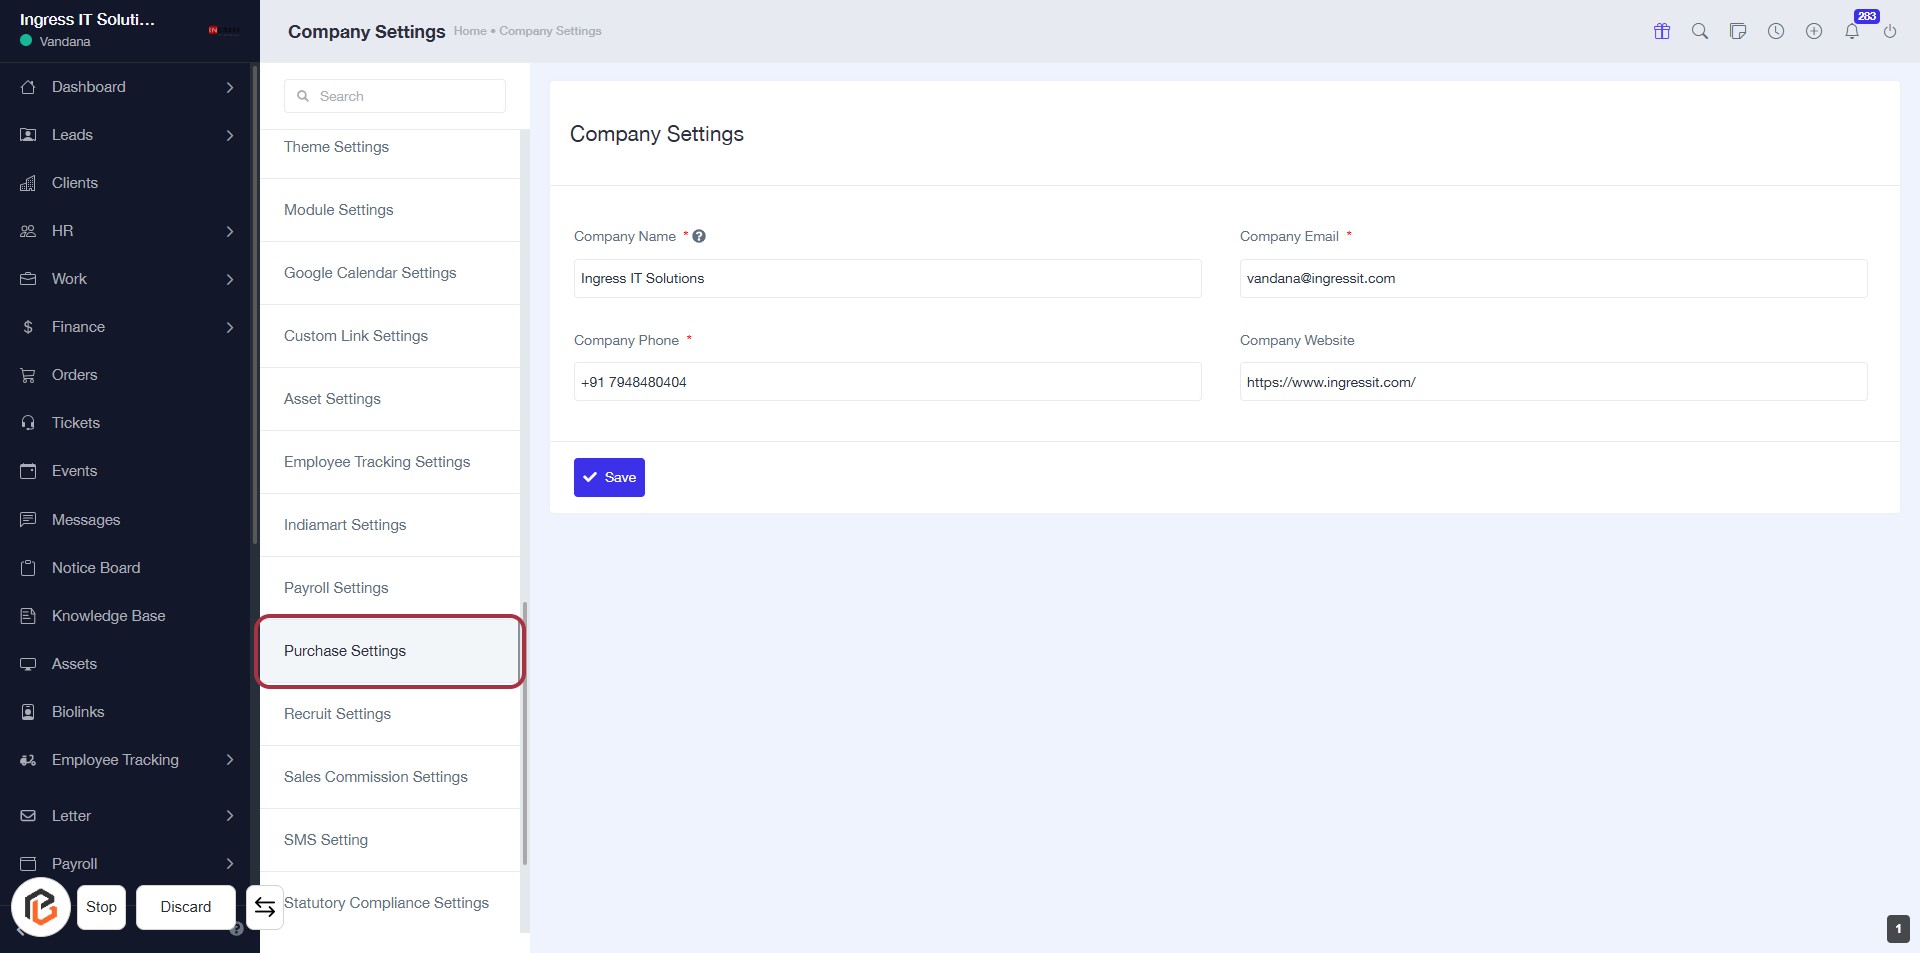
STEP 2: Click on "Purchase Settings"
- Navigate to the "Purchase Settings" option in the sidebar menu.
- Click on the "Purchase Settings" link to access the relevant configuration options.
- Ensure to review all required fields marked with an asterisk (*) in the settings form.
- Proceed to the next step by selecting "Purchase Notification Settings" for further configurations.
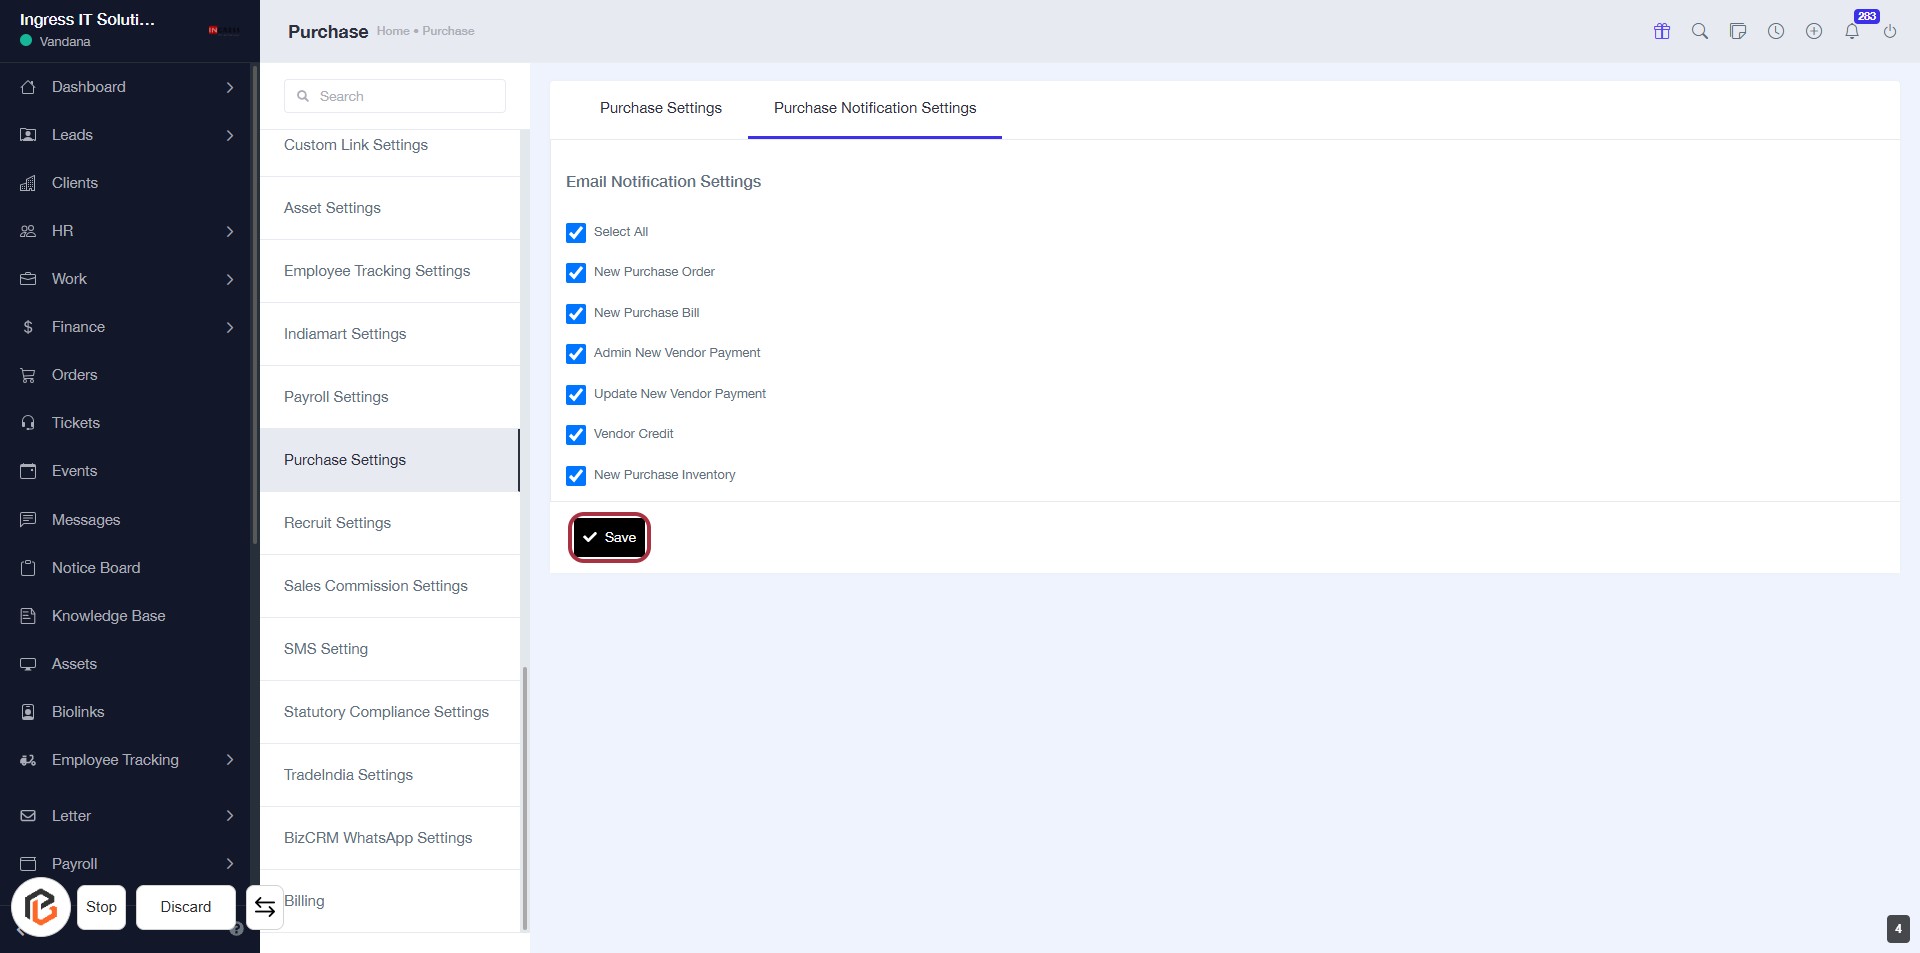
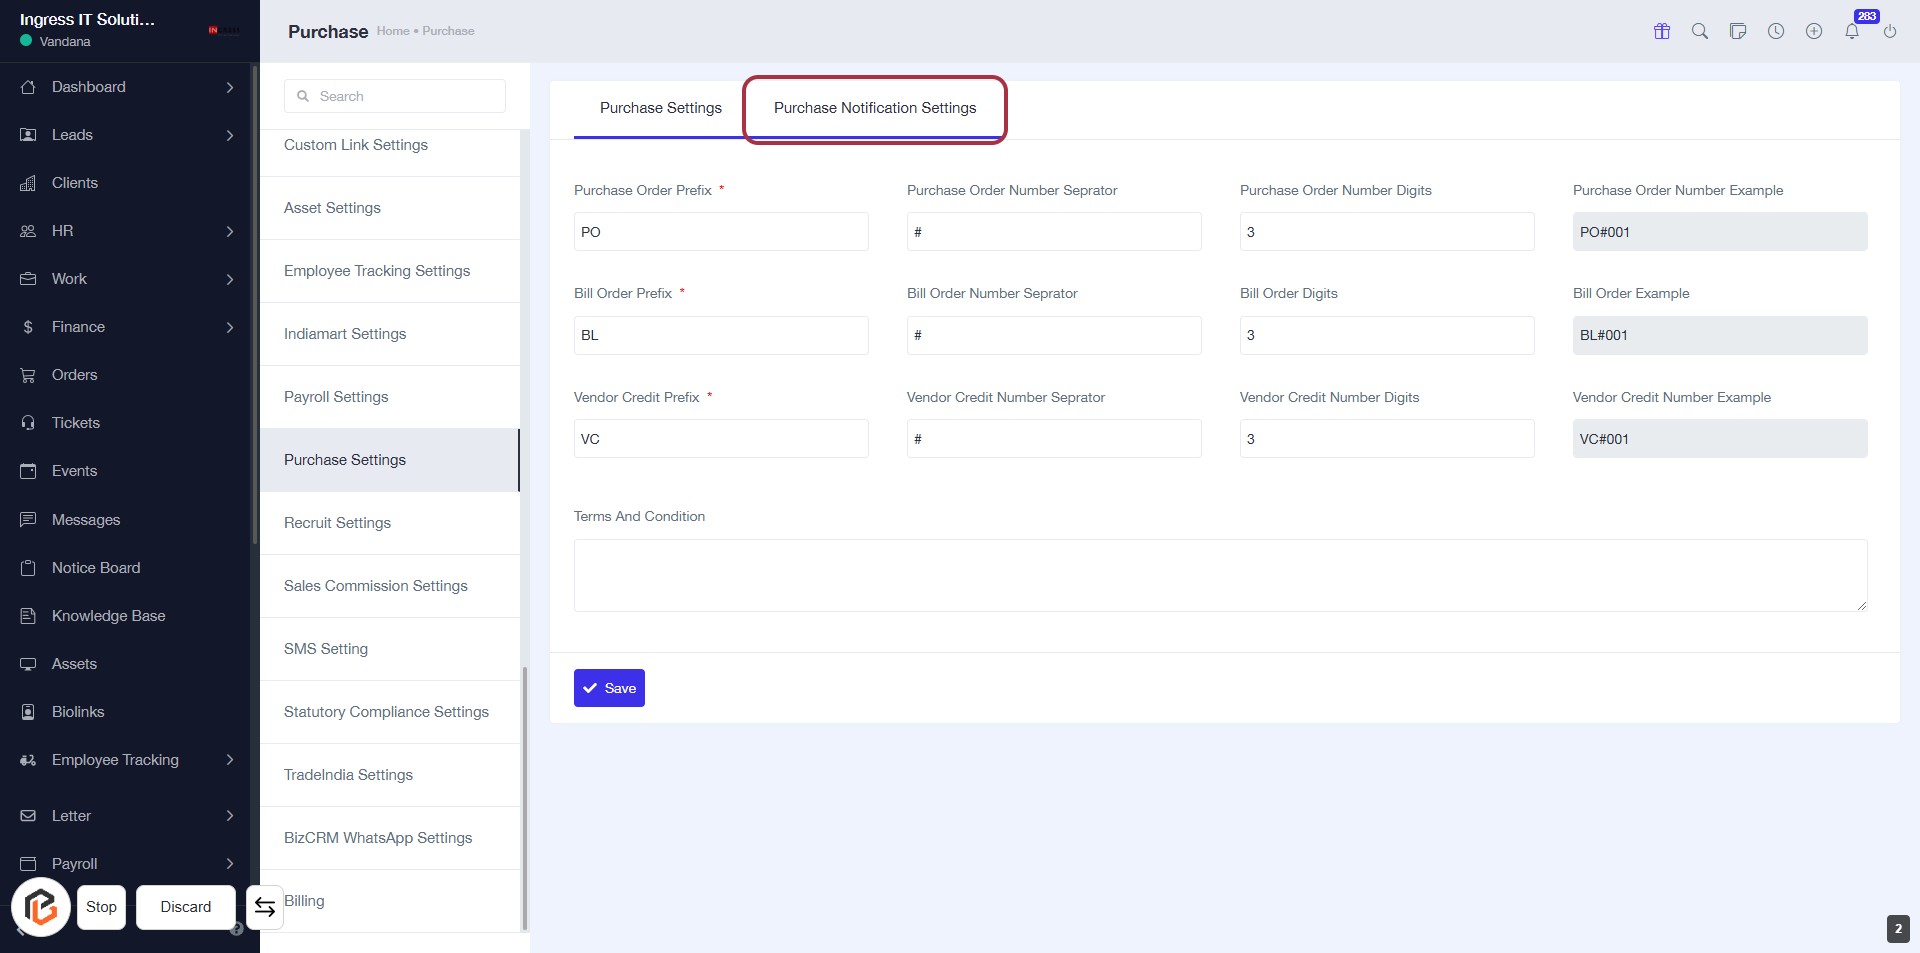
STEP 3: Select "Purchase Notification Settings"
- Click on the "Purchase Notification Settings" tab to access the relevant configuration options.
- Fill in the required fields:
- Purchase Order Prefix (*)
- Bill Order Prefix (*)
- Vendor Credit Prefix (*)
- Specify separators and number digits for each order type.
- Review examples provided for clarity.
- Click Save to apply your settings.
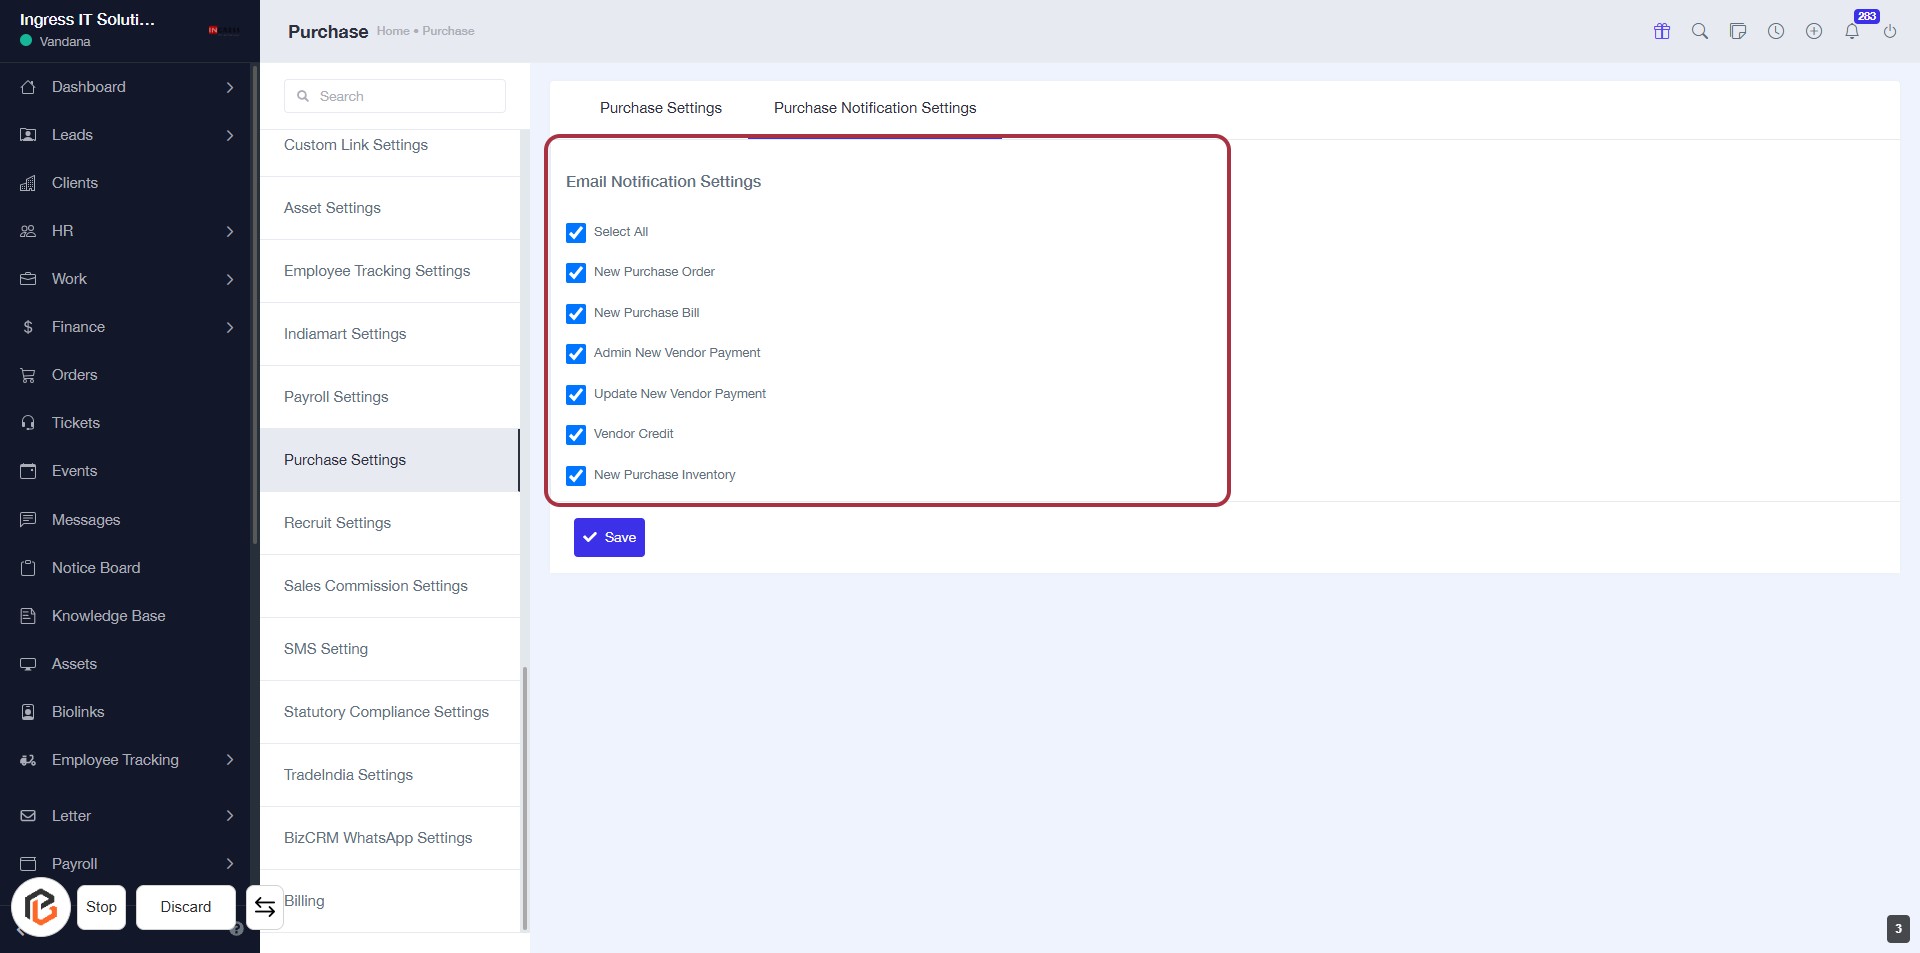
STEP 4: Select Email Notification Settings
- Click on the "Email Notification Settings" section.
- Review the options available:
- Select All
- New Purchase Order
- New Purchase Bill
- Admin New Vendor Payment
- Update New Vendor Payment
- Vendor Credit
- New Purchase Inventory
- Ensure your preferences are checked.
- Proceed to the next step by clicking the "Save" button.
STEP 5: Click on "Save" to Confirm Email Notification Settings
- Ensure all desired email notification options are selected.
- Locate the Save button highlighted in red.
- Click the Save button to apply your changes.
- Verify that a confirmation message appears, indicating successful saving of settings.