Step-by-Step Guide to Adding Custom Fields in Dashboard Settings
10 mins read · Updated 29 Sep, 2025
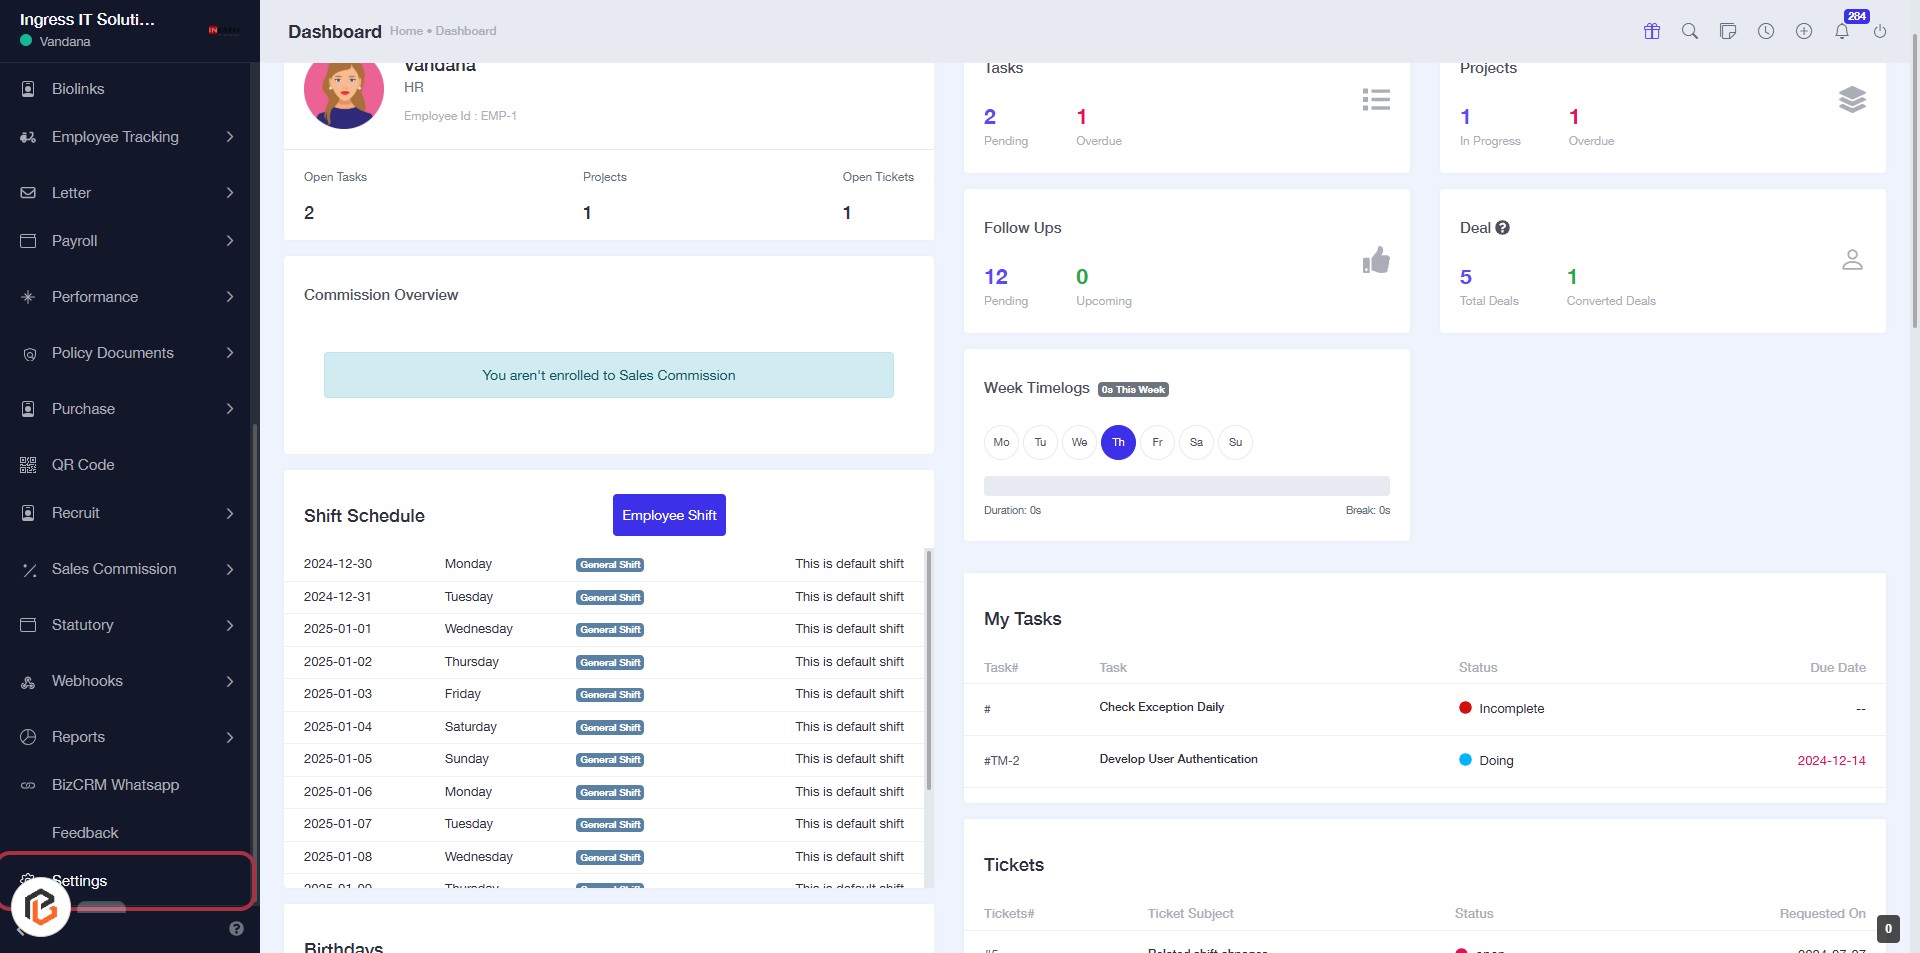
STEP 1: Click on "Settings" in the Dashboard
- Navigate to the left sidebar of the dashboard.
- Locate and click on the "Settings" option highlighted in red.
- This will direct you to the settings page for further configurations.
Next Step: Go to "Custom Fields".
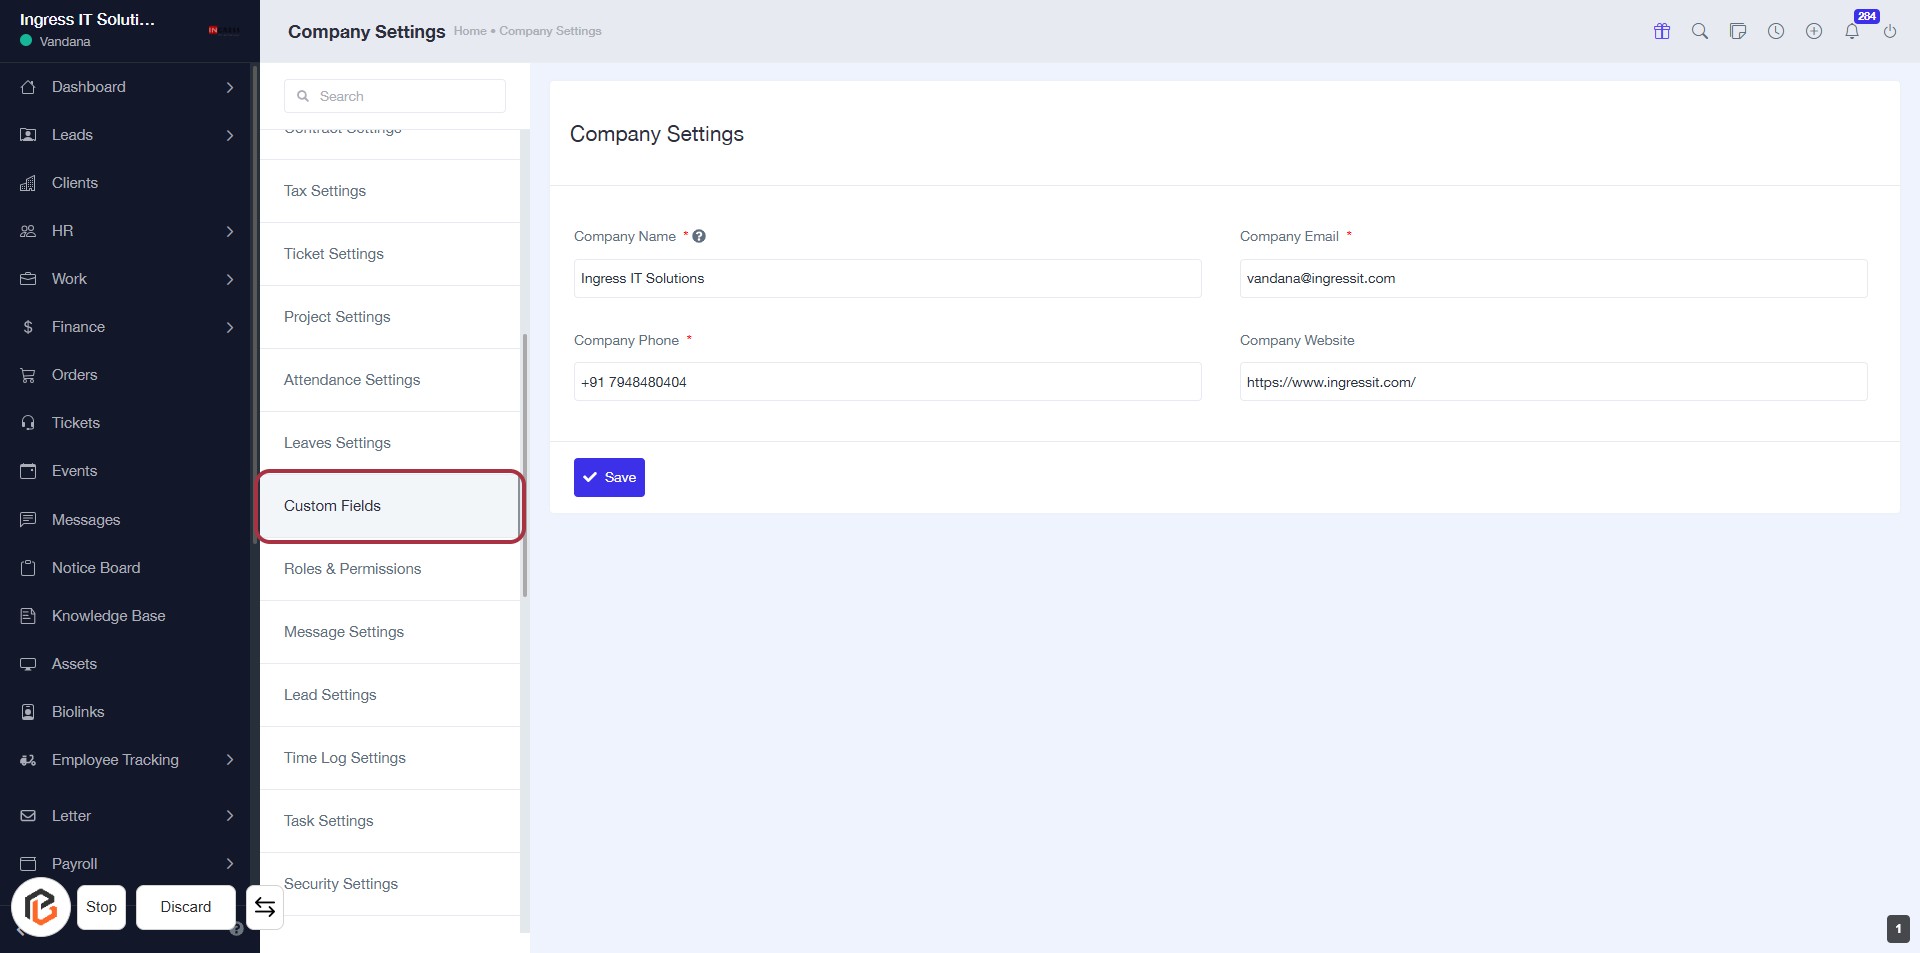
STEP 2: Click on "Custom Fields" in Company Settings
- Navigate to the "Custom Fields" section in the settings menu.
- Ensure you are on the Company Settings page.
- Look for the highlighted area to confirm your selection.
- After clicking, proceed to the next step by clicking on "Add Field."
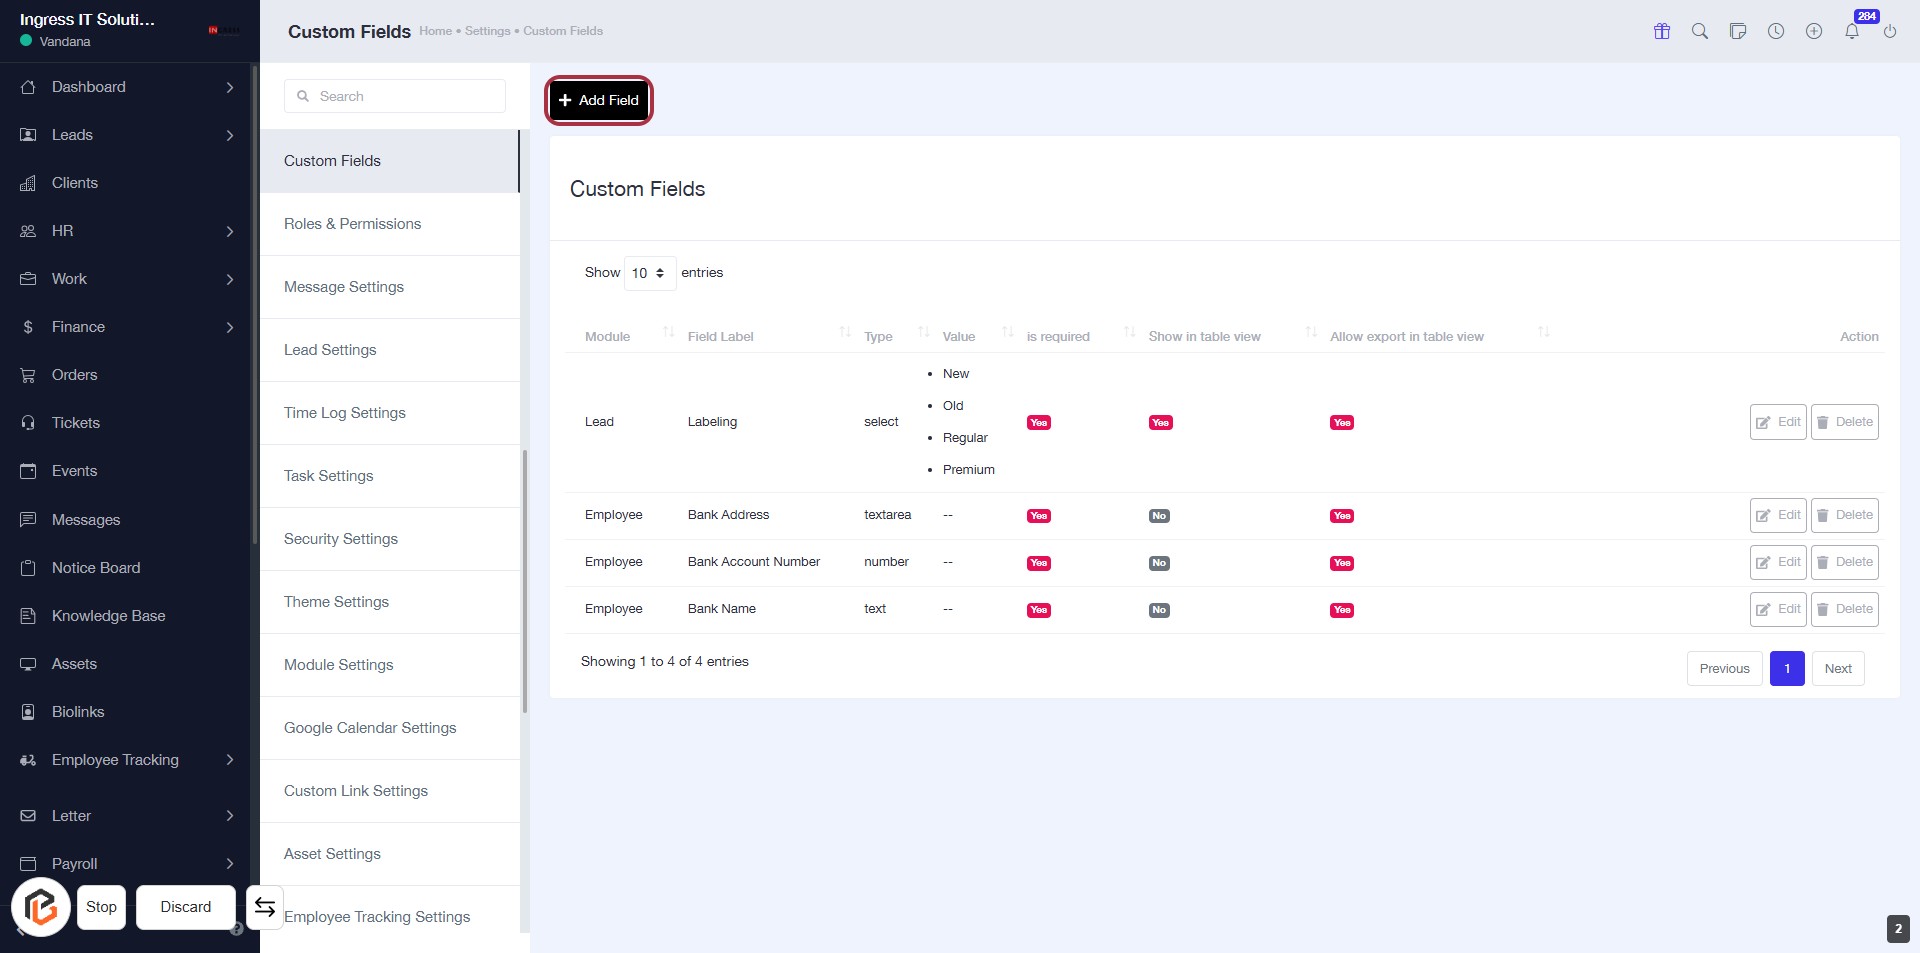
STEP 3: Click on "Add Field" to Create a Custom Field
- Navigate to the "Custom Fields" section in Company Settings.
- Click the Add Field button located at the top right of the Custom Fields page.
- This action will allow you to enter details for a new custom field.
- Ensure to fill in all required fields marked with an asterisk (*).
STEP 4: Select "Module"
- Click on the "Module" dropdown.
- Choose "Client" from the options.
- Ensure to fill in the required fields marked with an asterisk (*).
- Review other options like "Field Type" and "Show in table view" as needed.
- Proceed to the next step by entering the "Field Label".

STEP 5: Enter Field Label
- Click on the Field Label input box (marked with an asterisk * for required).
- Enter a descriptive label for the field you are creating.
- Ensure the label is clear and relevant to the data it will represent.
- Proceed to the next step to choose whether this field is required.
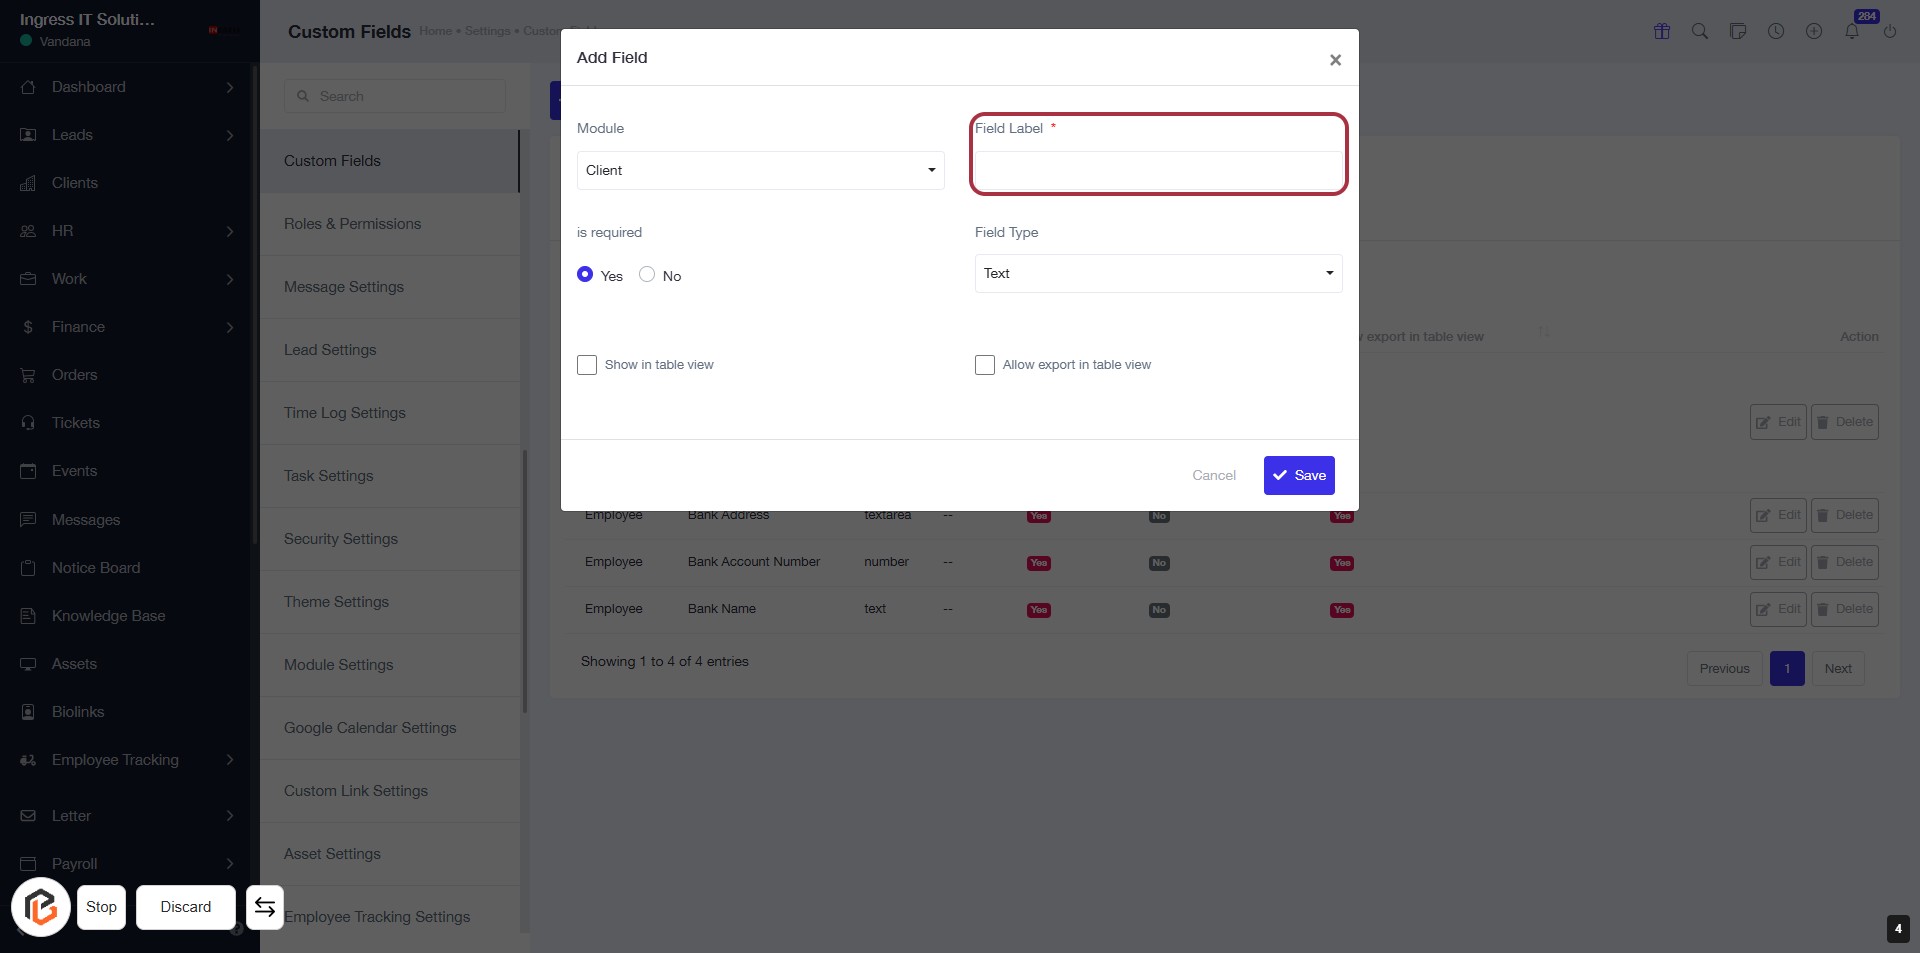
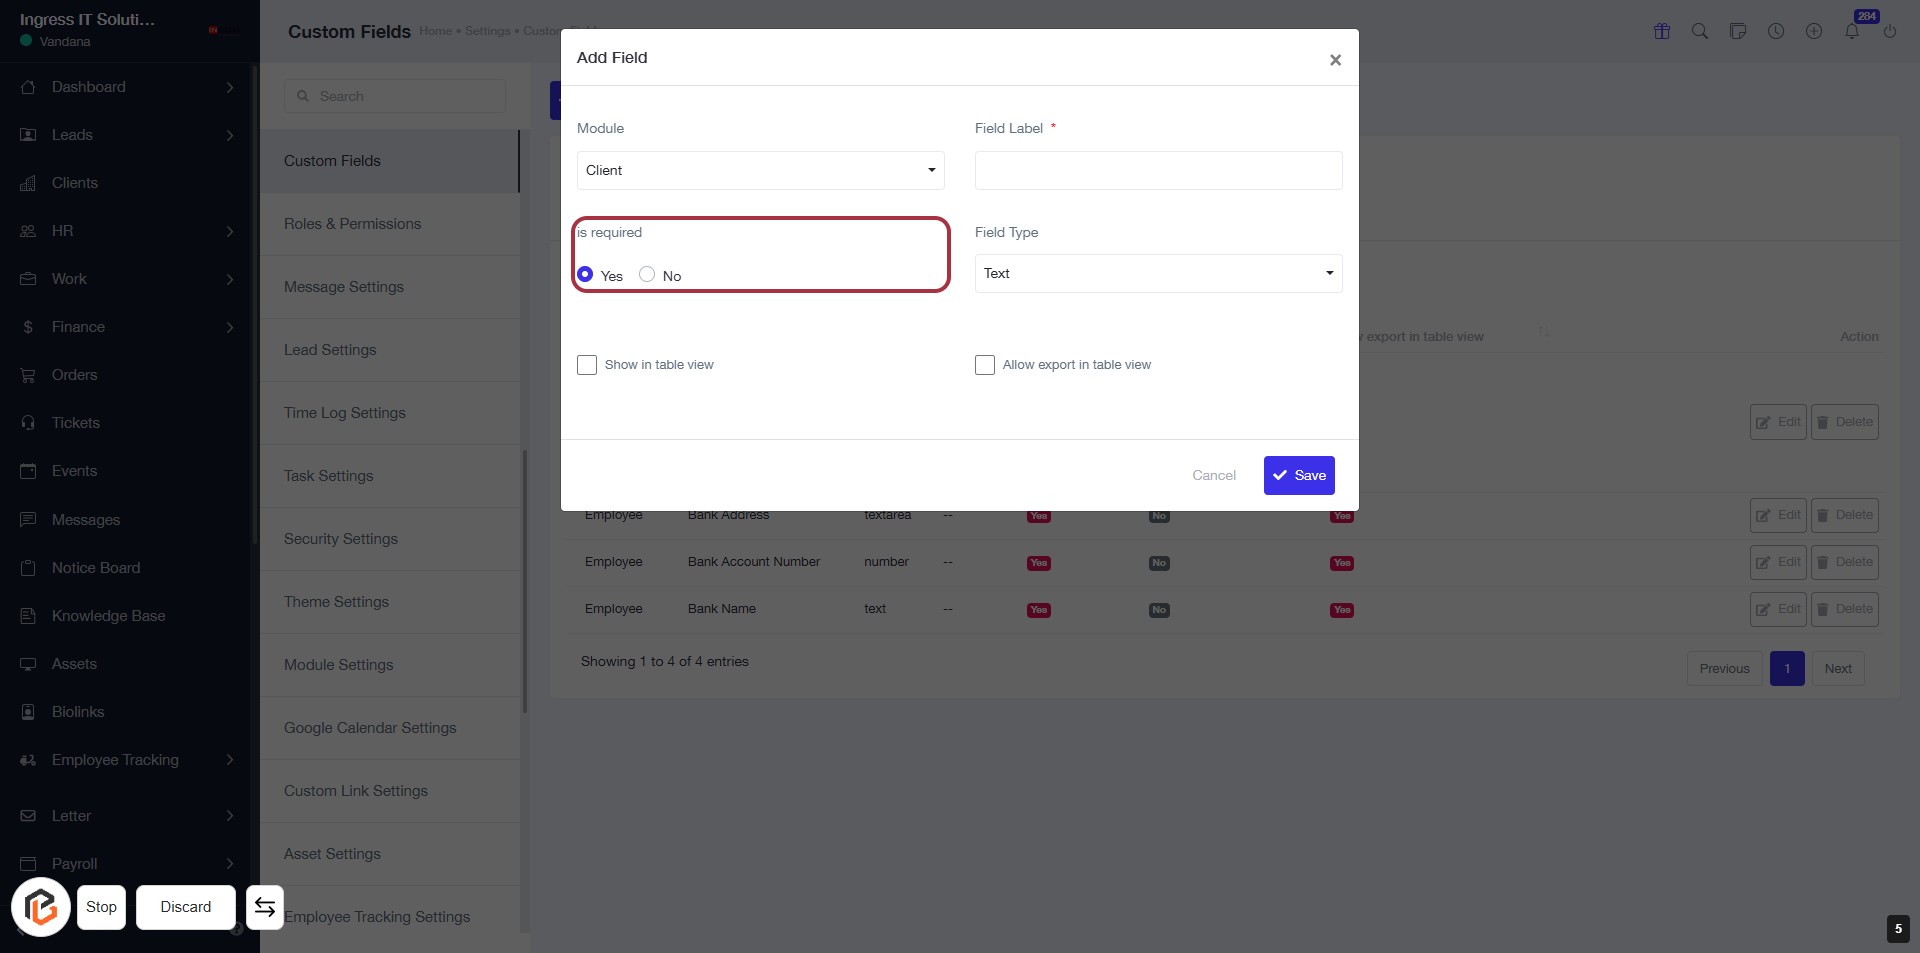
STEP 6: Select "is required" Option
- Click on the "is required" section in the form.
- Choose between "Yes" or "No" to specify if the field is mandatory.
- Ensure to fill out other required fields marked with an asterisk (*).
- Review your selections before proceeding to the next step.
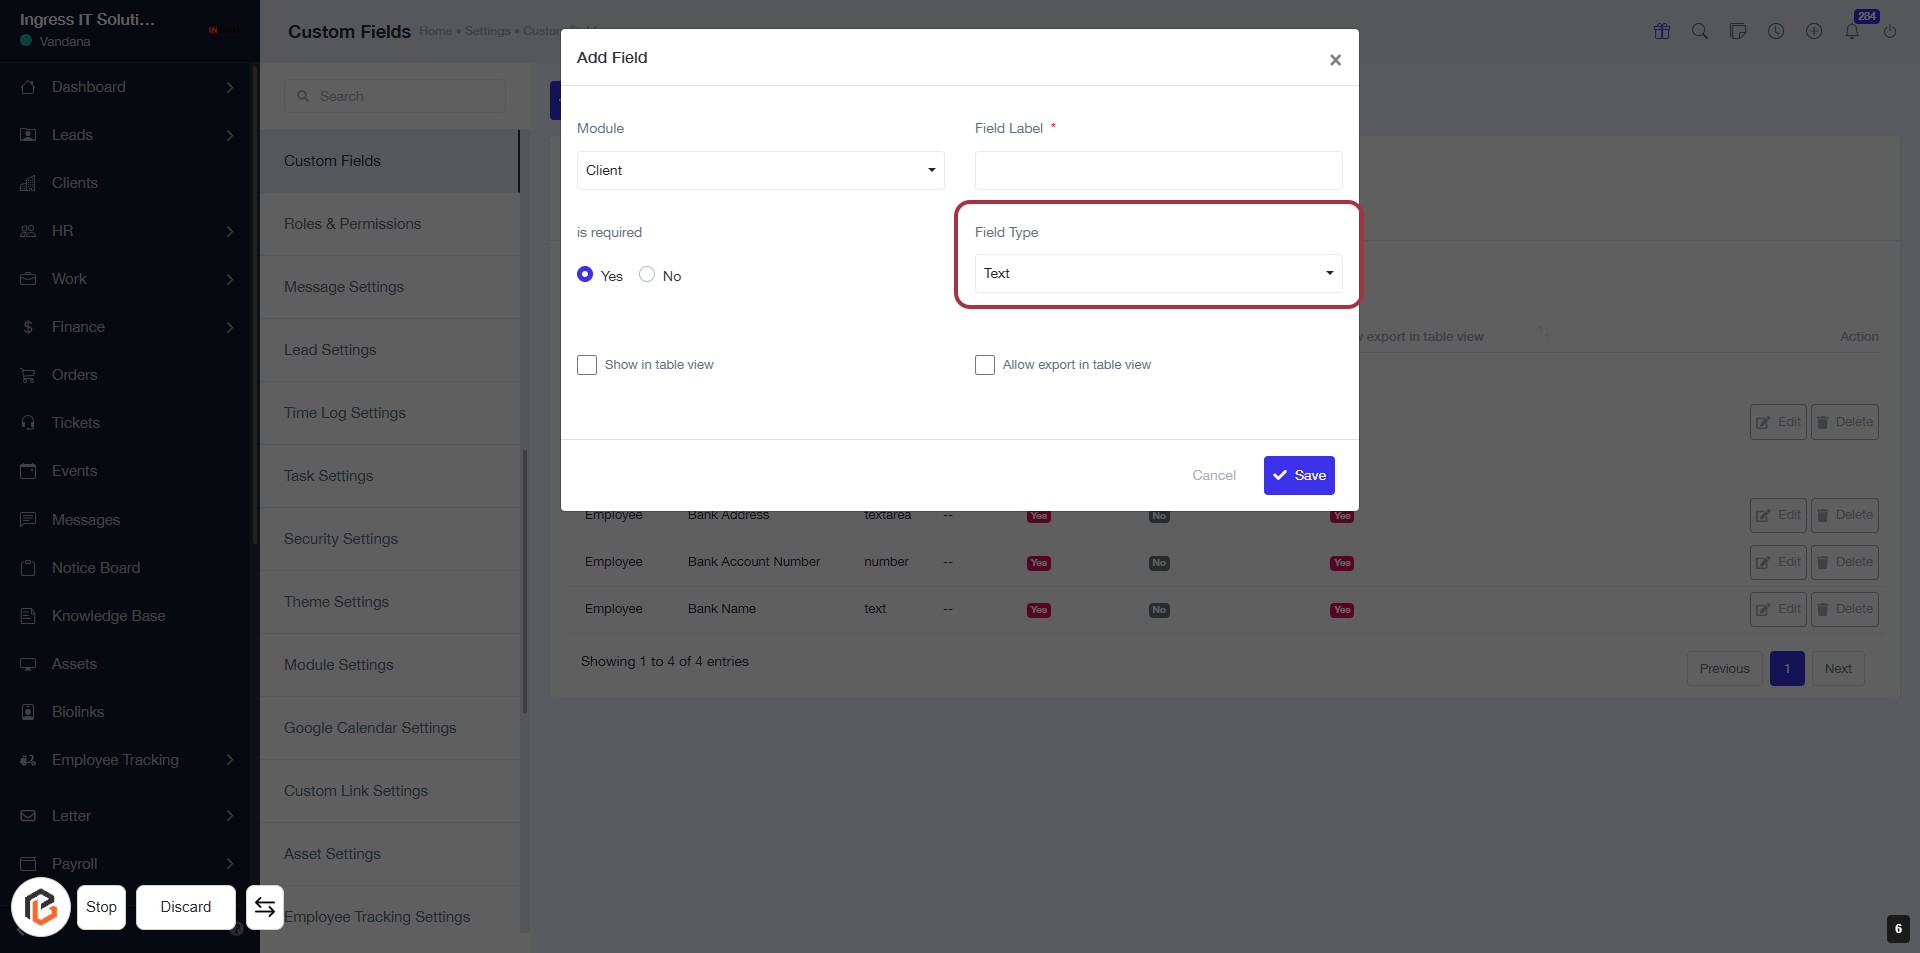
STEP 7: Click on "Field Type"
- Navigate to the "Add Field" dialog.
- Locate the "Field Type" section.
- Click on the "Field Type" dropdown.
- Select "Text" from the options available.
- Ensure all required fields marked with an asterisk (*) are filled out.
- Proceed to the next step by selecting "Show in table view."
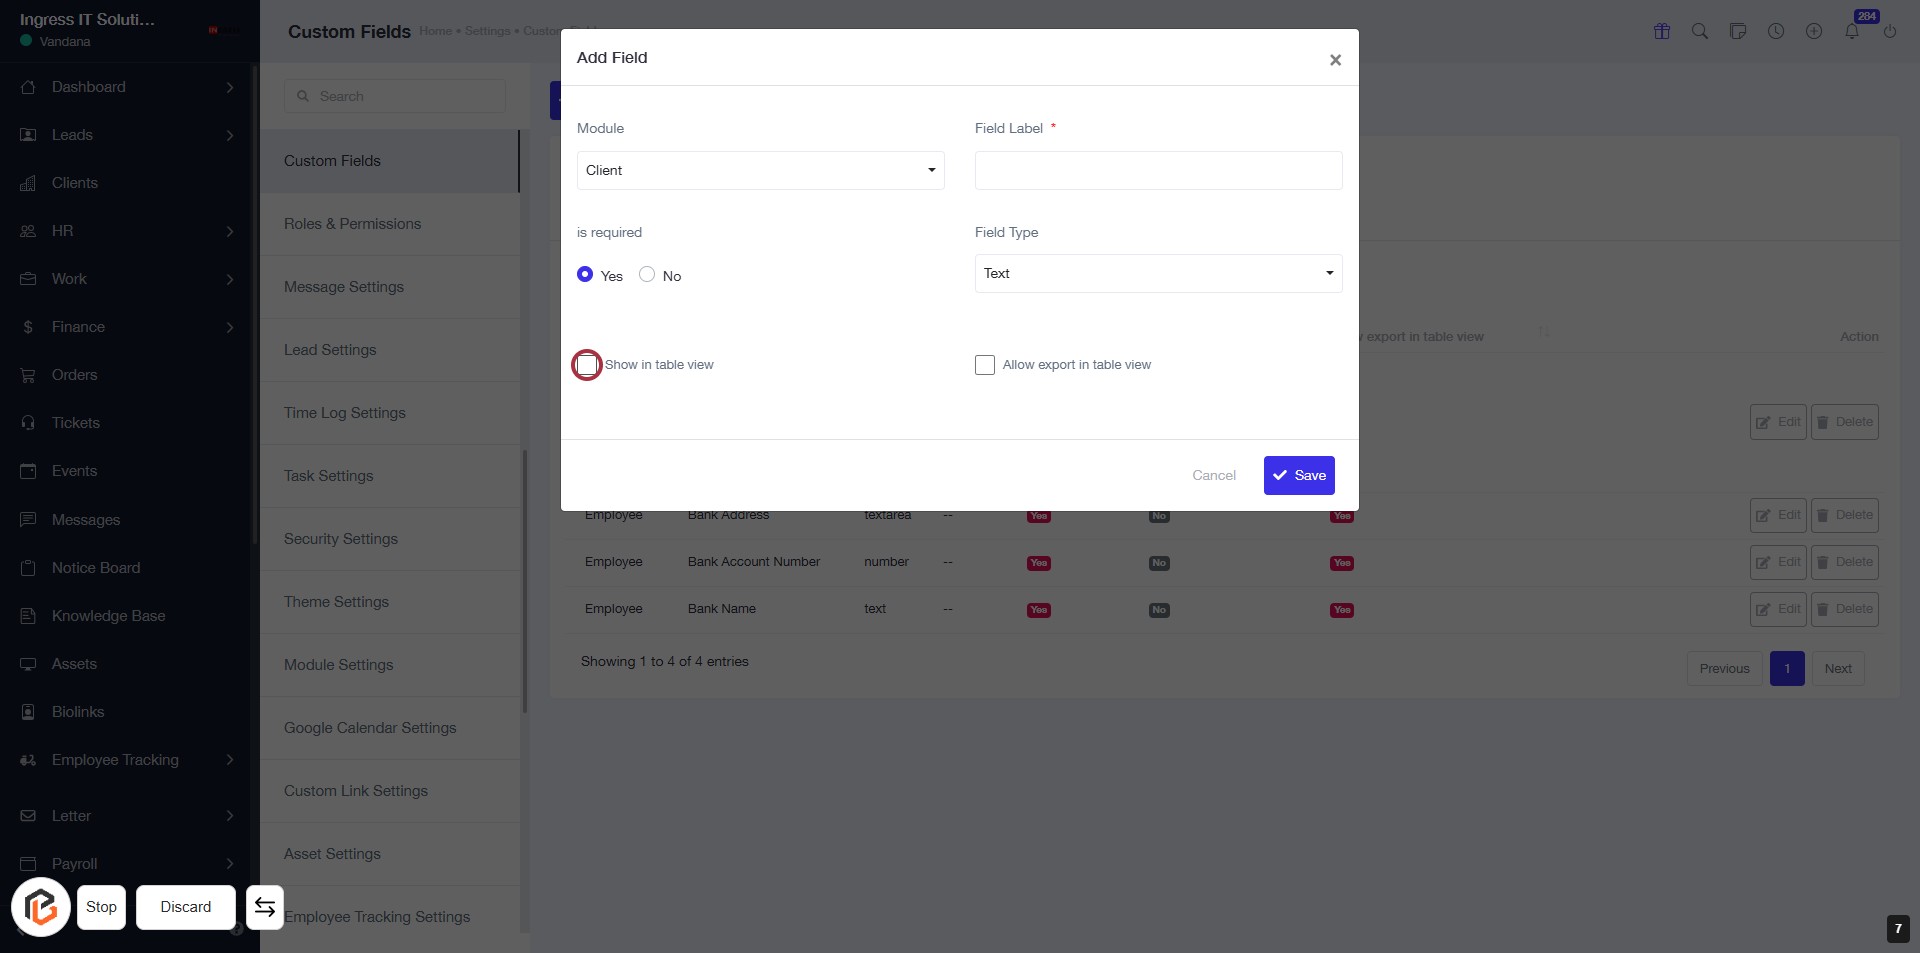
STEP 8: Select "Show in table view"
- Click on the checkbox labeled Show in table view to enable this option.
- Ensure that the checkbox is marked if you want this field to be visible in the table view.
- Review other fields in the form, such as Module, Field Label, is required, and Field Type.
- Proceed to the next step by selecting Allow export in table view.
STEP 9: Select "Allow export in table view"
- Click on the checkbox labeled Allow export in table view to enable this feature.
- Ensure that other required fields are filled out:
- Module: Select the relevant module.
- Field Label: Enter a descriptive label for the field.
- Is required: Choose Yes or No.
- Field Type: Select the appropriate type for the field.
- Proceed to the next step by clicking the Save Button.

STEP 10: Click on "Save" to finalize your changes
- Ensure all required fields are filled out.
- Review the options selected, such as "Show in table view" and "Allow export in table view."
- Click the Save button located at the bottom right of the dialog box to save your settings.
- If you wish to cancel, click the Cancel button.
