Comprehensive Guide to Customizing Purchase Settings: A Step-by-Step Checklist
13 mins read · Updated 01 Oct, 2025
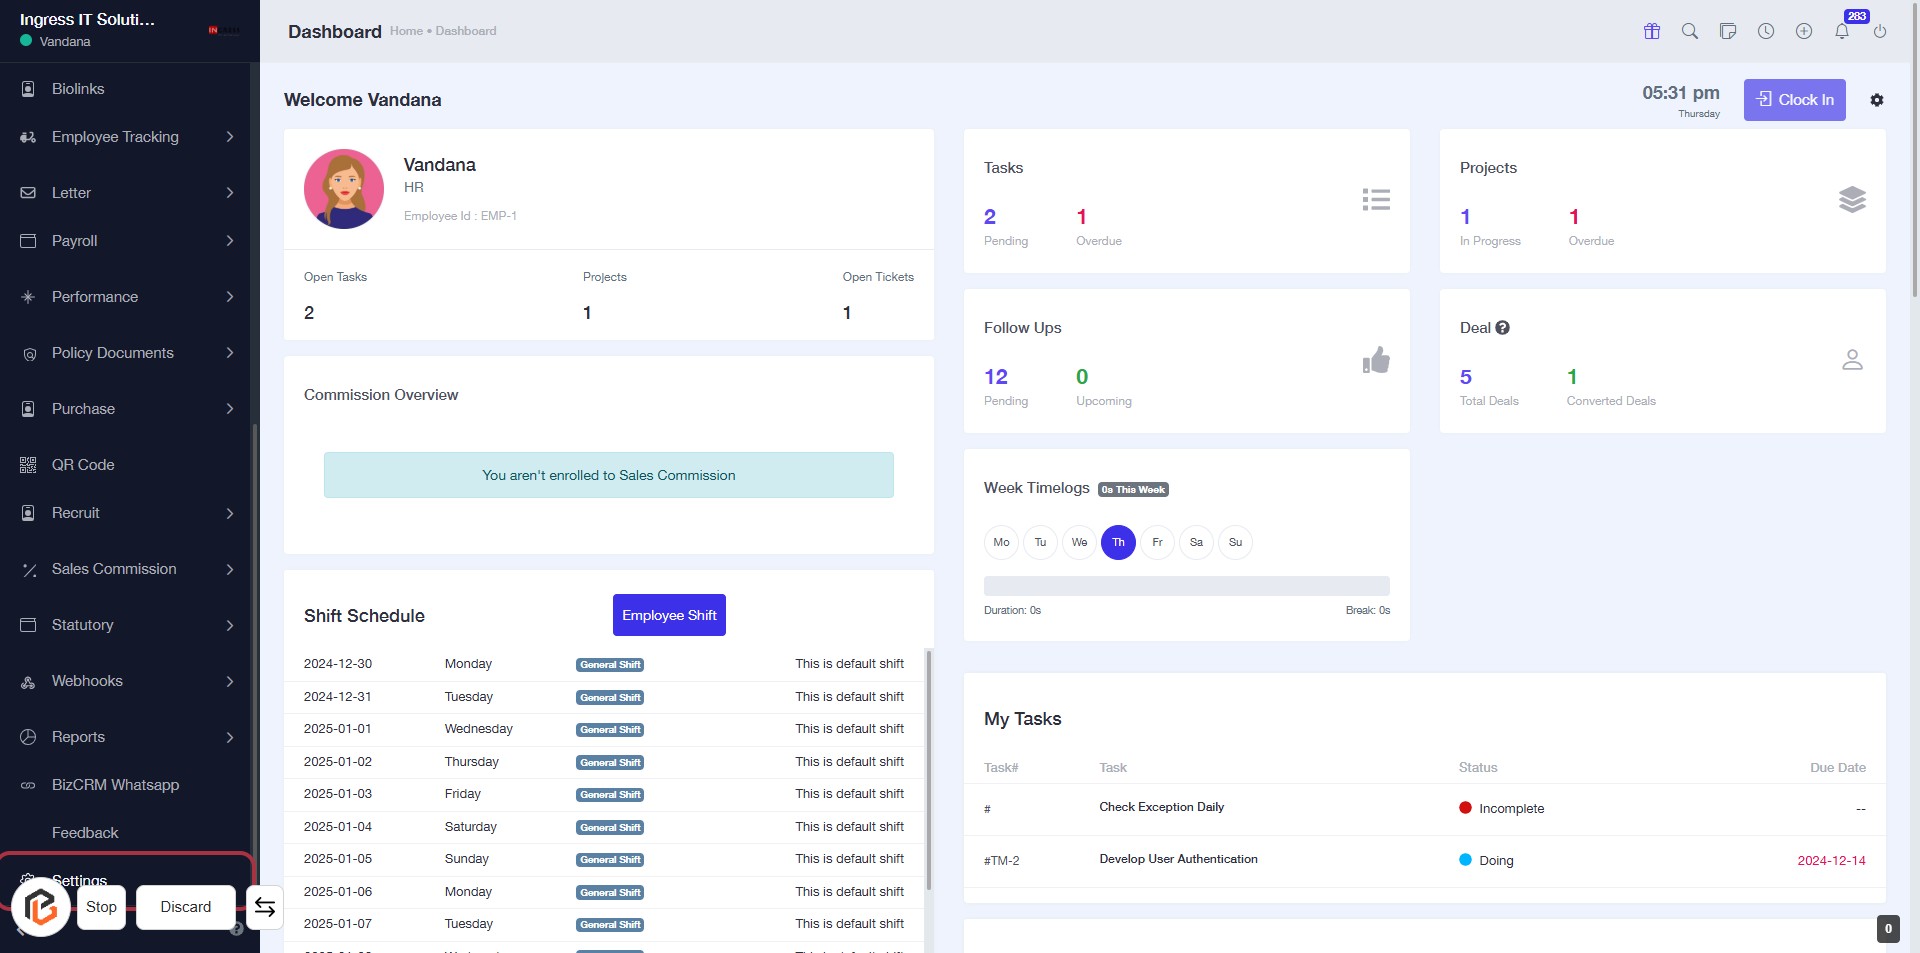
STEP 1: Click on "Settings" to Access Configuration Options
- Click on the Settings link located in the sidebar menu.
- This action will direct you to the configuration options for your account.
- Ensure to review all available settings for customization.
- Look for any fields marked with an asterisk (*) as they are required inputs.
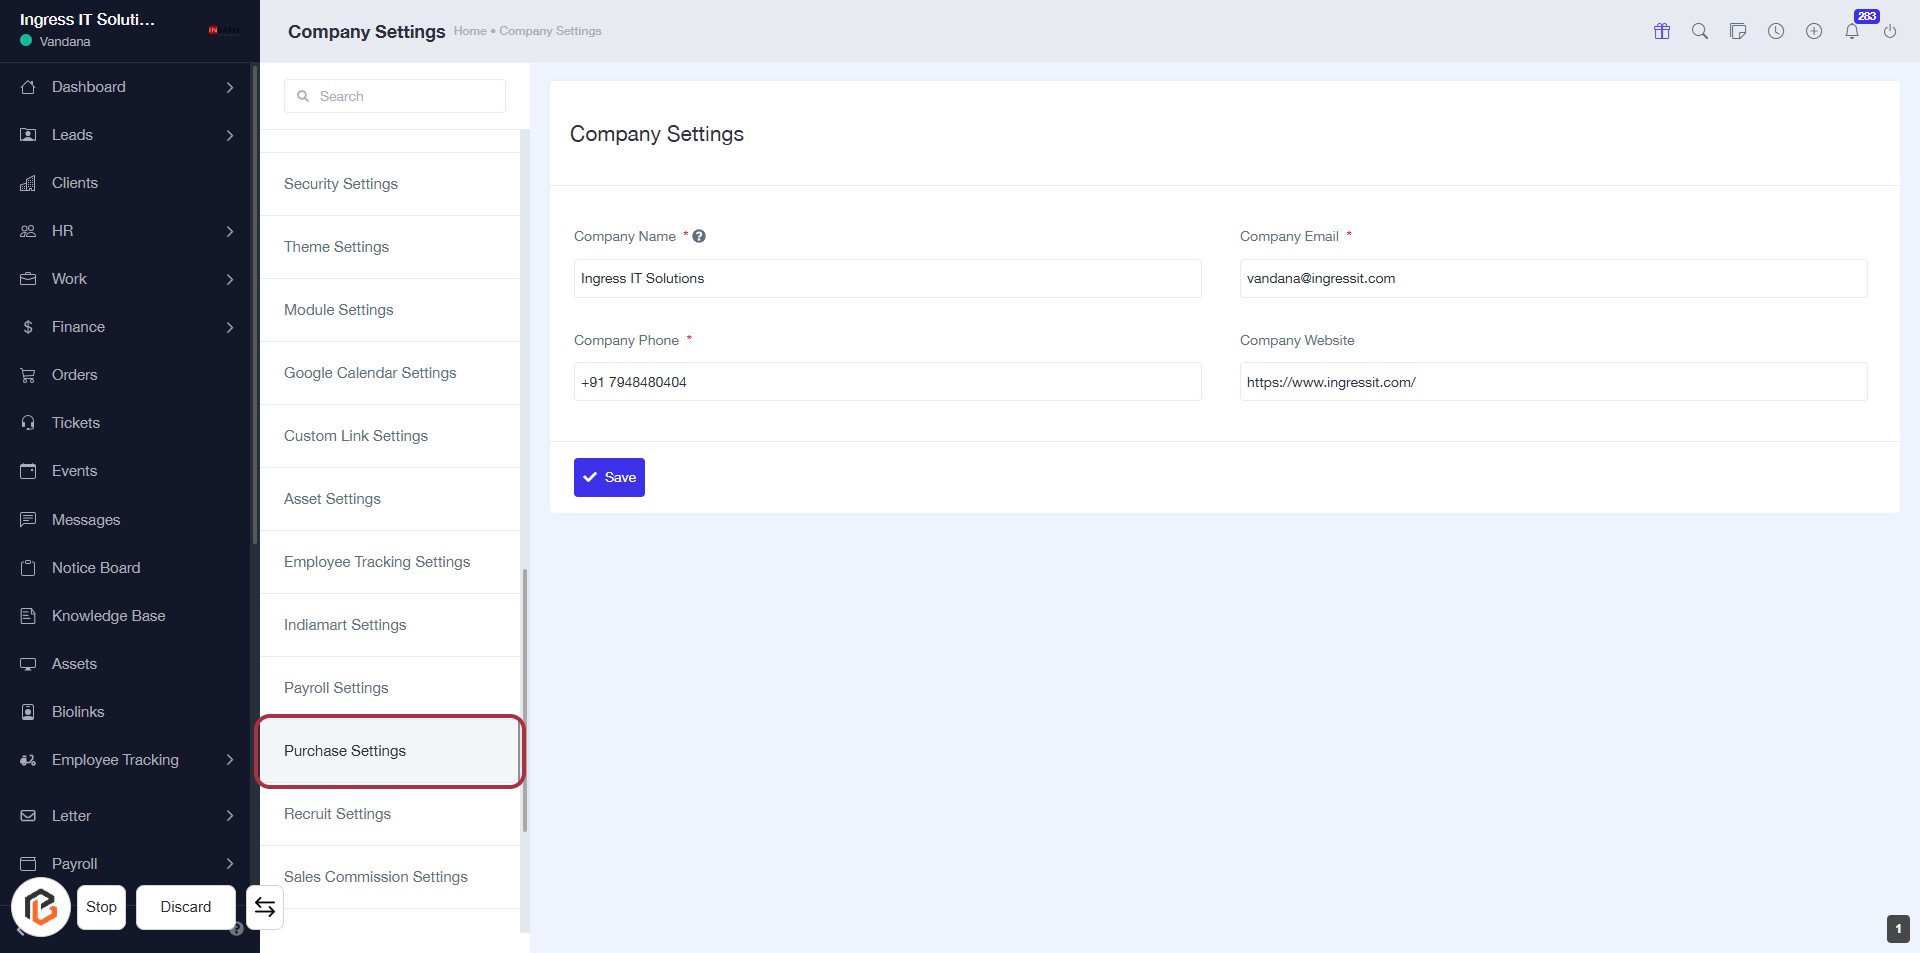
STEP 2: Click on "Purchase Settings" to Access Purchase Configuration
- Click on the "Purchase Settings" link in the left sidebar to access the purchase configuration options.
- Ensure you are on the Company Settings page to view relevant fields.
- Look for required fields marked with an asterisk (*) for completion.
- Proceed to the next step to enter the Purchase Order Prefix.
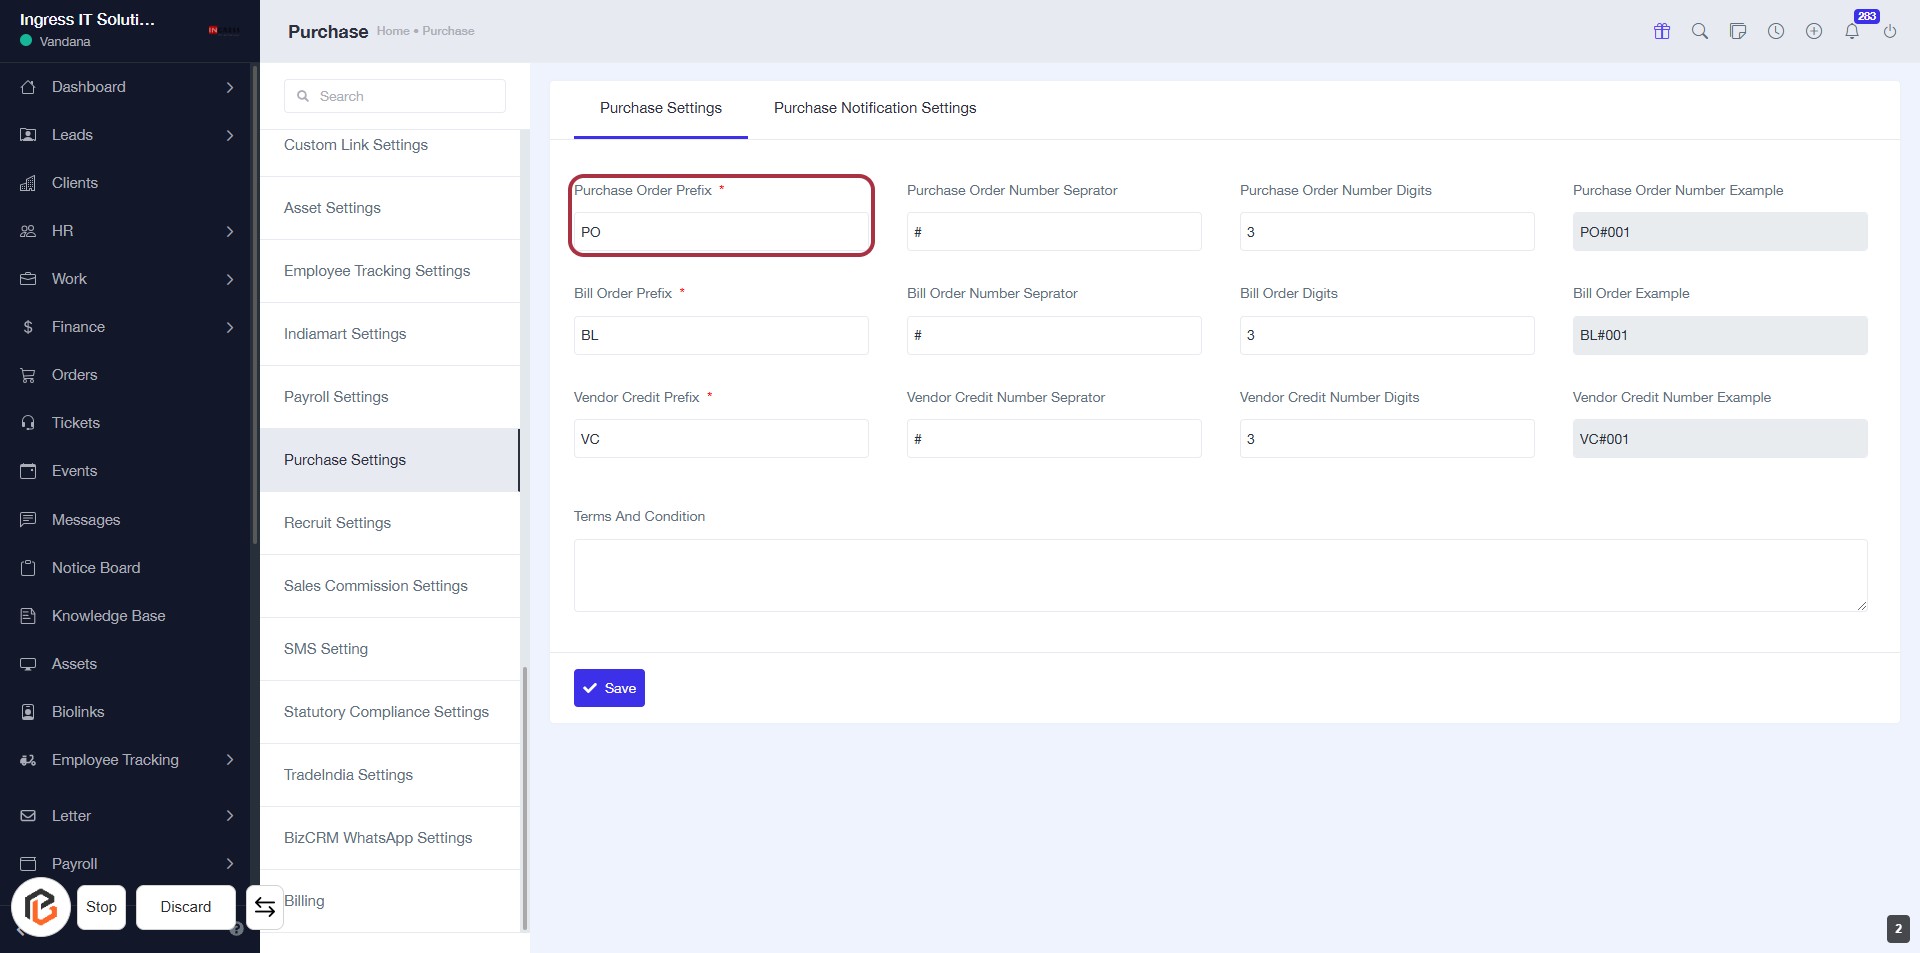
STEP 3: Enter Purchase Order Prefix
- Click on the "Purchase Order Prefix" field.
- Input the desired prefix (e.g., "PO").
- Note that this field is mandatory (indicated by the asterisk '*').
- Ensure the prefix aligns with your organization's naming conventions.
- Proceed to the next step by entering the "Bill Order Prefix".
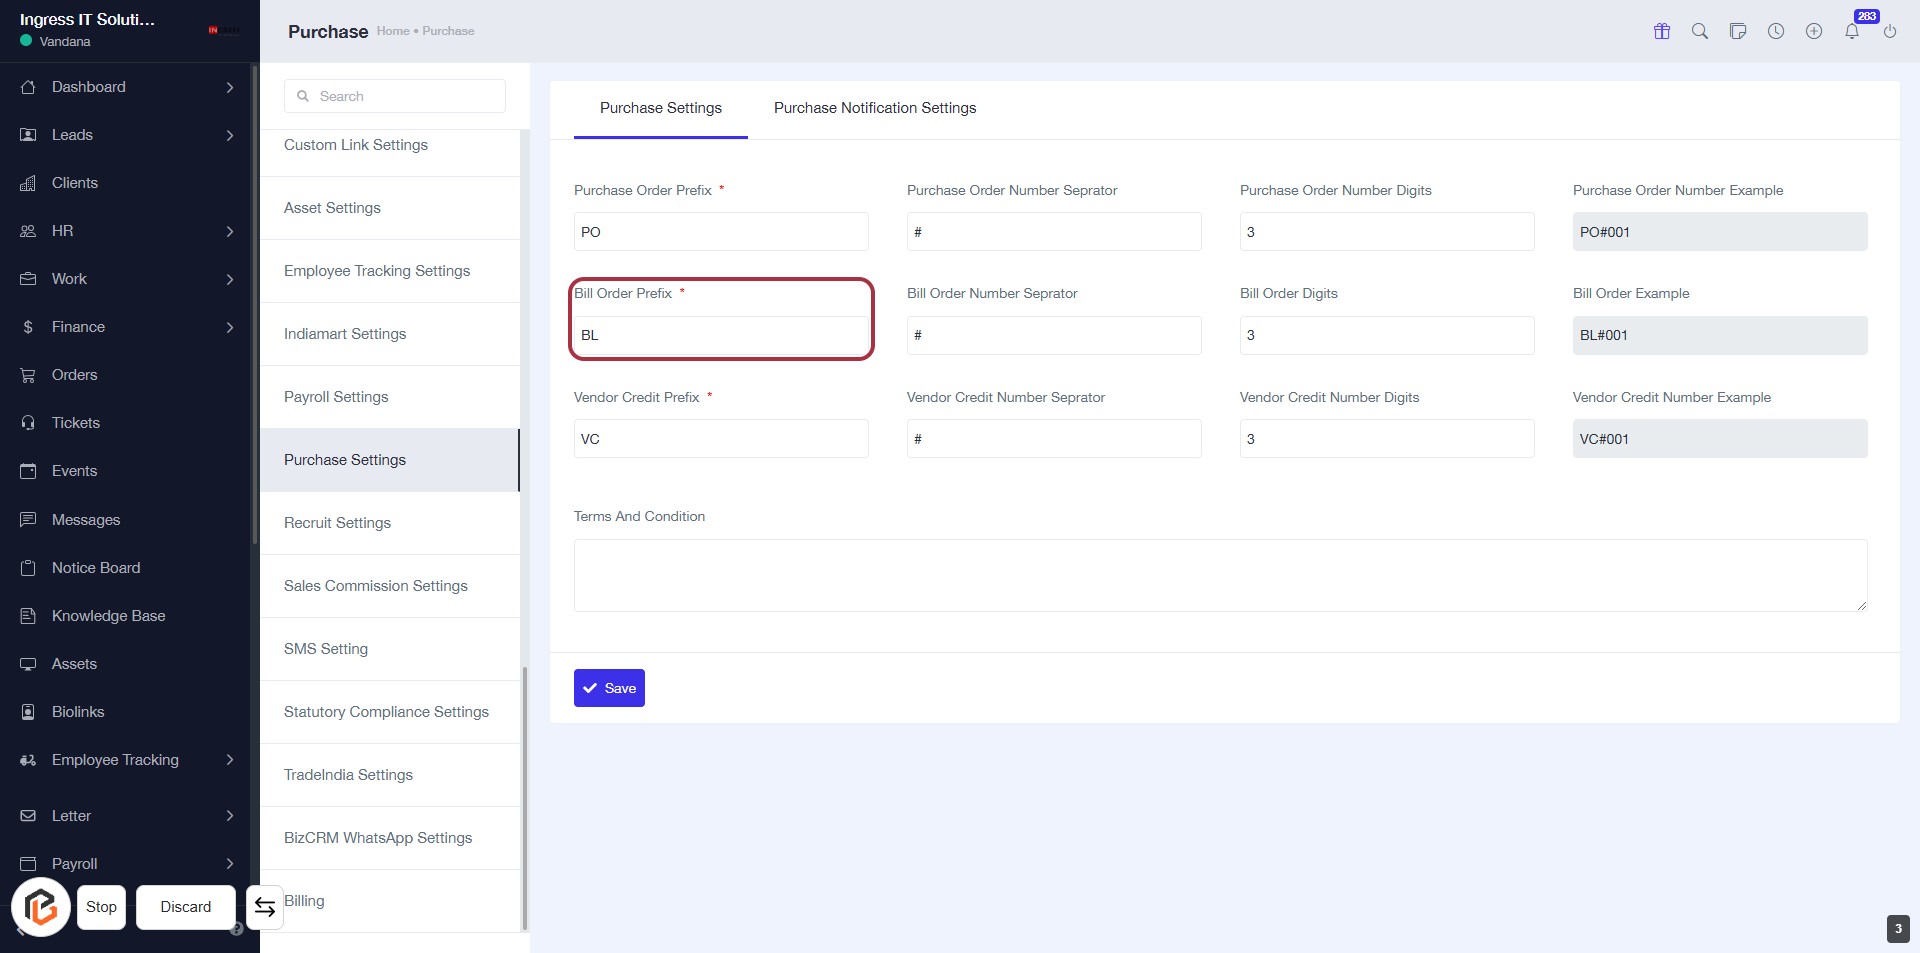
STEP 4: Enter Bill Order Prefix
- Click on the Bill Order Prefix field (marked with an asterisk * for required input).
- Input the desired prefix for bill orders (e.g., "BL").
- Ensure to fill in any other required fields in the form.
- After completing the necessary fields, click Save to apply your changes.
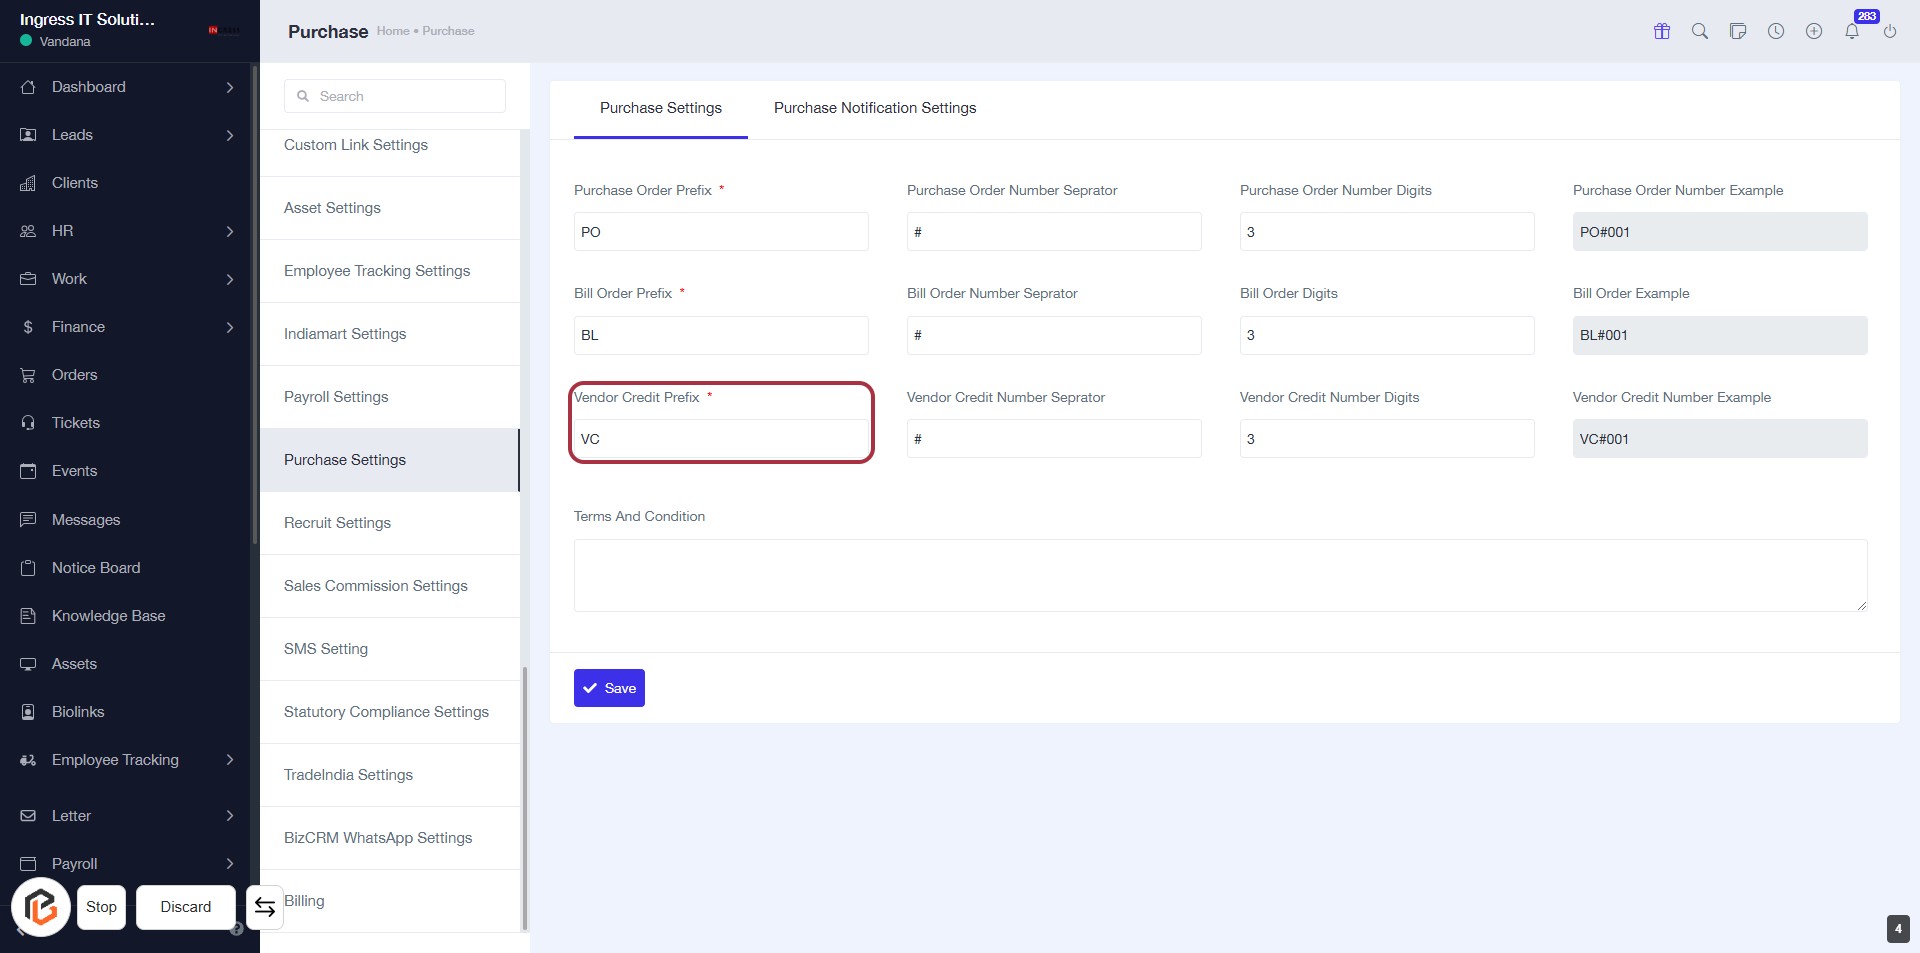
STEP 5: Enter Vendor Credit Prefix
- Click on the Vendor Credit Prefix field (marked with a red border).
- This field is required (indicated by the asterisk '*').
- Input the desired prefix for vendor credits (e.g., "VC").
- Ensure to follow the format as per your organization's guidelines.
- After entering, proceed to the next step by clicking on the Save button.
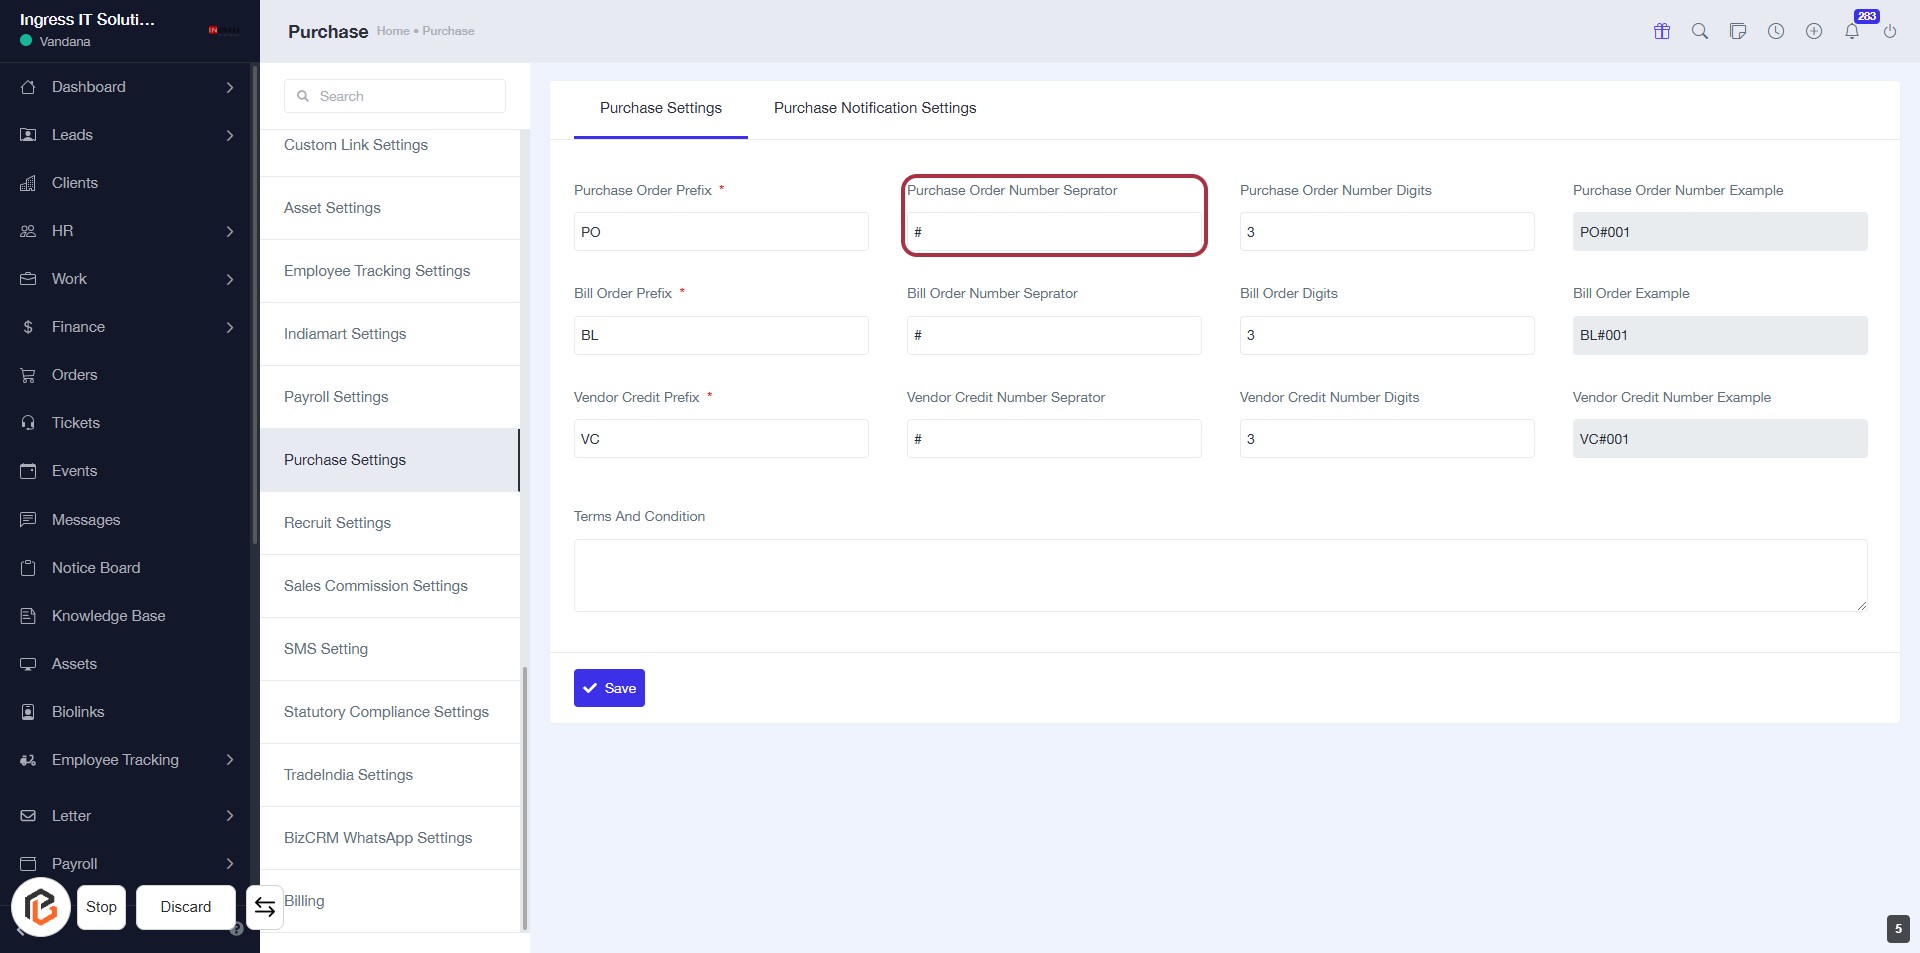
STEP 6: Click Purchase Order Number Separator
- Navigate to the Purchase Settings section.
- Locate the Purchase Order Number Separator field highlighted in red.
- Click on the field to enter the desired separator (e.g.,
#). - Ensure that any required fields marked with an asterisk (*) are filled out.
- Proceed to the next step by entering the Bill Order Number Separator.
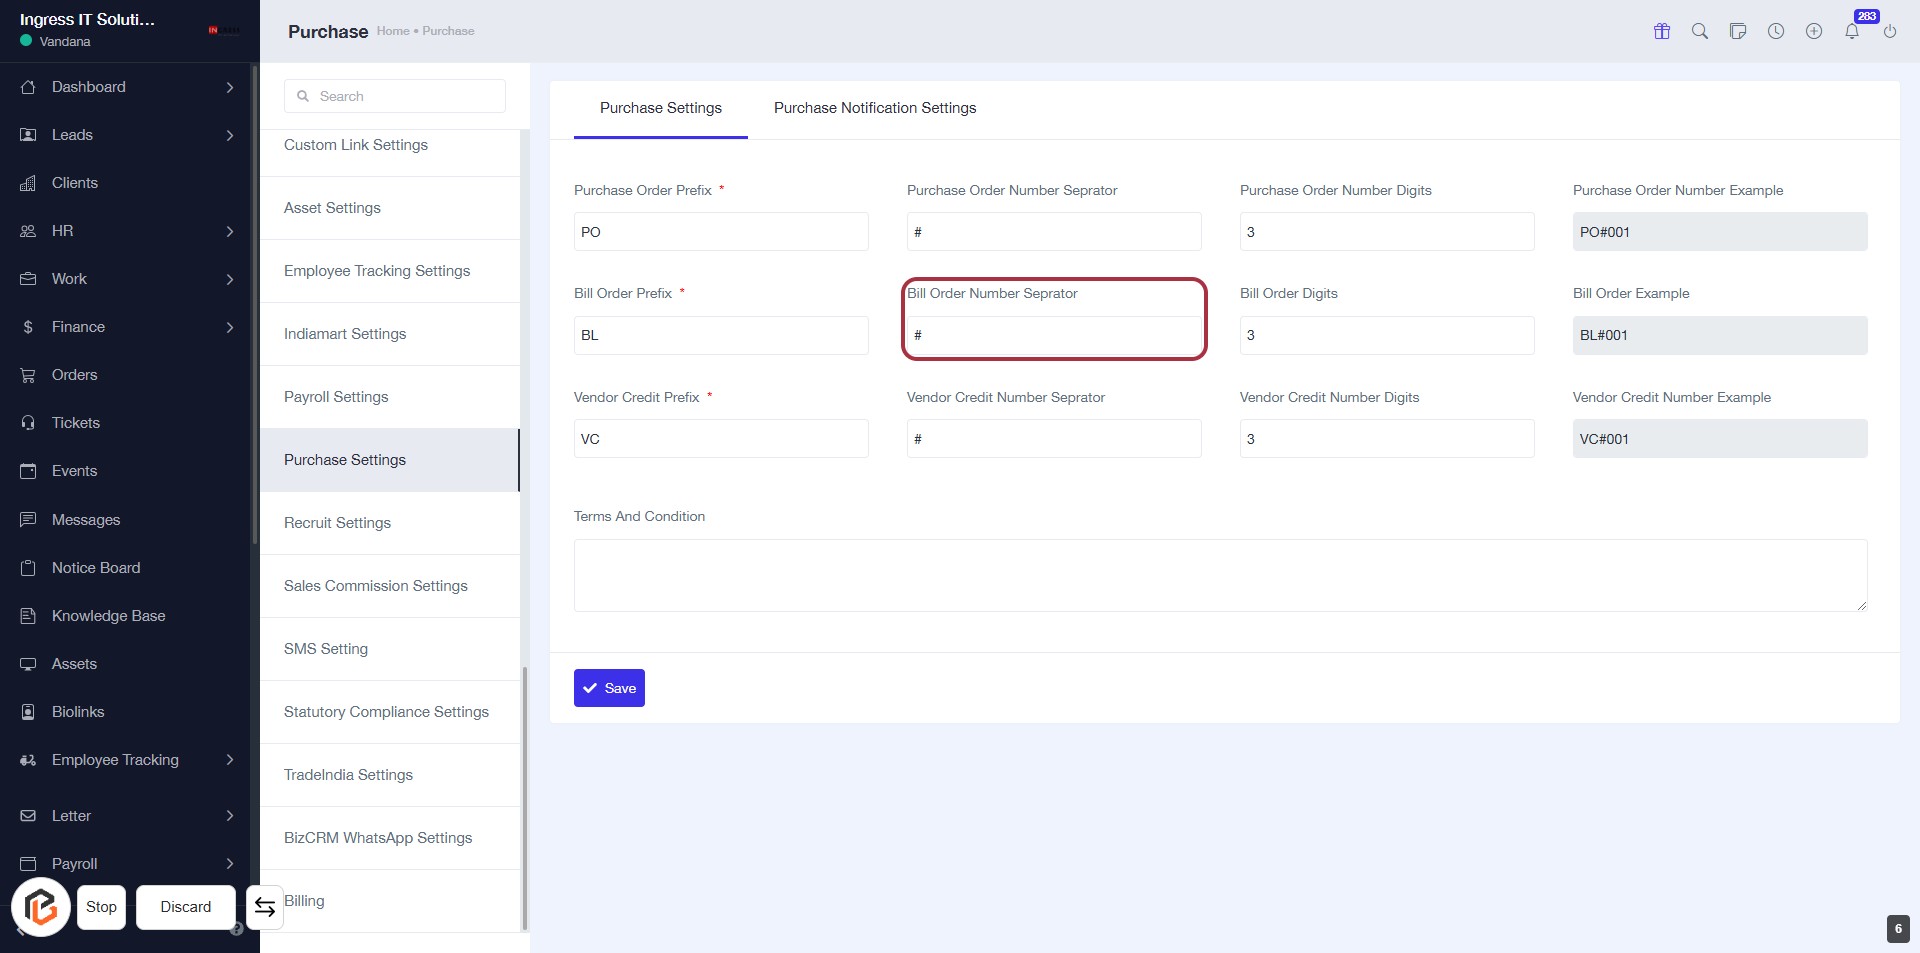
STEP 7: Enter Bill Order Number Separator
- Click on the highlighted area labeled "Bill Order Number Separator."
- This field is used to specify the separator for bill order numbers (e.g., #).
- Ensure that you fill in any required fields marked with an asterisk (*).
- Review the examples provided for clarity on formatting.
- After entering the separator, proceed to the next step.
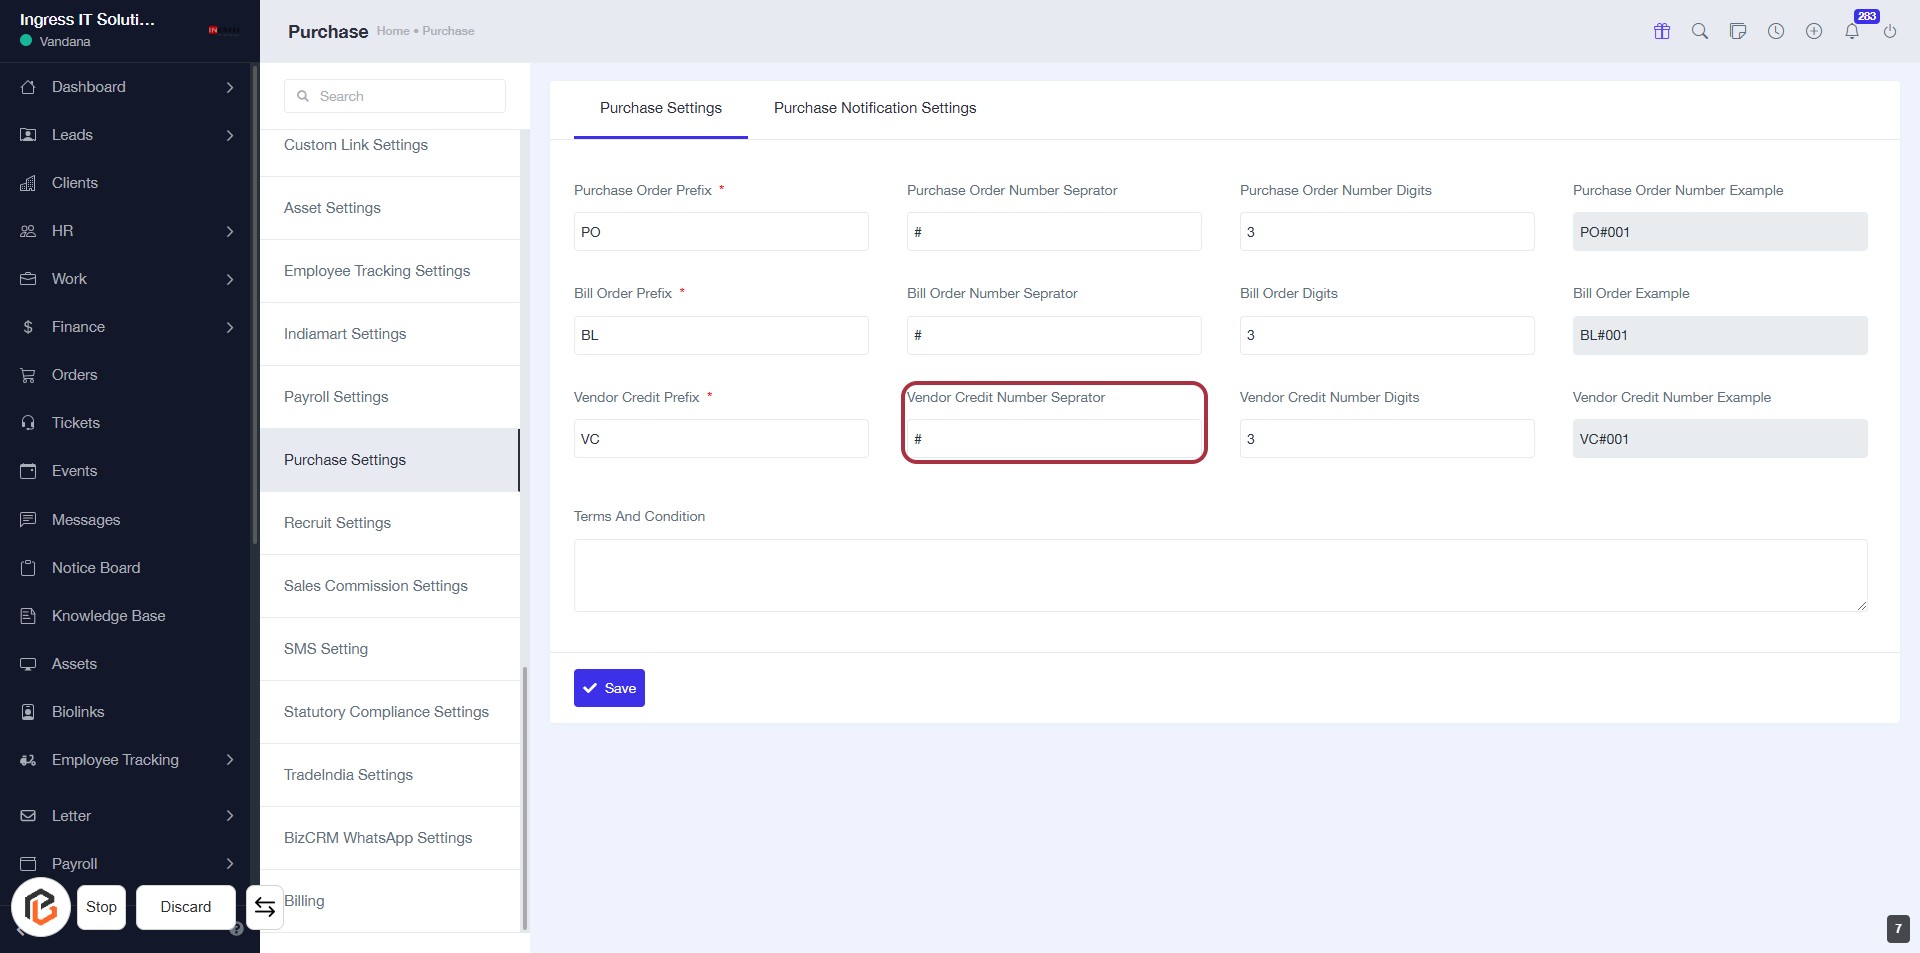
STEP 8: Enter Vendor Credit Number Separator
- Click on the "Vendor Credit Number Separator" field.
- Enter the desired separator character (e.g., #).
- Ensure that the separator aligns with your organization's formatting standards.
- Proceed to the next step by entering the "Purchase Order Number Digits".
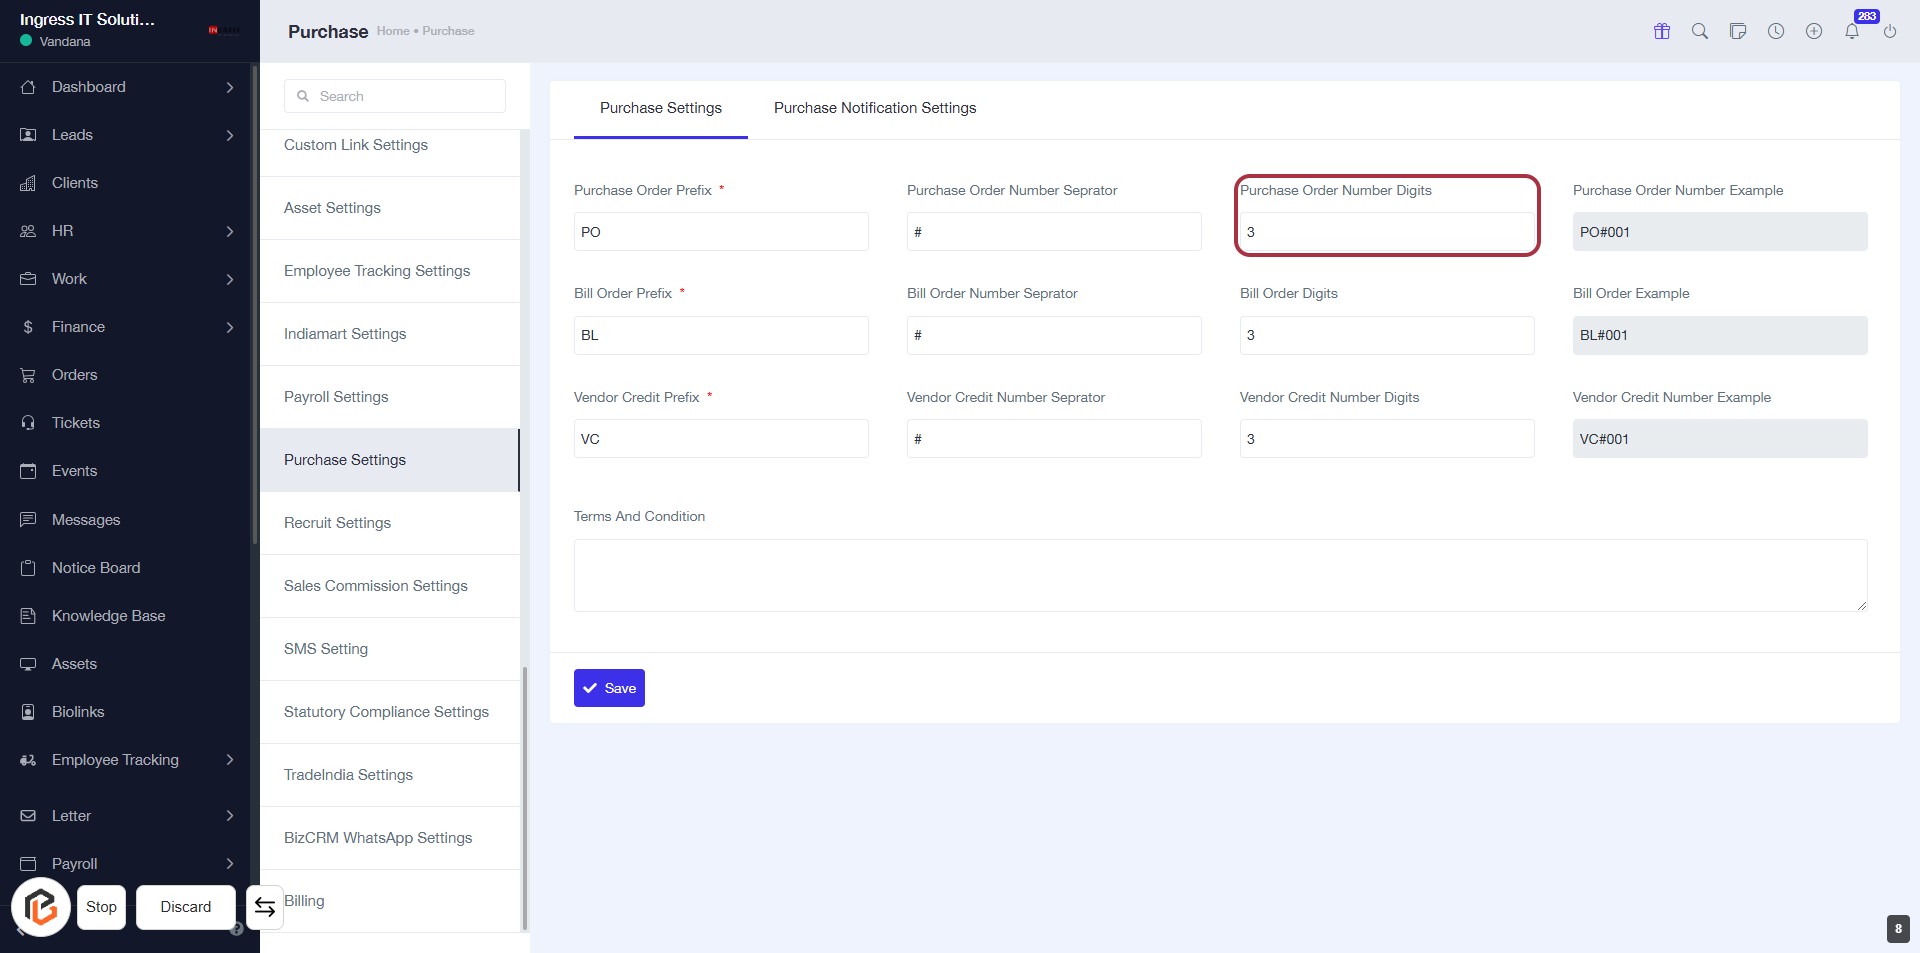
STEP 9: Enter Purchase Order Number Digits
- Click on the Purchase Order Number Digits field highlighted in red.
- Ensure to enter the required number of digits for the purchase order.
- Review other fields for any additional inputs marked with an asterisk (*).
- After entering the digits, proceed to the next step by clicking on the relevant button.
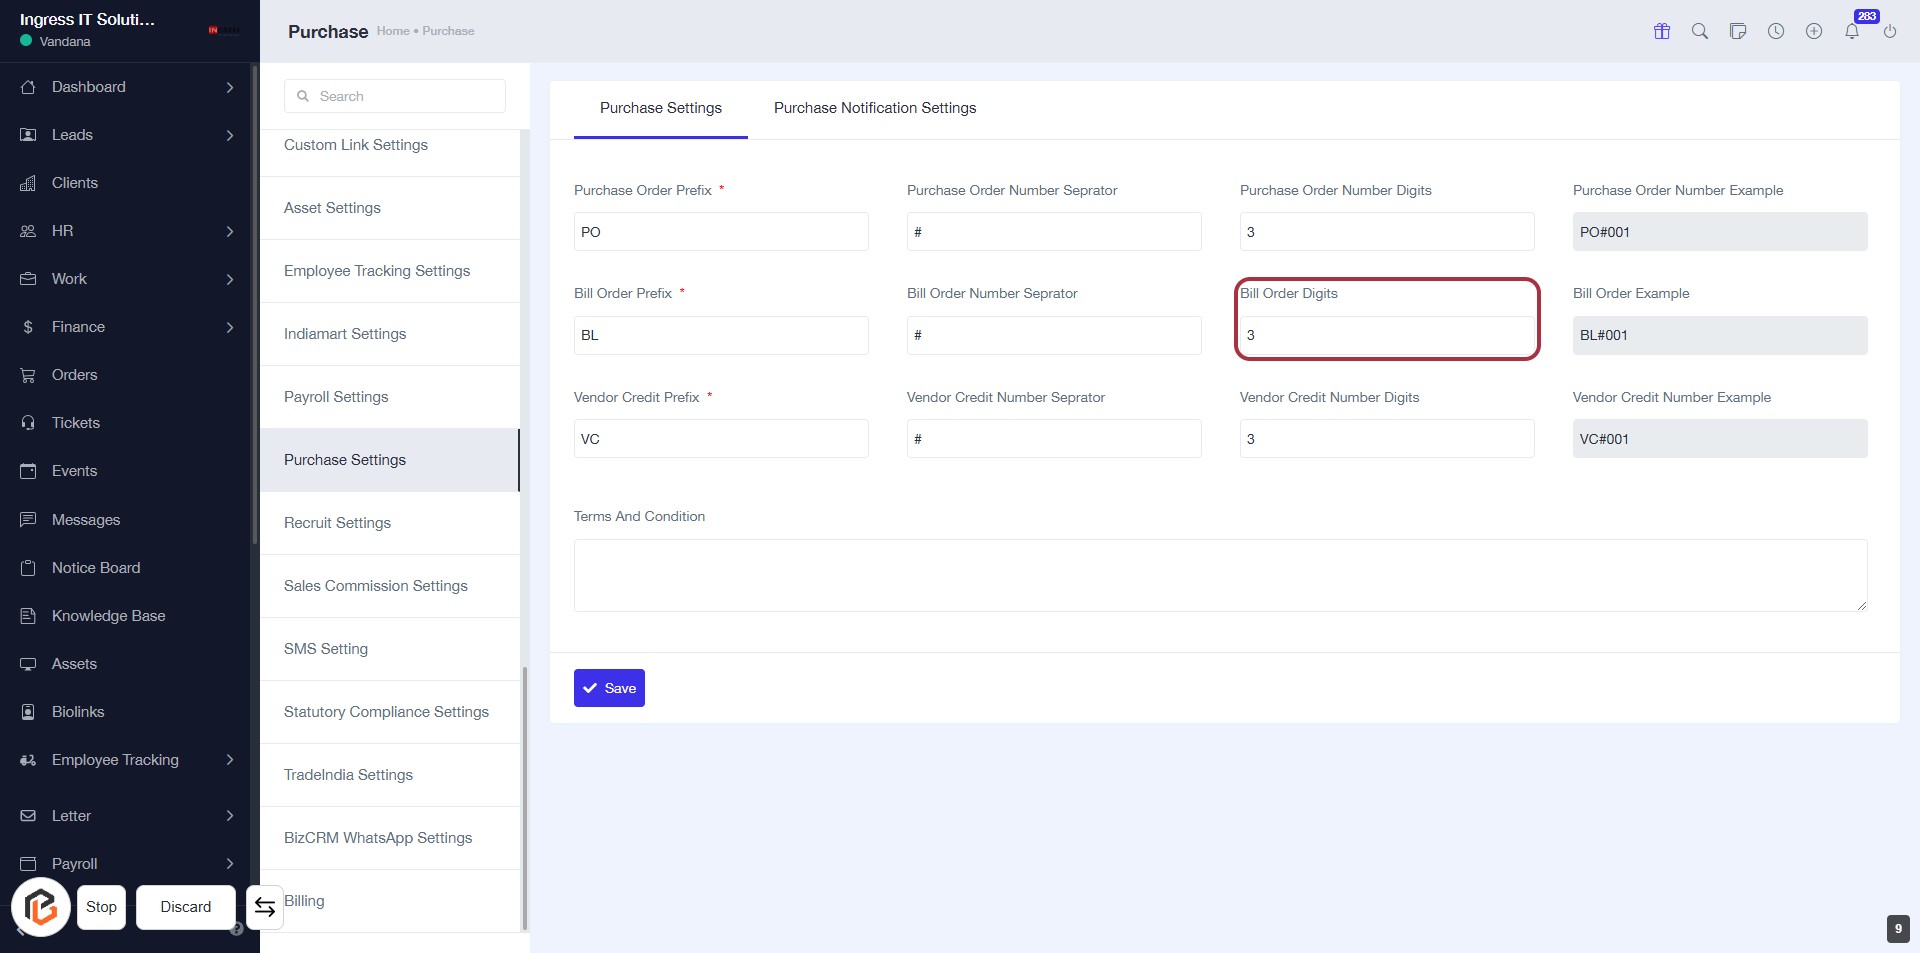
STEP 10: Enter Bill Order Digits
- Click on the "Bill Order Digits" field highlighted in red.
- Input the number of digits required for the Bill Order.
- Ensure that the field is filled as per your organization's requirements.
- Review other related fields for consistency, such as "Bill Order Number Separator."
- Save your changes to finalize the settings.
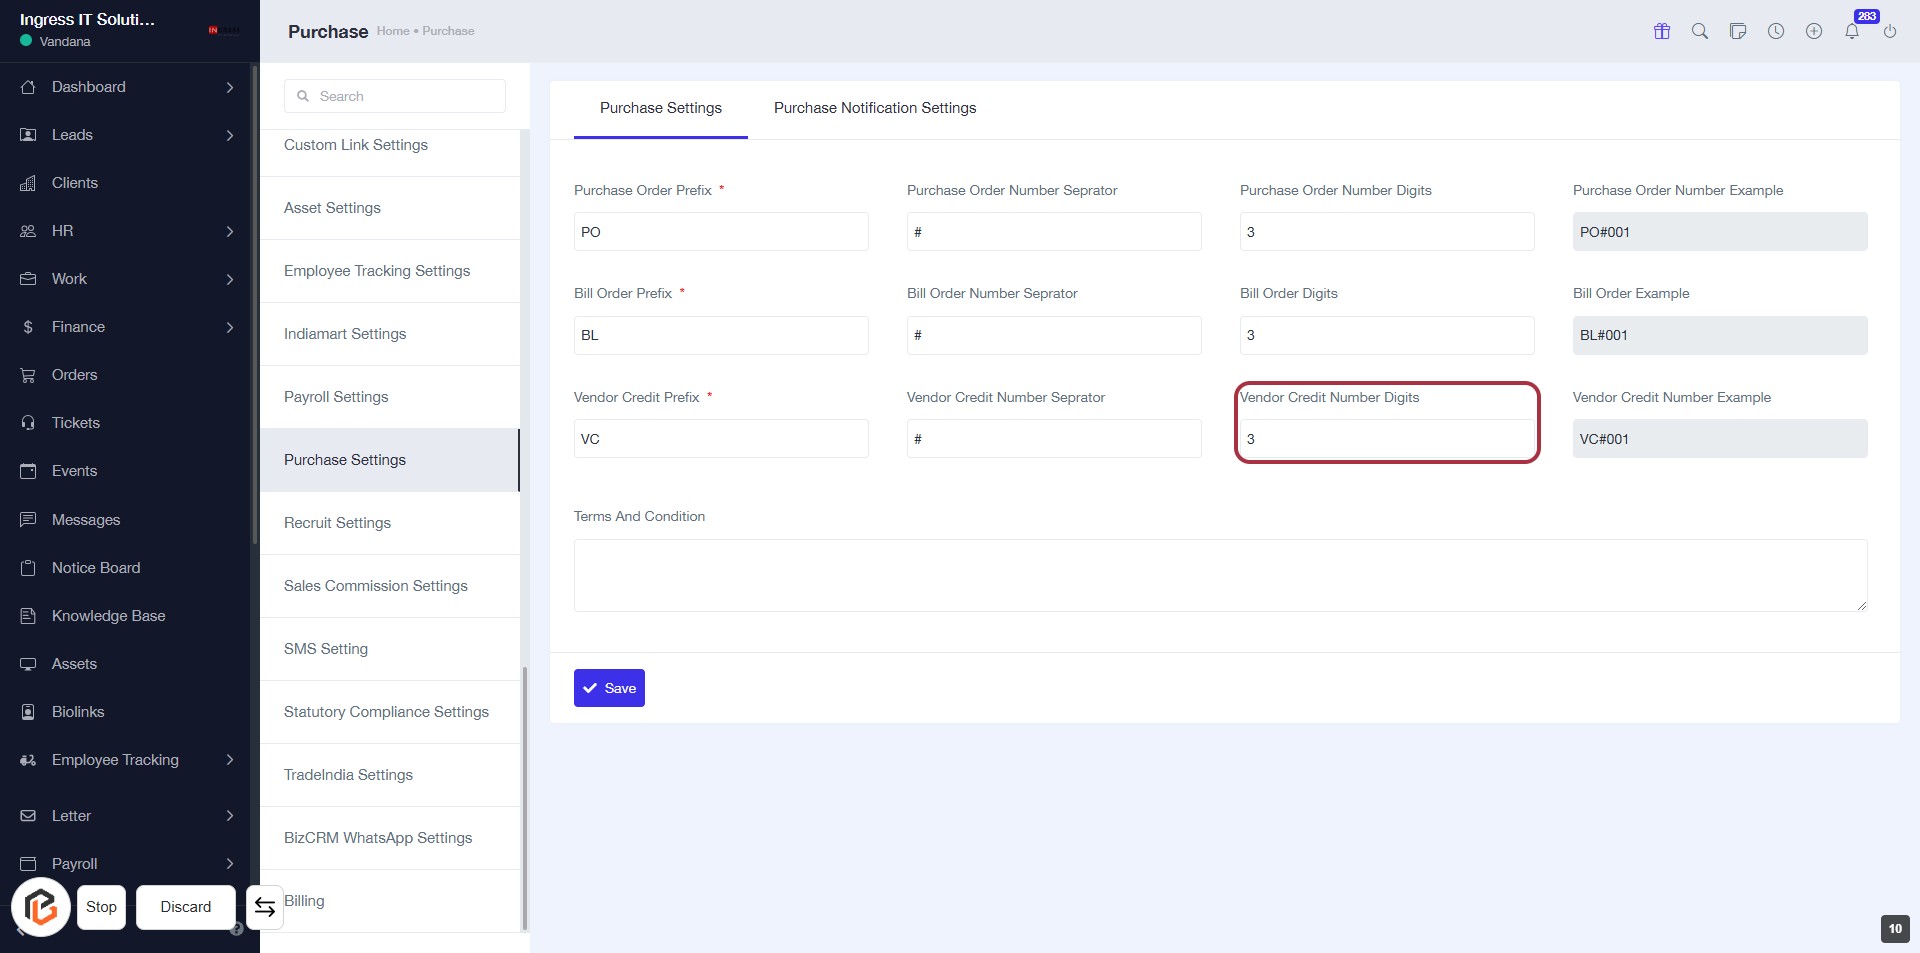
STEP 11: Enter Vendor Credit Number Digits
- Click on the "Vendor Credit Number Digits" field.
- Enter the desired number of digits (e.g., 3).
- Ensure that the input meets any specified requirements (indicated by an asterisk).
- Review other fields for completeness before proceeding to the next step.
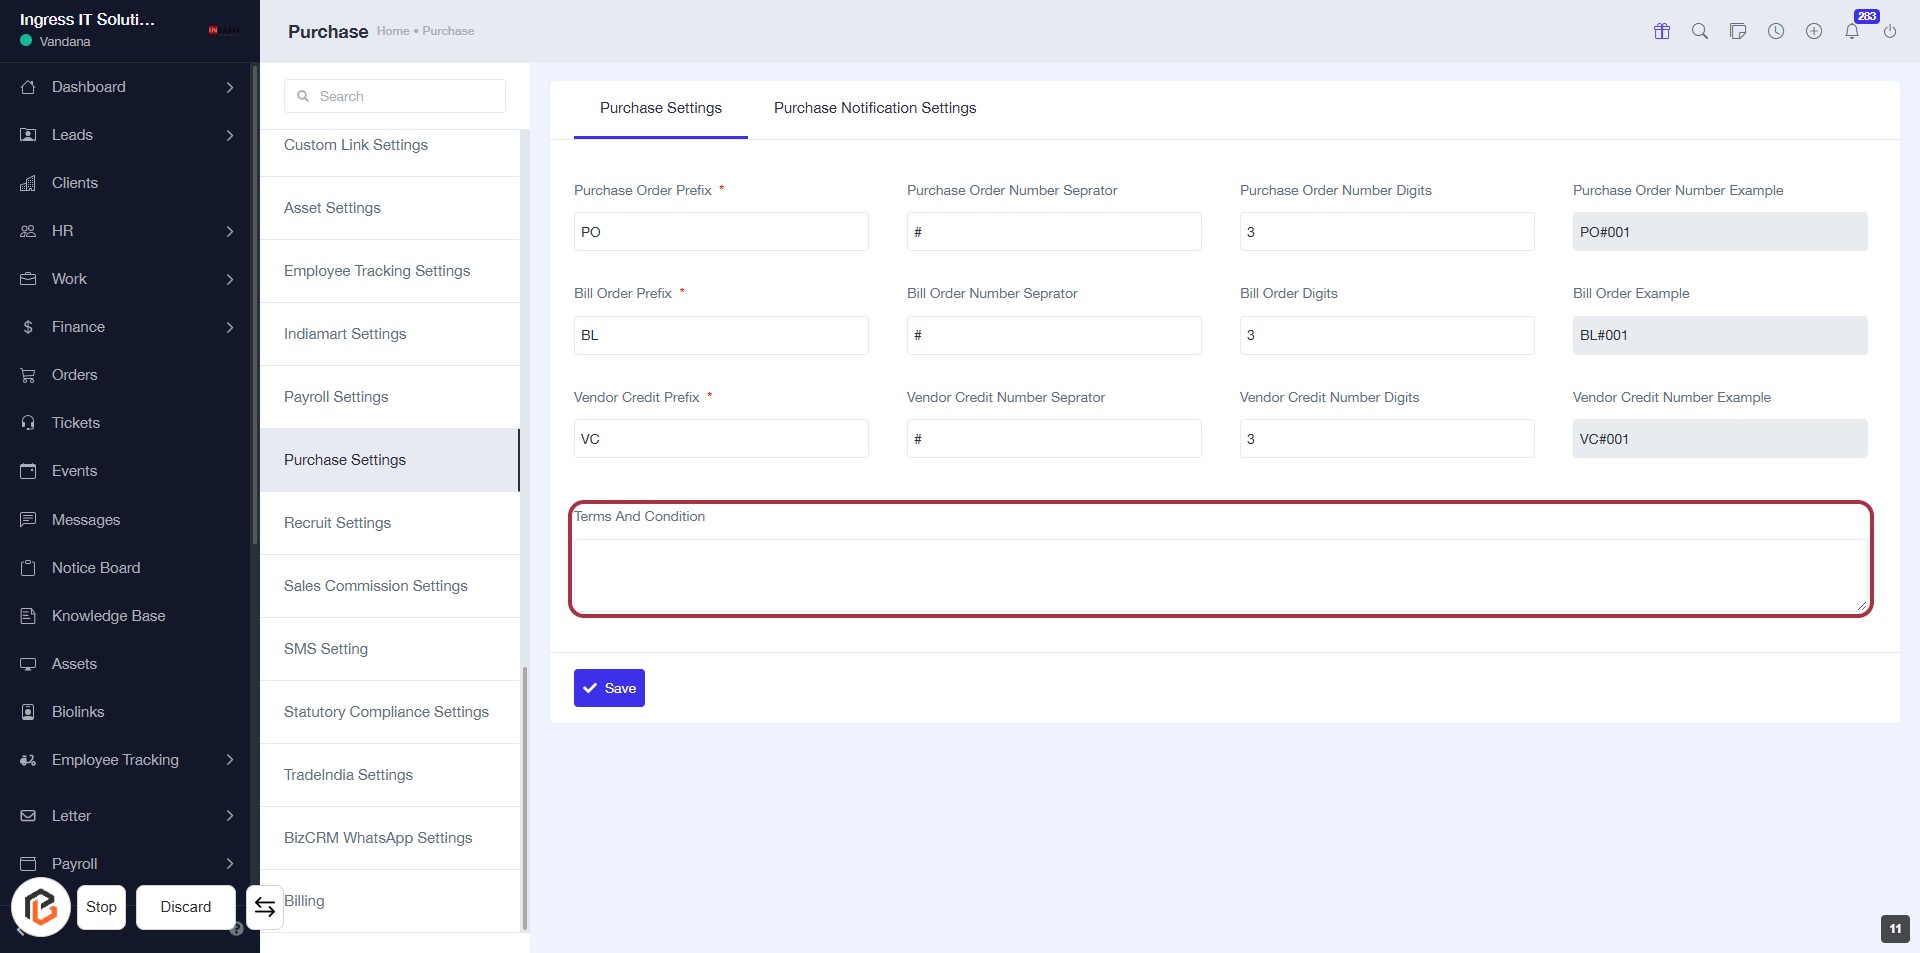
STEP 12: Enter Terms and Conditions
- Click on the "Terms And Condition" section highlighted in red.
- Fill in the required information in the text area provided.
- Ensure all mandatory fields marked with an asterisk (*) are completed.
- Review your entries for accuracy before proceeding.
- Next, click on the "Save" button to finalize your settings.
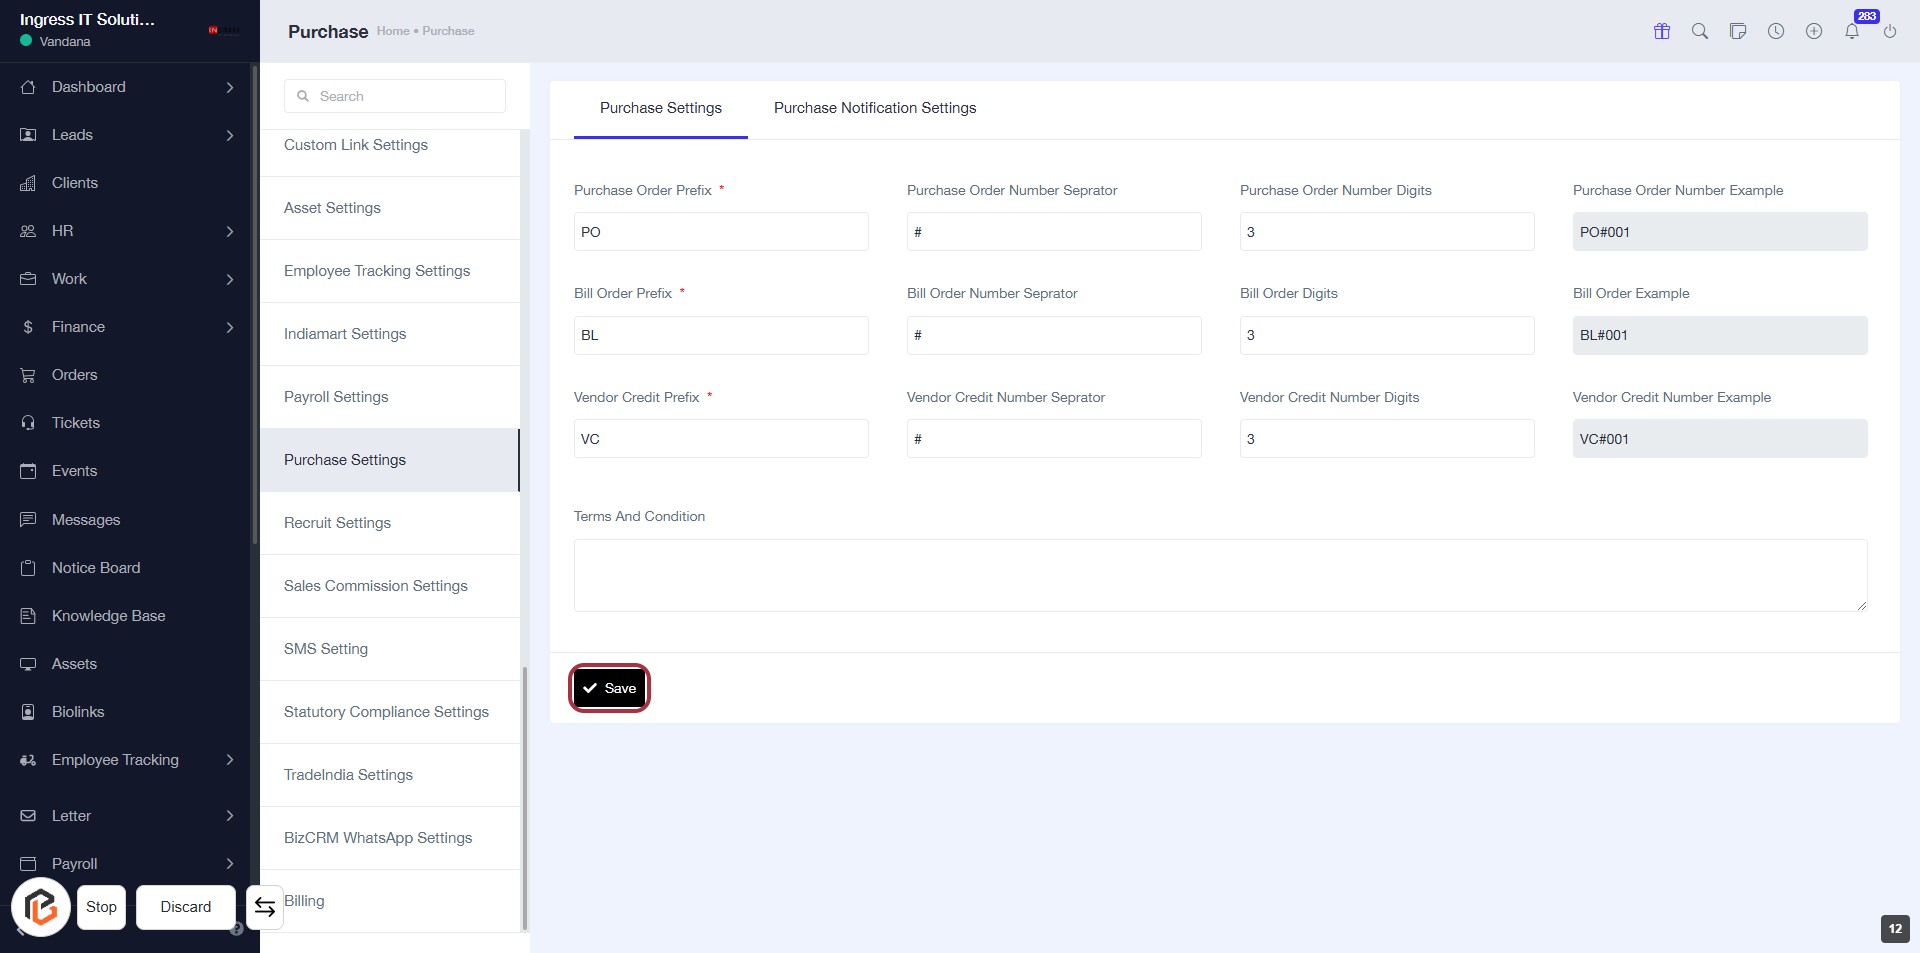
STEP 13: Click on "Save" to Finalize Settings
- Ensure all required fields are filled, marked with an asterisk (*).
- Review the "Terms and Conditions" section for any necessary input.
- Click the Save button at the bottom of the form to save your settings.
- Confirm that a success message appears to indicate successful saving.