Comprehensive Guide to Configuring Attendance and Employee Shift Settings in Your Dashboard
17 mins read · Updated 29 Sep, 2025
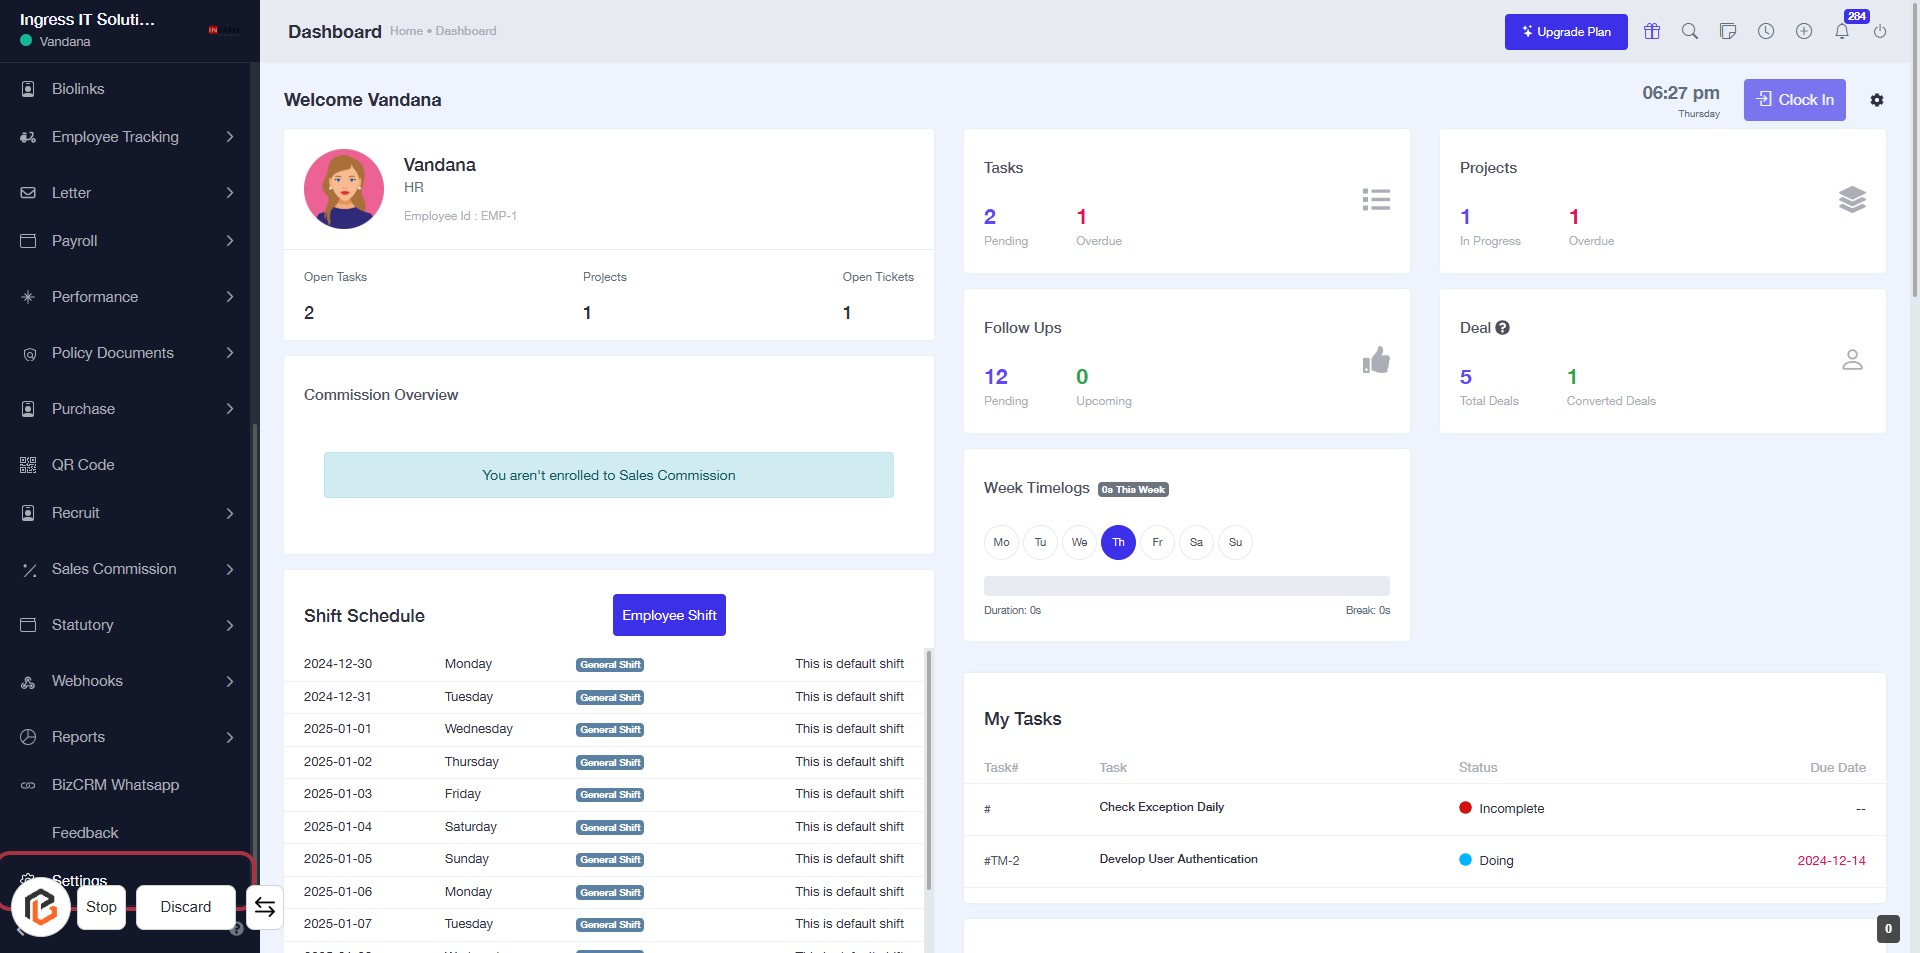
STEP 1: Click on "Settings" to Access Configuration Options
- Navigate to the left sidebar of the dashboard.
- Click on the Settings link to open configuration options.
- Ensure you are on the correct page before proceeding to the next step.
- Look for any additional prompts or options that may appear after clicking.
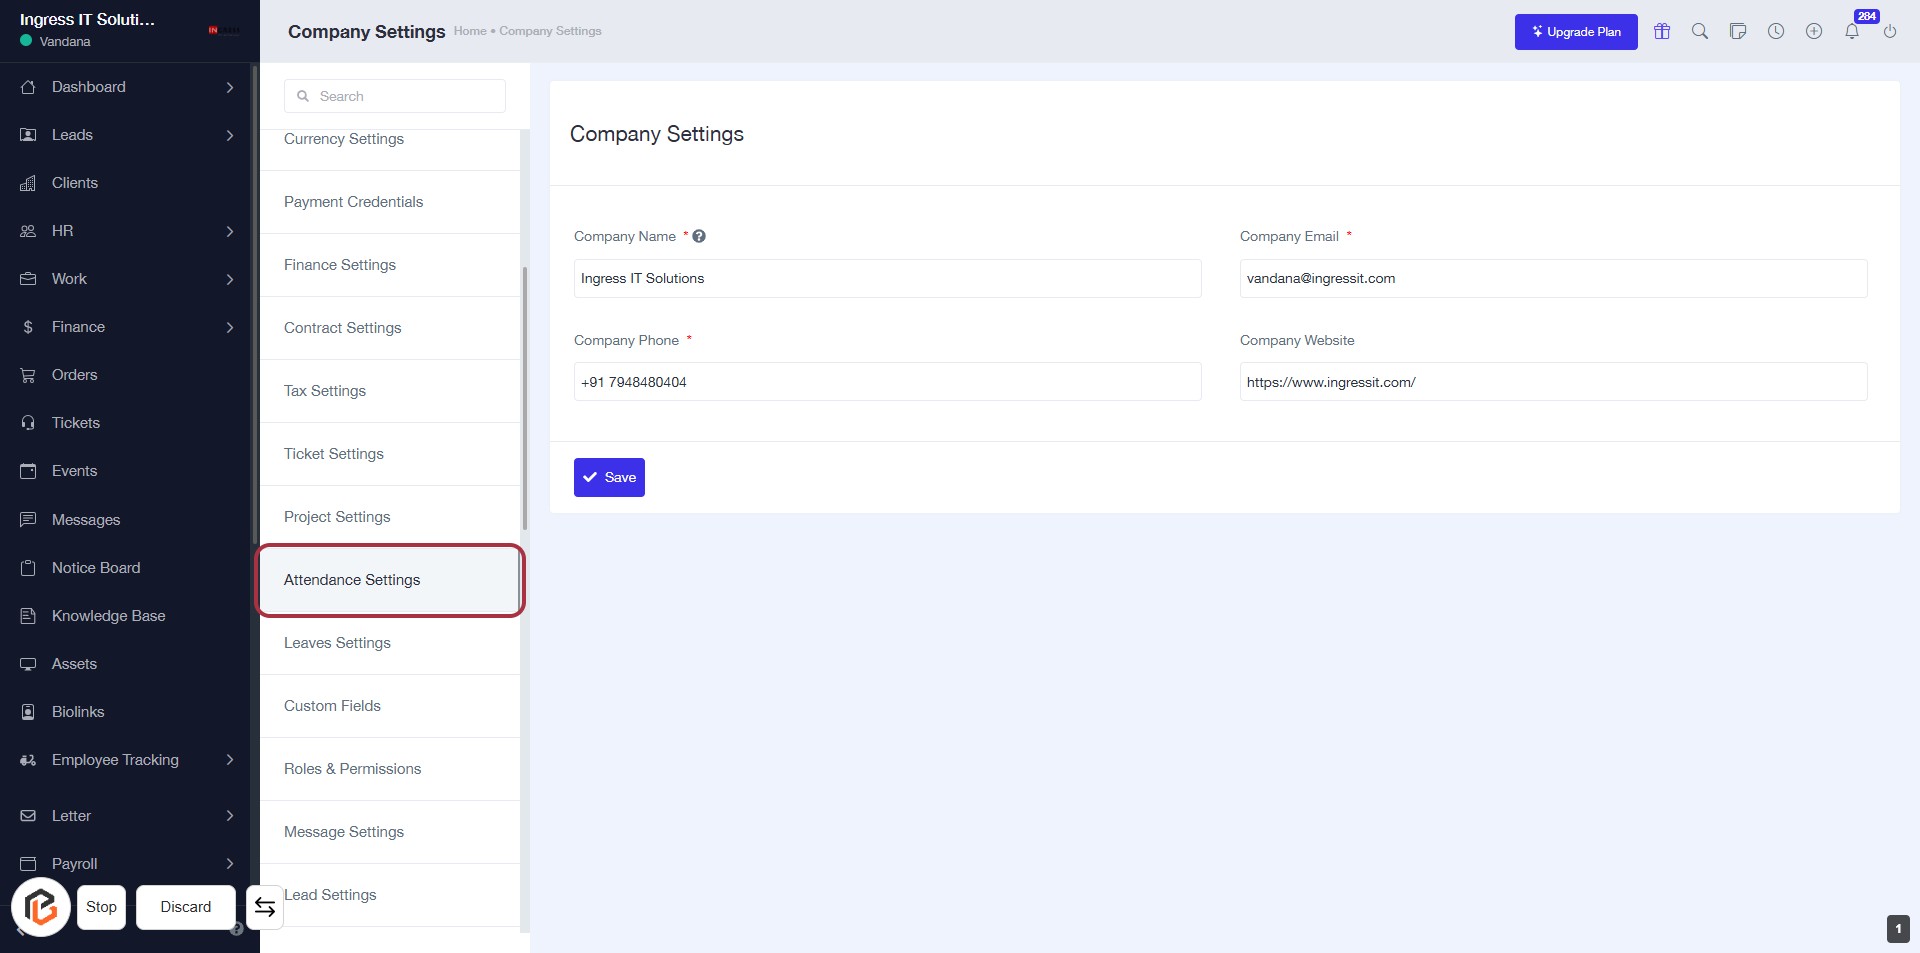
STEP 2: Click on "Attendance Settings"
- Navigate to the "Attendance Settings" option in the sidebar.
- Click on it to access the attendance configuration options.
- Ensure to check for any required fields marked with an asterisk (*).
- Review the settings available for managing attendance.
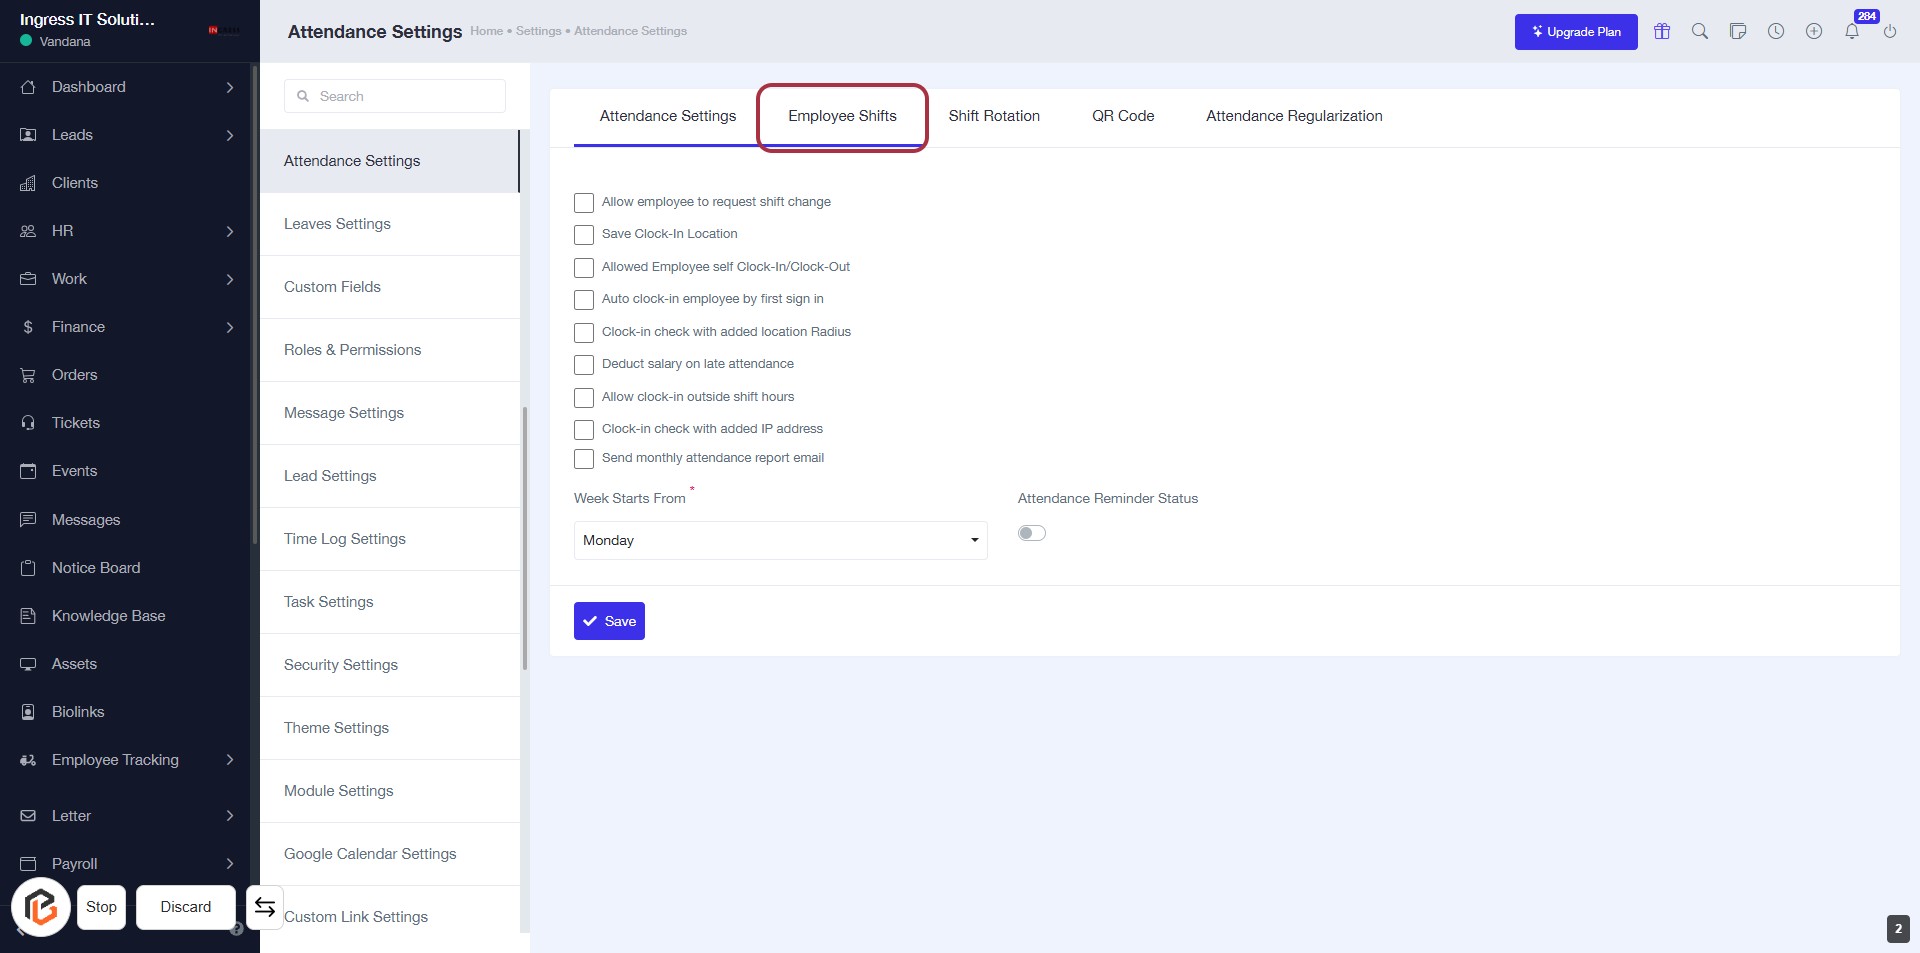
STEP 3: Select "Employee Shifts"
- Click on the "Employee Shifts" tab to access shift-related settings.
- Review the options available, such as allowing employees to request shift changes and setting clock-in locations.
- Ensure to fill in mandatory fields marked with an asterisk (*).
- After making adjustments, proceed to the next step by clicking "Add New Shift."
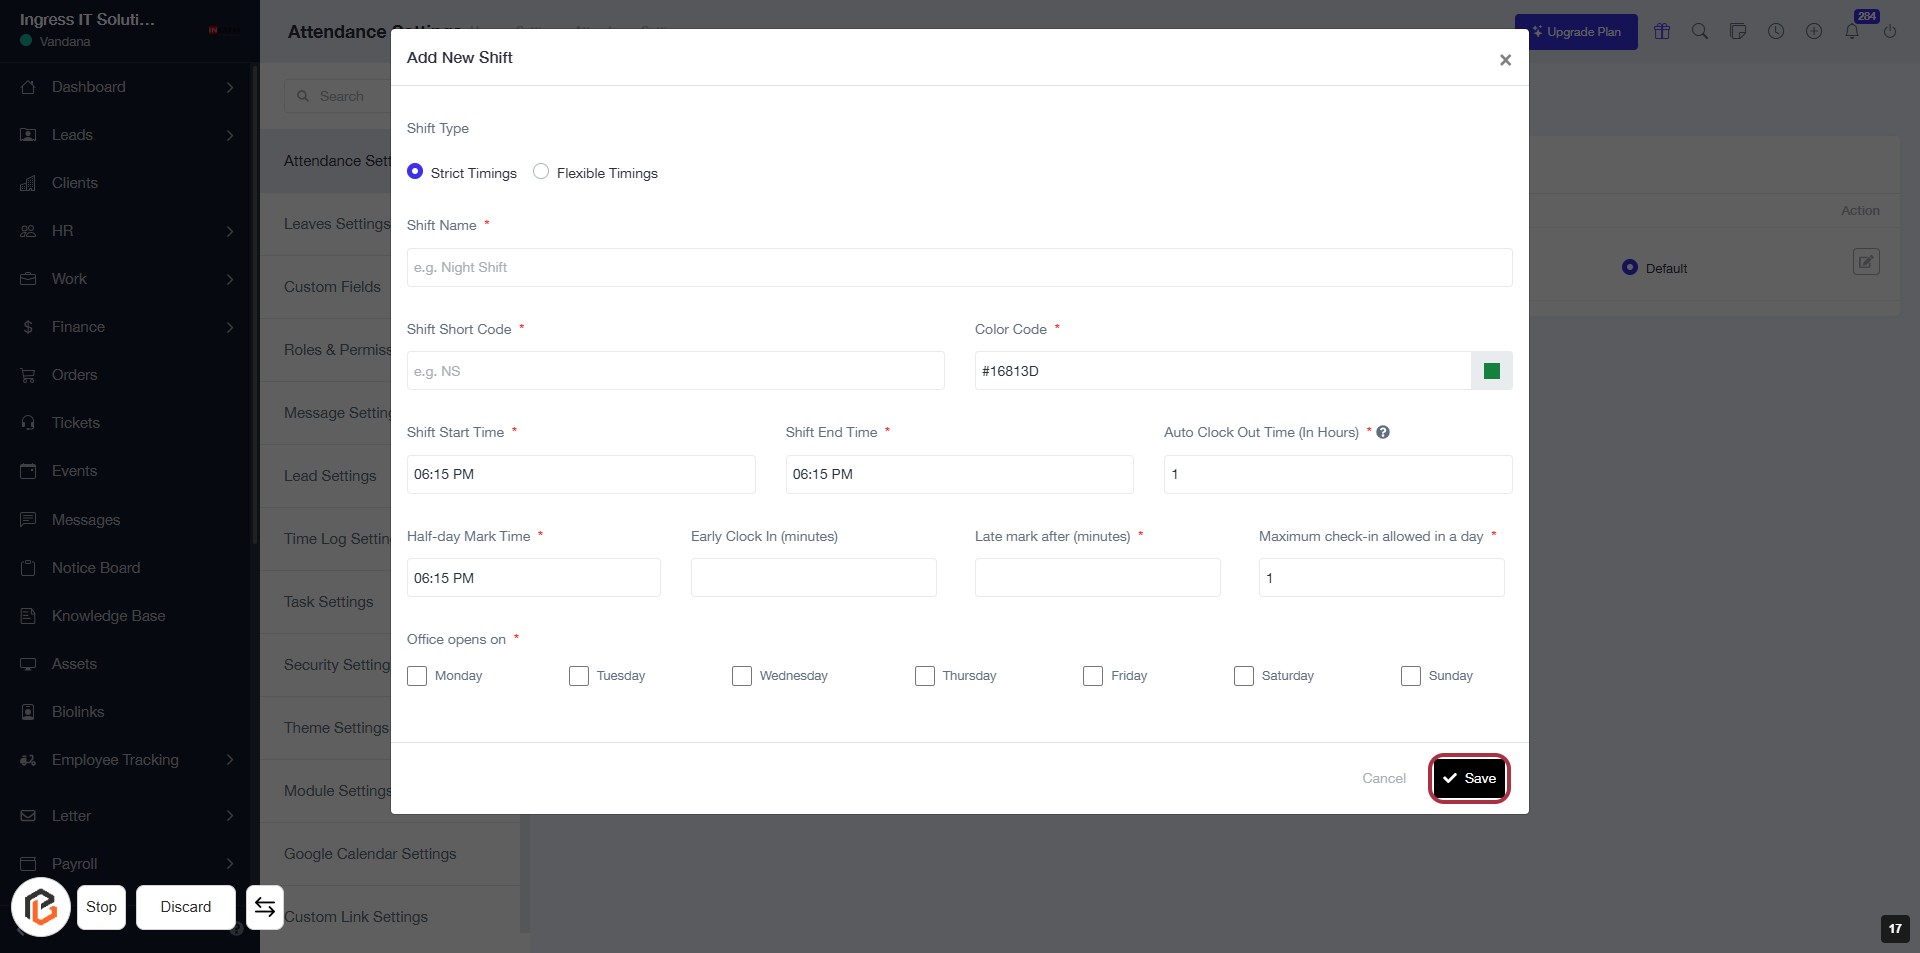
STEP 4: Click on "Add New Shift"
- Navigate to the Attendance Settings page.
- Locate the Add New Shift button highlighted in red.
- Click on the button to proceed with adding a new shift.
- Ensure all required fields are filled in the upcoming form.
- After clicking, you will be directed to select the Shift Type in the next step.

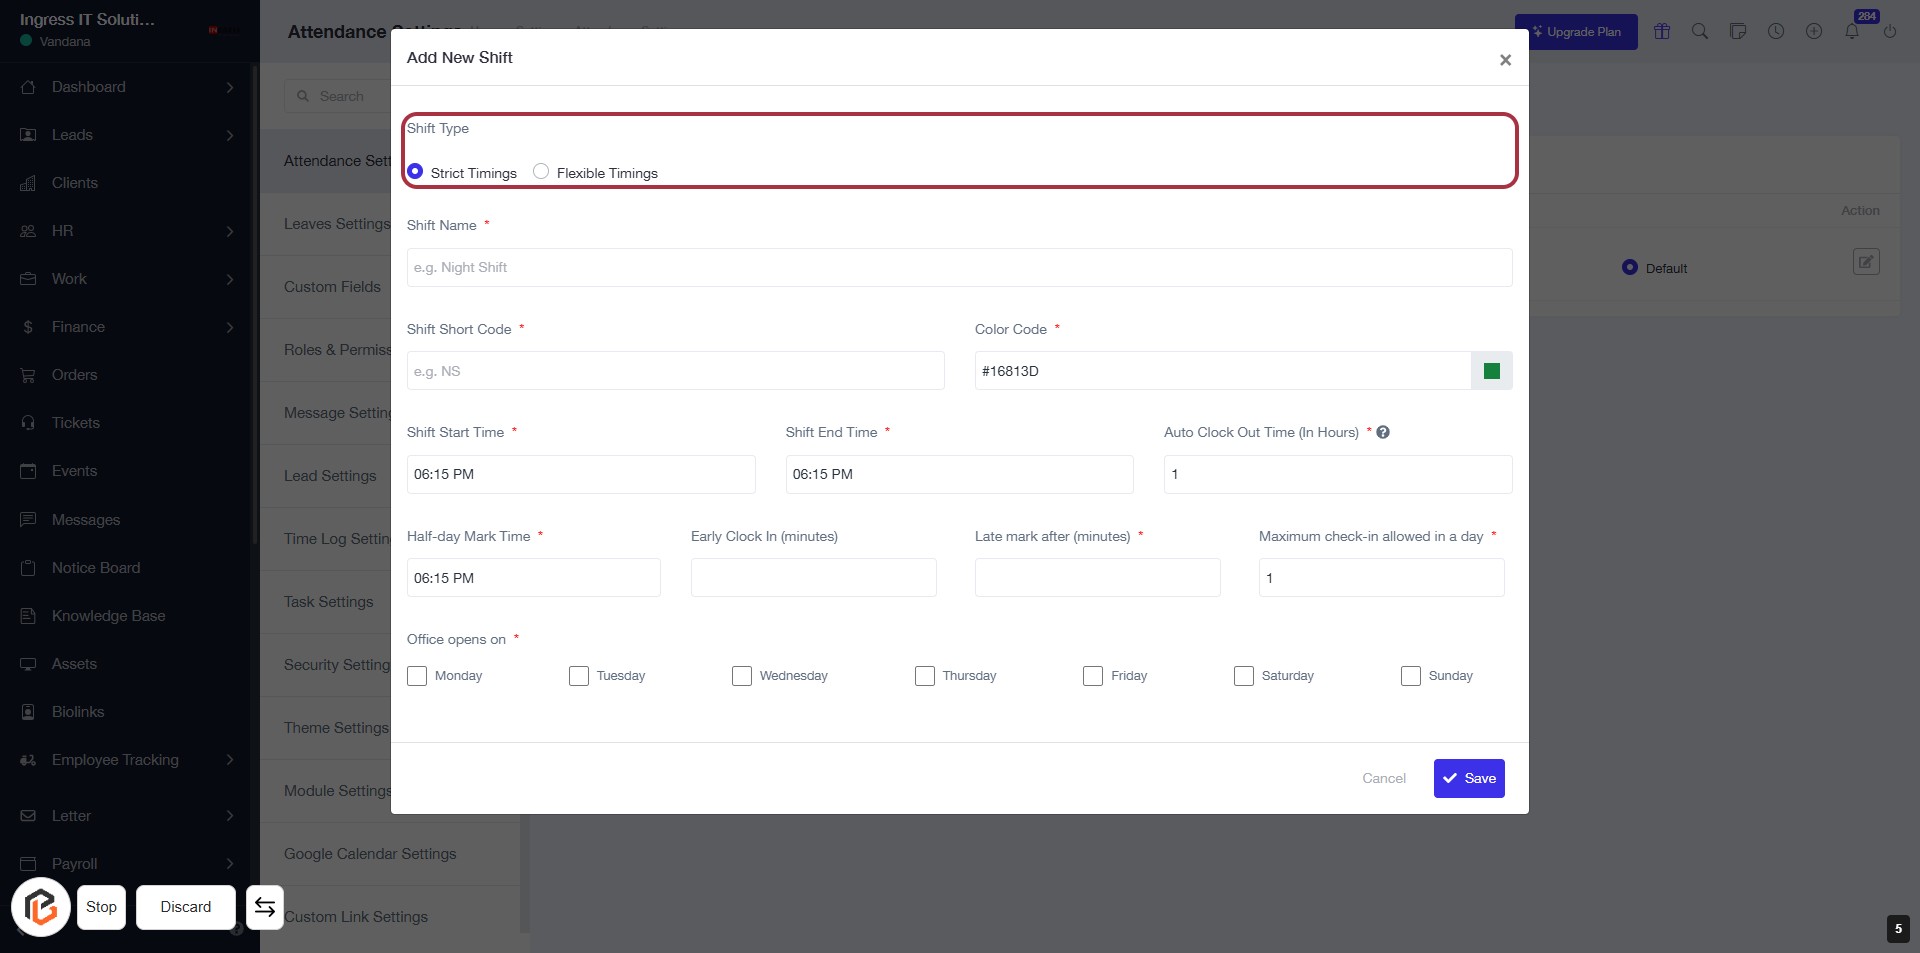
STEP 5: Select "Shift Type"
- Click on the "Shift Type" option in the form.
- Choose between "Strict Timings" or "Flexible Timings."
- Ensure to fill in any required fields marked with an asterisk (*).
- Proceed to the next step by entering the "Shift Name."
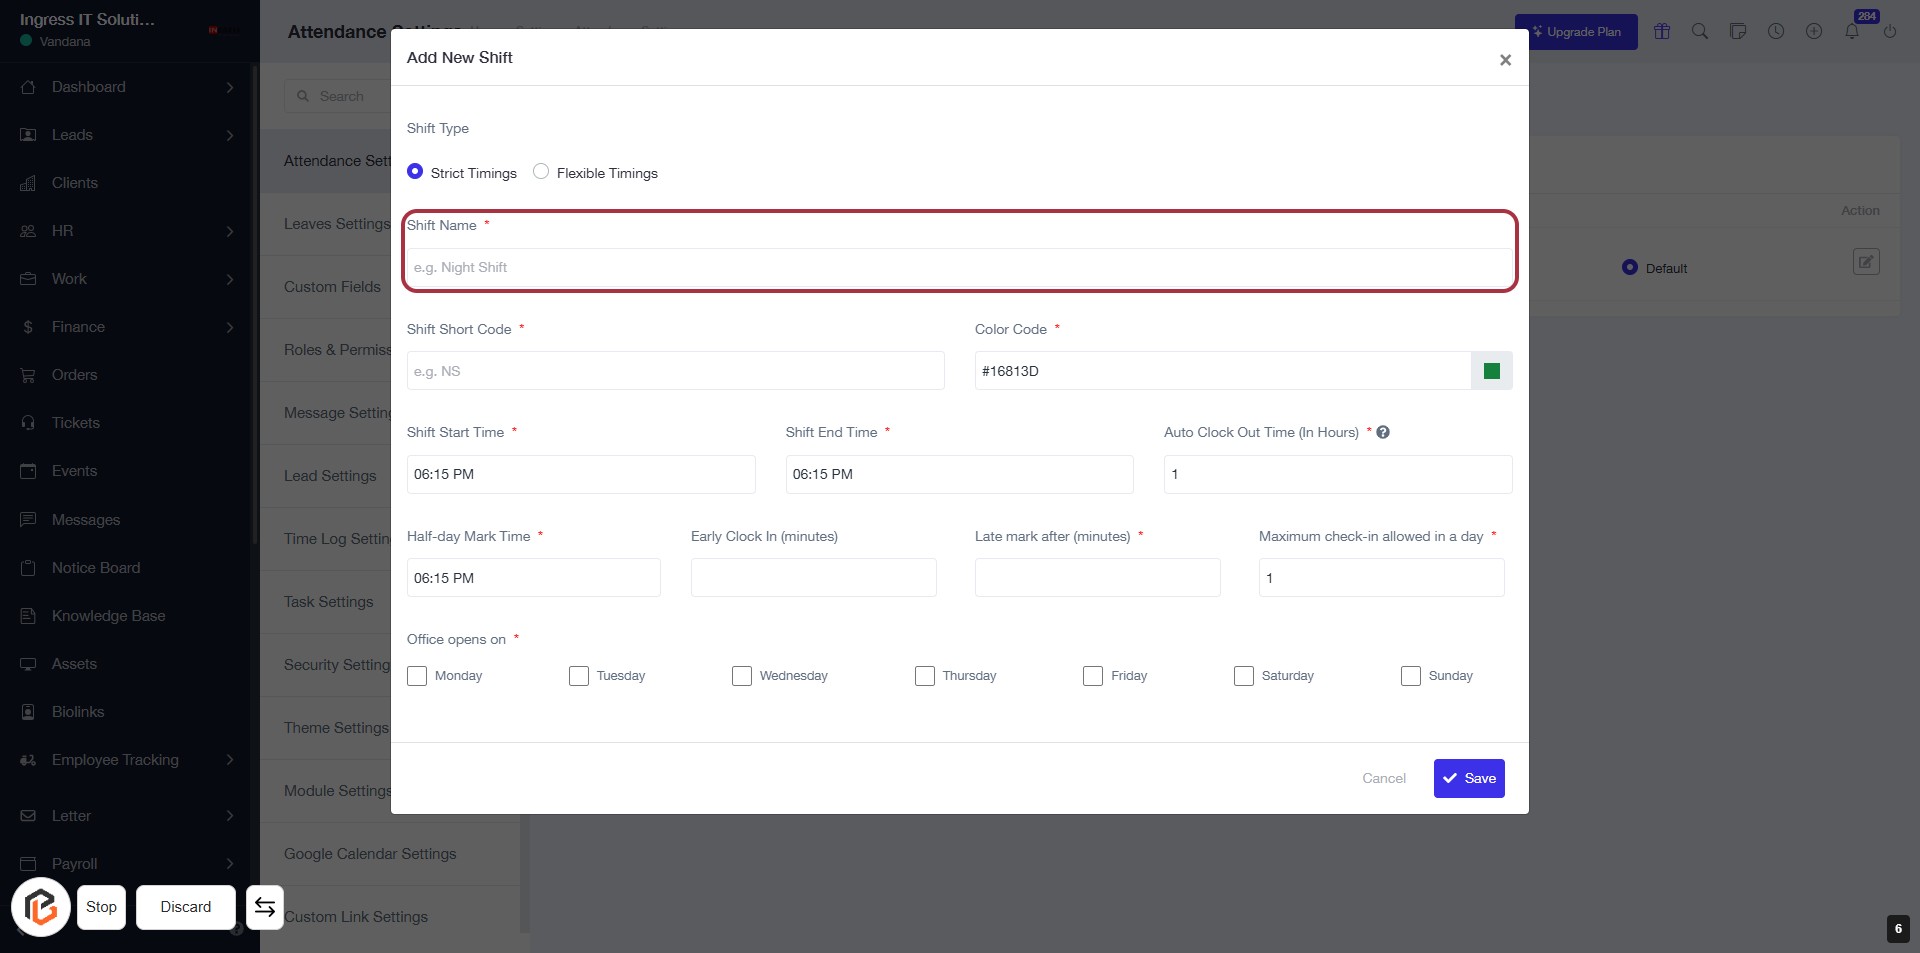
STEP 6: Enter "Shift Name"
- Click on the highlighted area labeled "Shift Name" (marked with an asterisk for required input).
- Ensure to provide a descriptive name for the shift (e.g., Night Shift).
- This field is mandatory; make sure to fill it before proceeding to the next step.
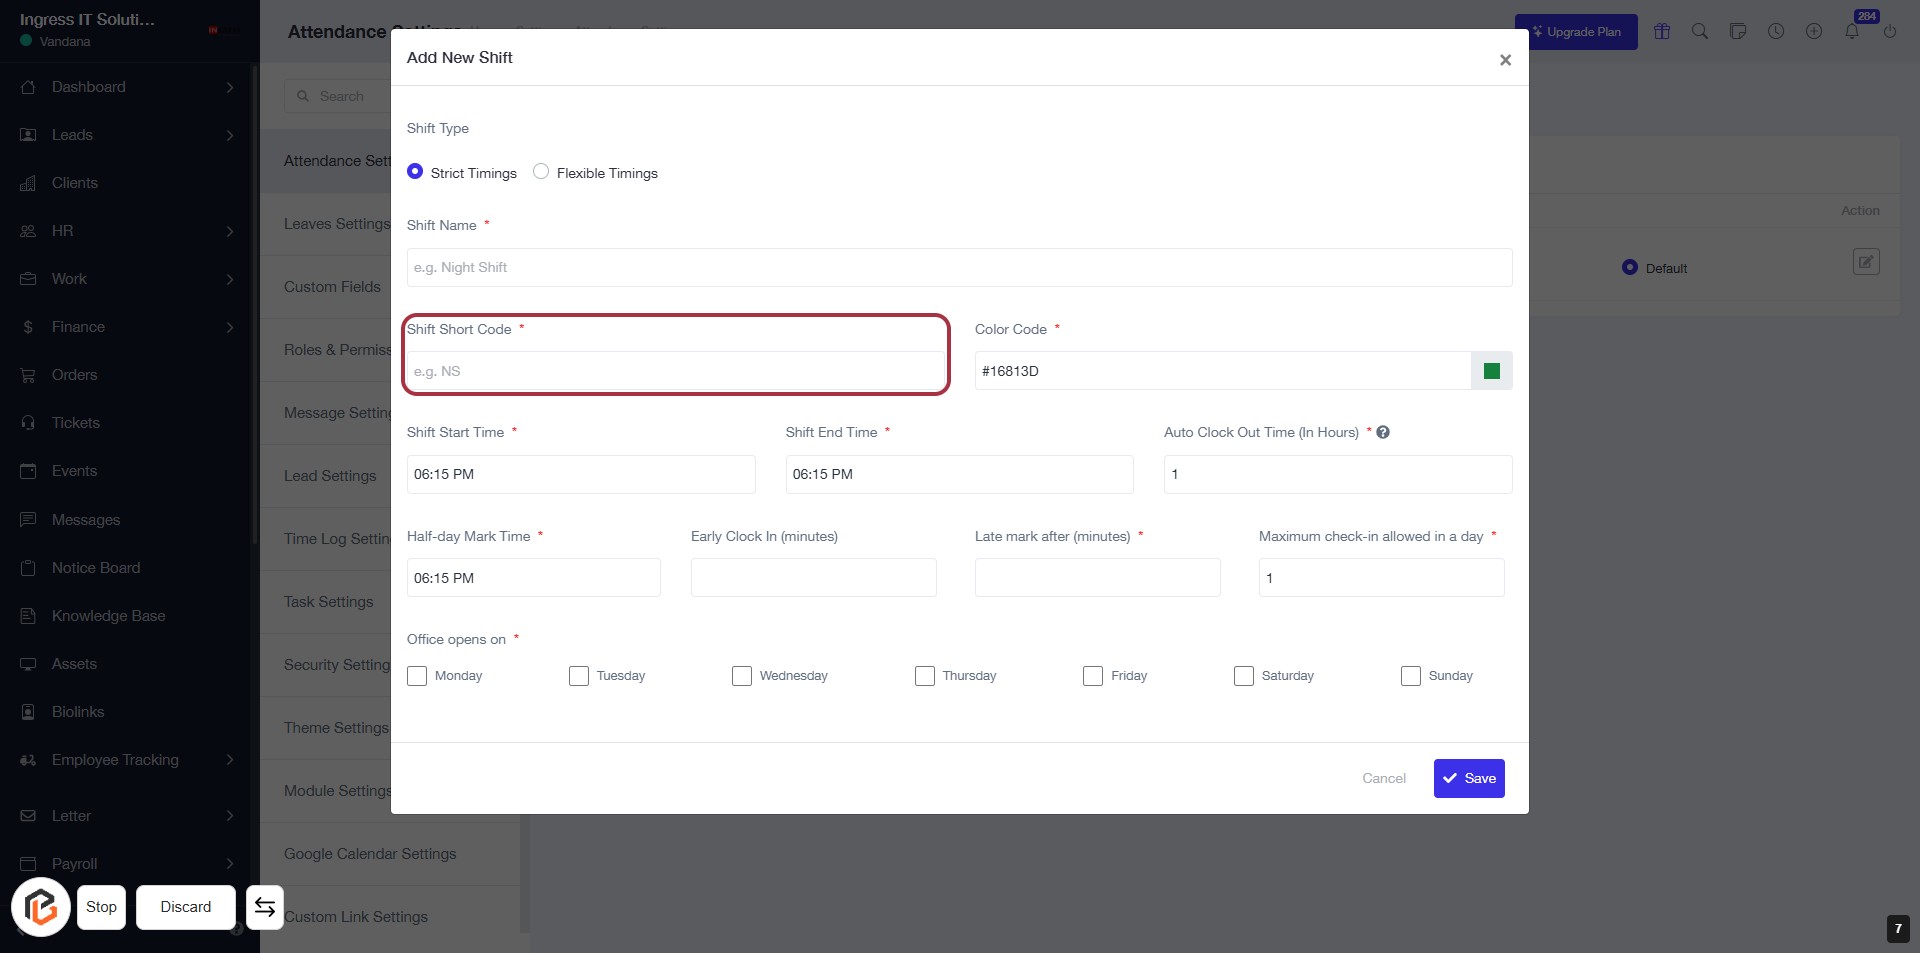
STEP 7: Enter "Shift Short Code"
- Click on the "Shift Short Code" field (marked with a red border).
- Enter a short code for the shift (e.g., NS).
- Ensure the field is filled as it is marked with an asterisk (*), indicating it's required.
- Proceed to the next step by selecting the "Color Code" field.
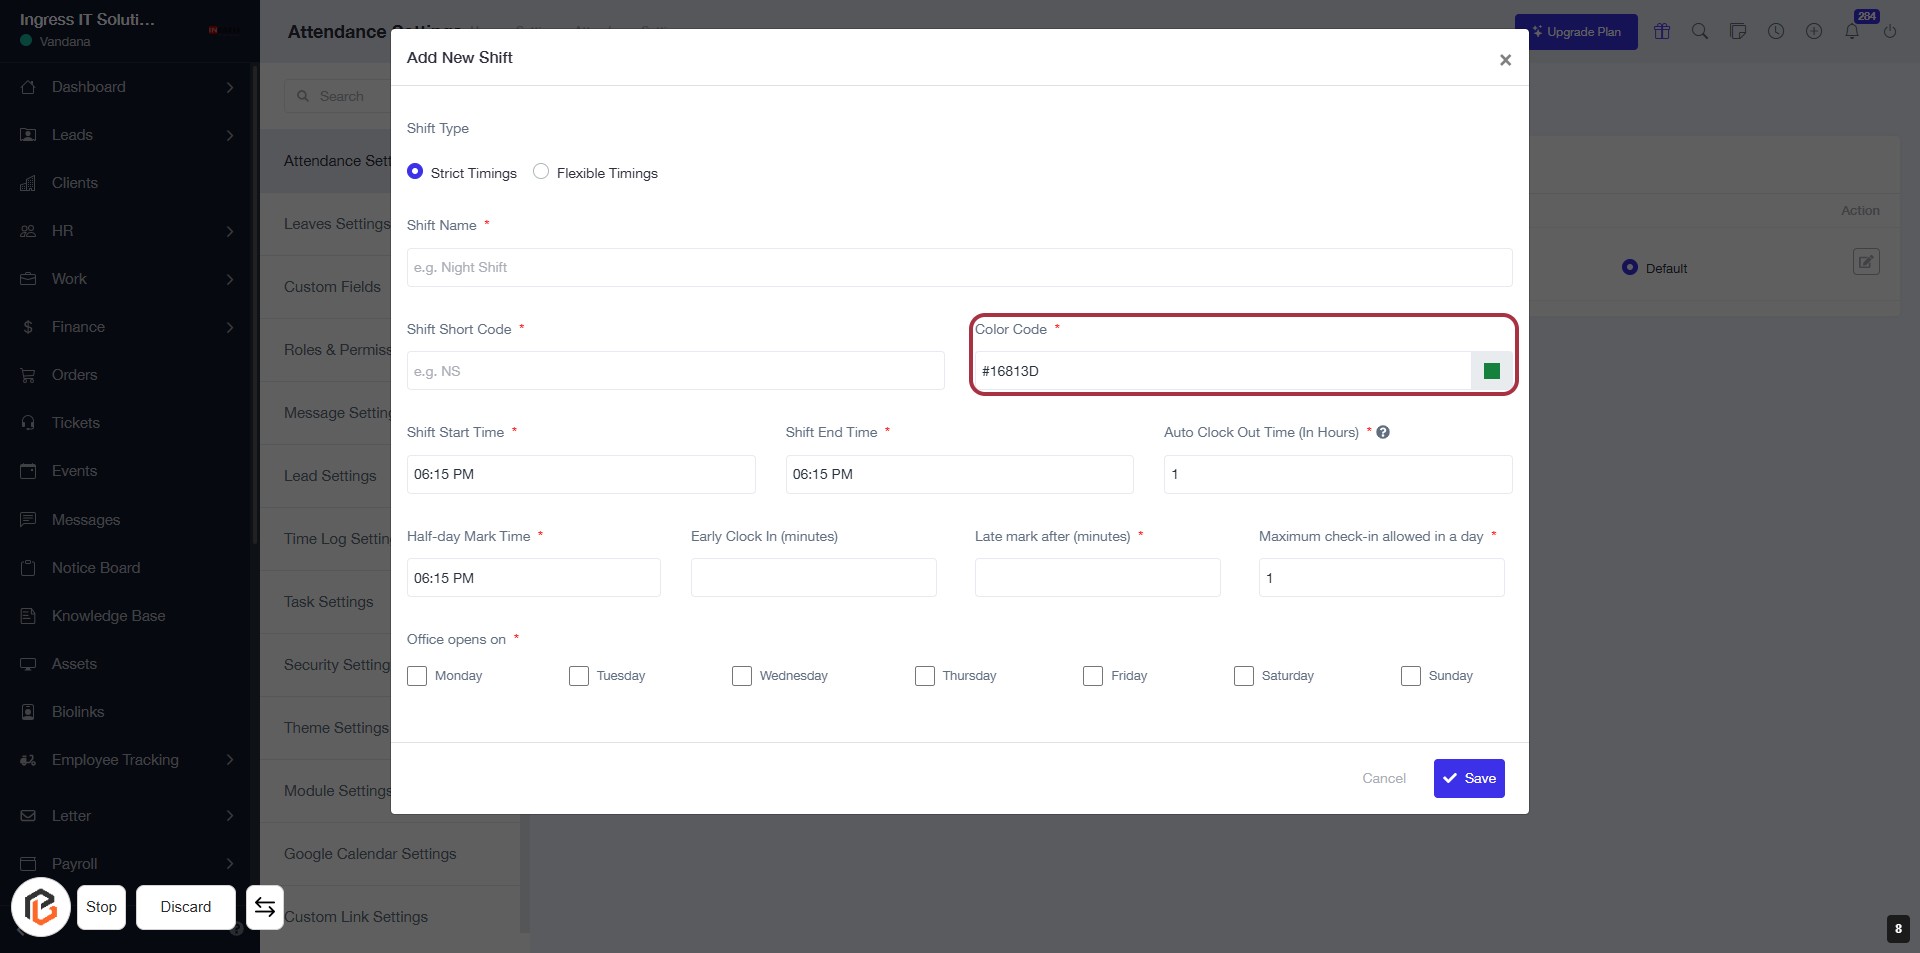
STEP 8: Select "Color Code"
- Click on the "Color Code" field (marked with a red border).
- Ensure the field is filled with a valid color code (e.g., #16813D).
- The asterisk (*) indicates this field is required.
- Proceed to the next step by entering the "Shift Start Time."
STEP 9: Enter "Shift Start Time"
- Click on the "Shift Start Time" field to input the starting time of the shift.
- Ensure the field is marked with an asterisk (*) indicating it is a required input.
- After entering the time, proceed to the next step to enter the "Shift End Time."

STEP 10: Enter "Shift End Time"
- Click on the Shift End Time field (marked with an asterisk * for required input).
- Ensure to enter the appropriate end time for the shift.
- Review other fields such as Shift Name, Shift Start Time, and Auto Clock Out Time (In Hours) for completeness.
- Proceed to the next step by clicking on Auto Clock Out Time (In Hours).

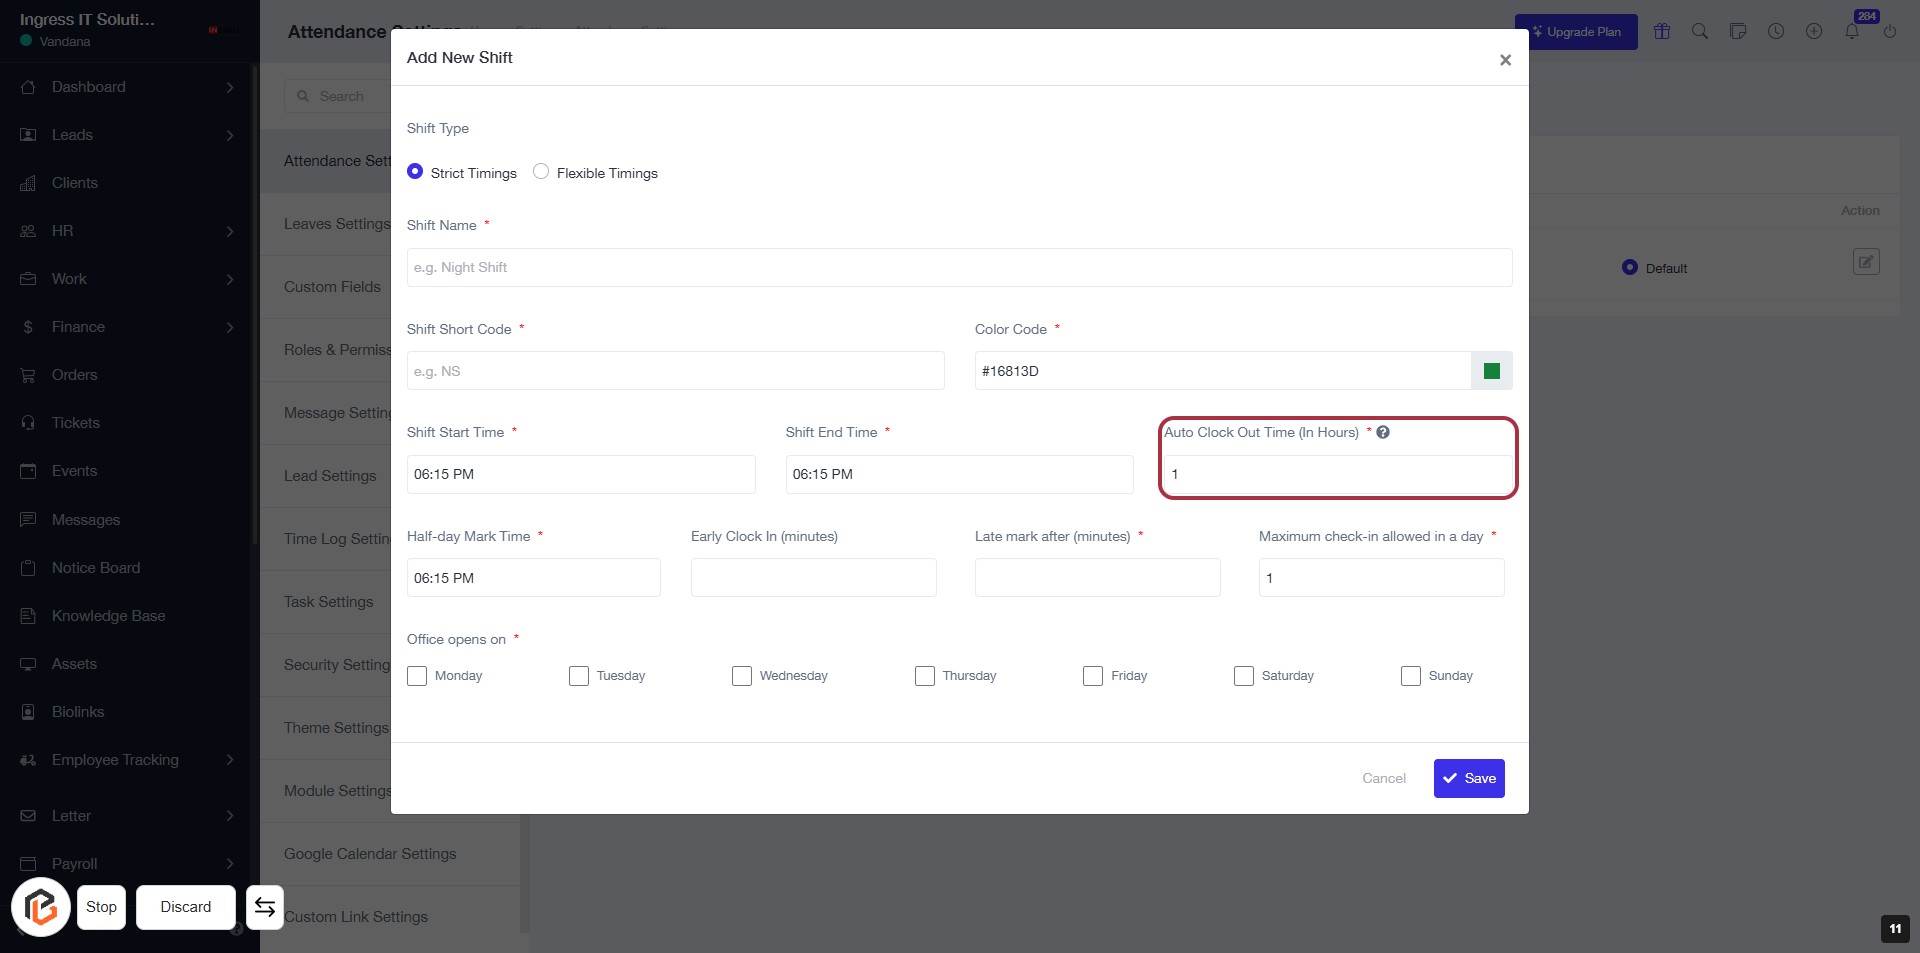
STEP 11: Click "Auto Clock Out Time (In Hours)"
- Click on the "Auto Clock Out Time (In Hours)" field to set the duration for automatic clock-out.
- Ensure to fill in the required input marked with an asterisk (*).
- Review other fields such as Shift Name, Shift Short Code, and Shift Start/End Time for completeness.
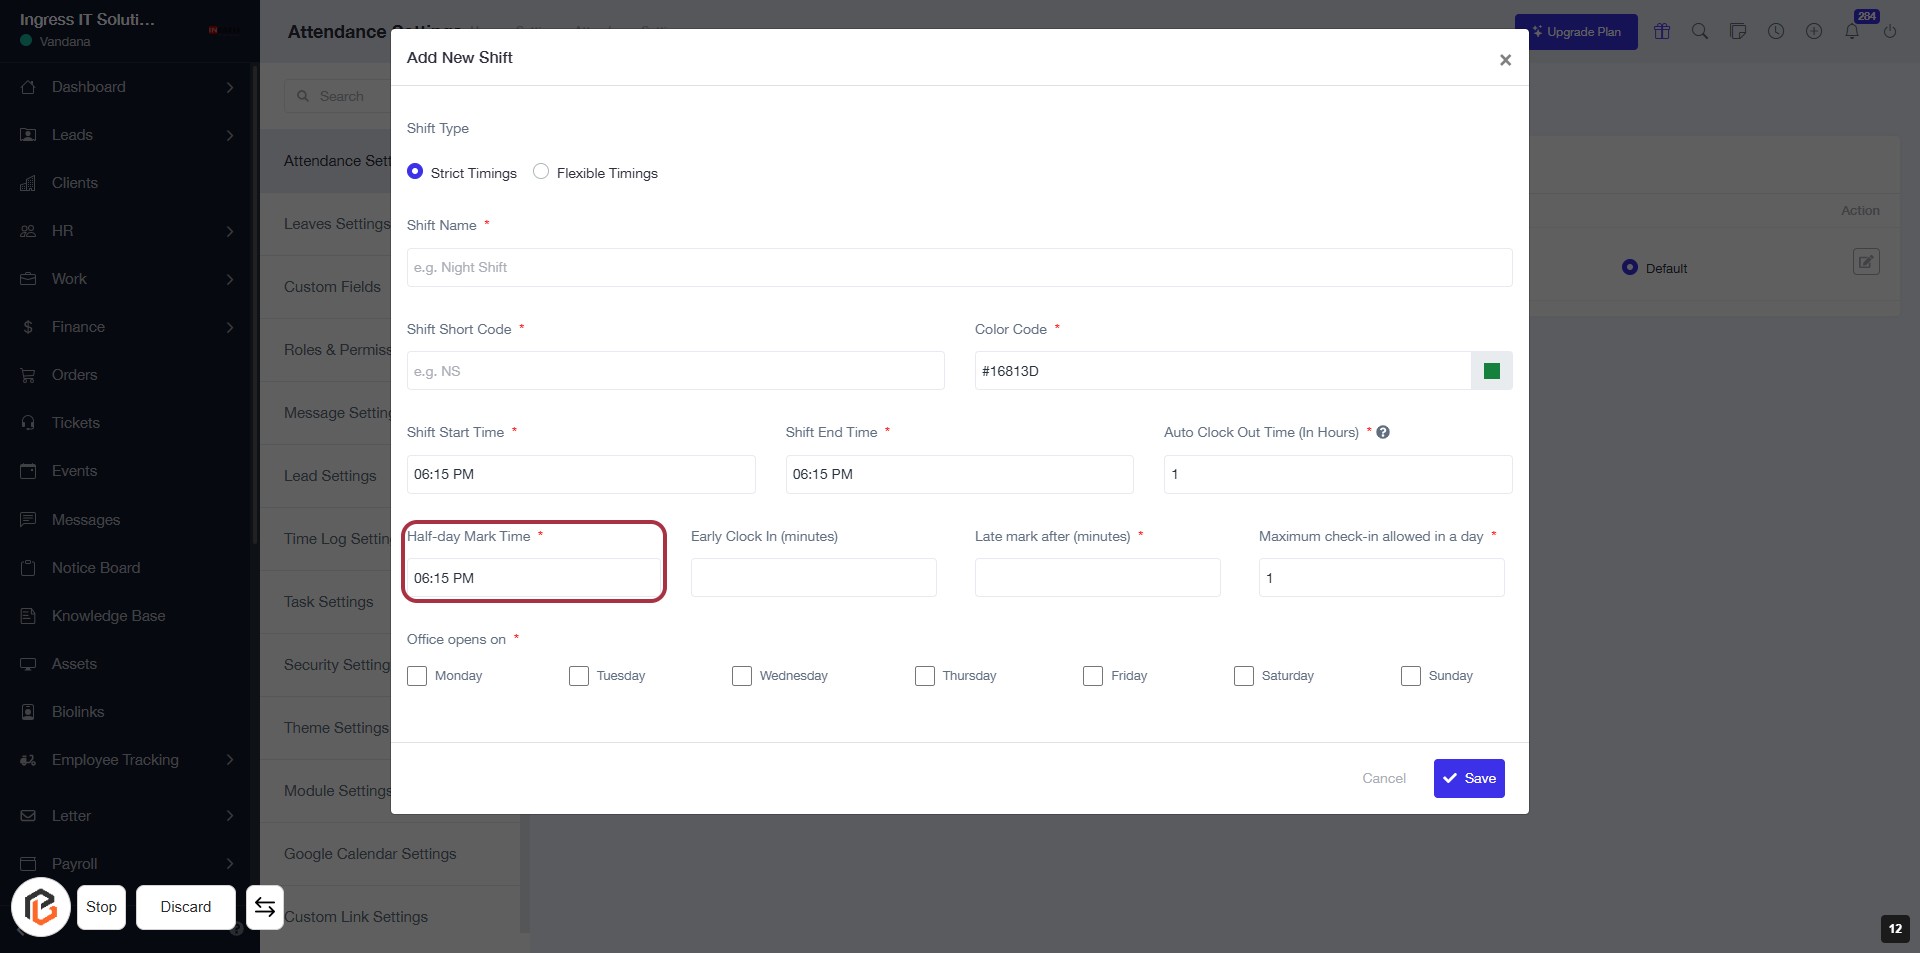
STEP 12: Enter Half-day Mark Time
- Click on the "Half-day Mark Time" field.
- Input the desired time for the half-day mark (indicated with an asterisk * for required).
- Ensure all other required fields are filled out before proceeding.
- Next, click on "Early Clock In (minutes)" to continue.
STEP 13: Click on "Early Clock In (minutes)"
- Locate the "Early Clock In (minutes)" field in the form.
- Click on the highlighted area to activate the input.
- Ensure to fill in the required value for early clock-in minutes.
- Review other fields for any additional required inputs marked with an asterisk (*).

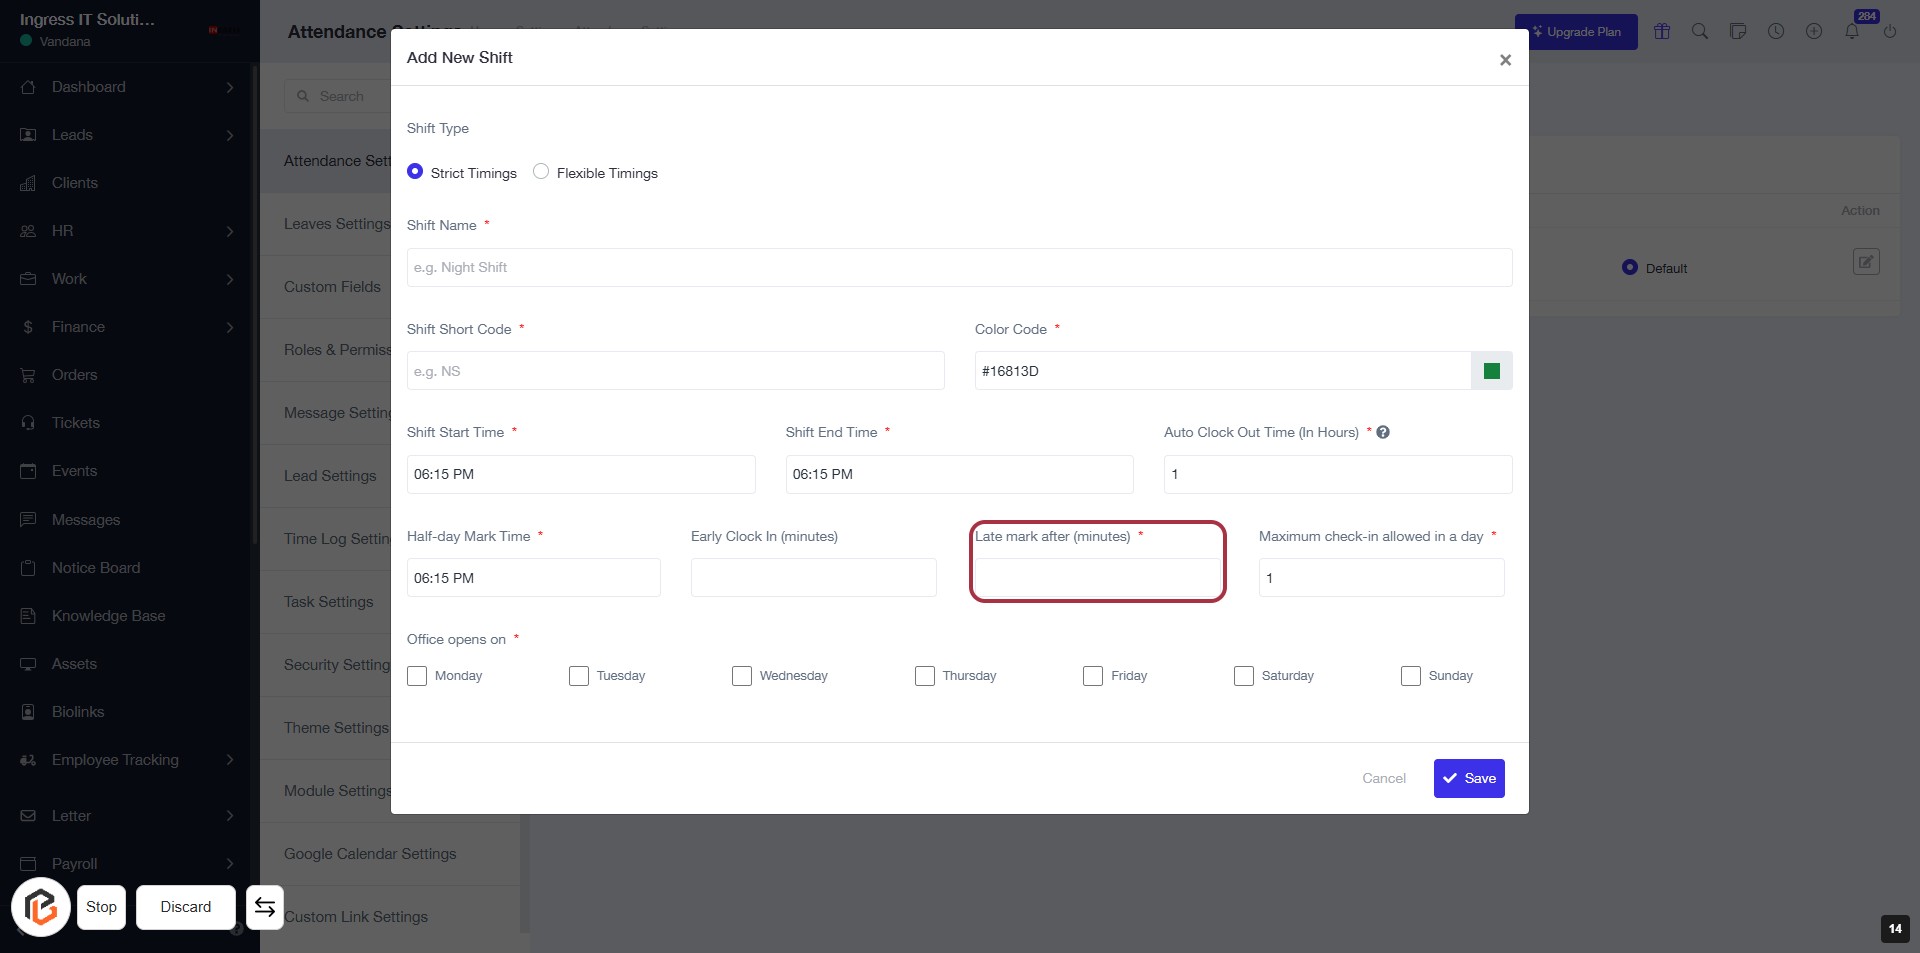
STEP 14: Enter "Late mark after (minutes)"
- Click on the "Late mark after (minutes)" field.
- This field is mandatory (indicated by the asterisk '*').
- Input the number of minutes after which a late mark will be recorded.
- Ensure to complete this before proceeding to the next step.
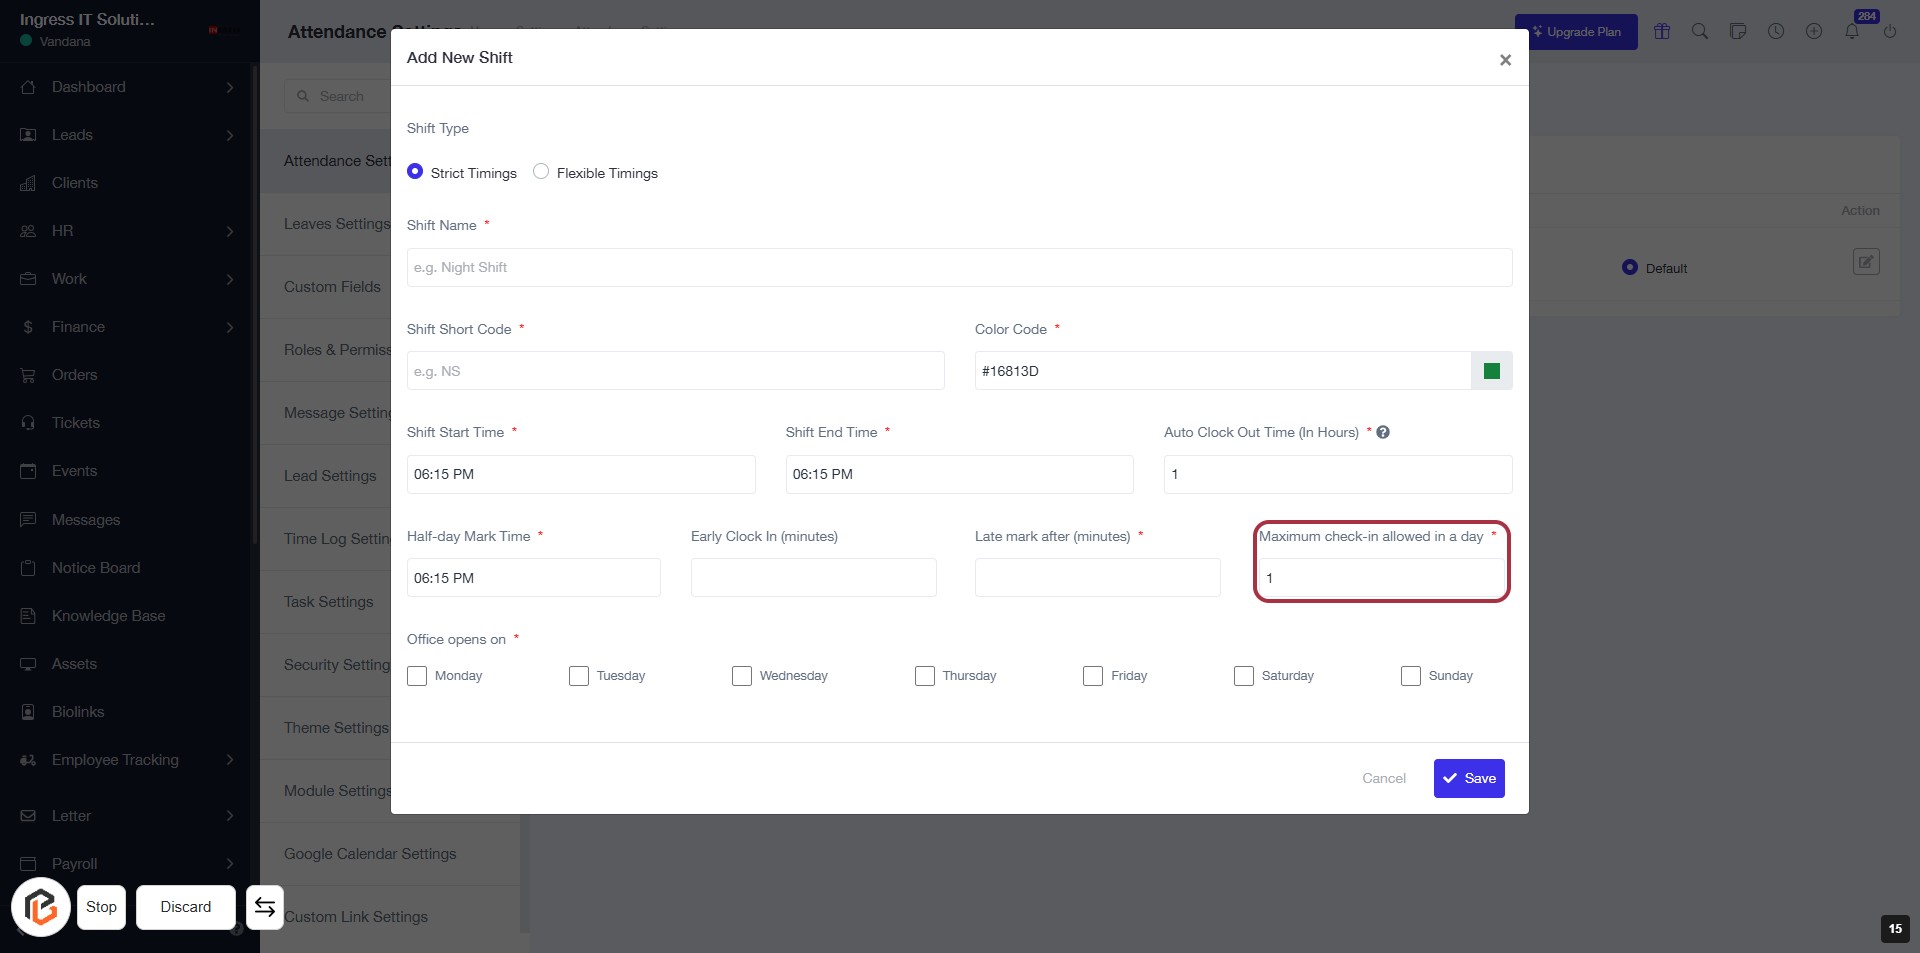
STEP 15: Enter "Maximum check-in allowed in a day"
- Click on the highlighted area labeled "Maximum check-in allowed in a day" (marked with a red border).
- Ensure to fill in the required input, indicated by the asterisk (*).
- Review other fields in the form for completeness before proceeding.
- After entering the value, continue to the next step to select "Office opens on".
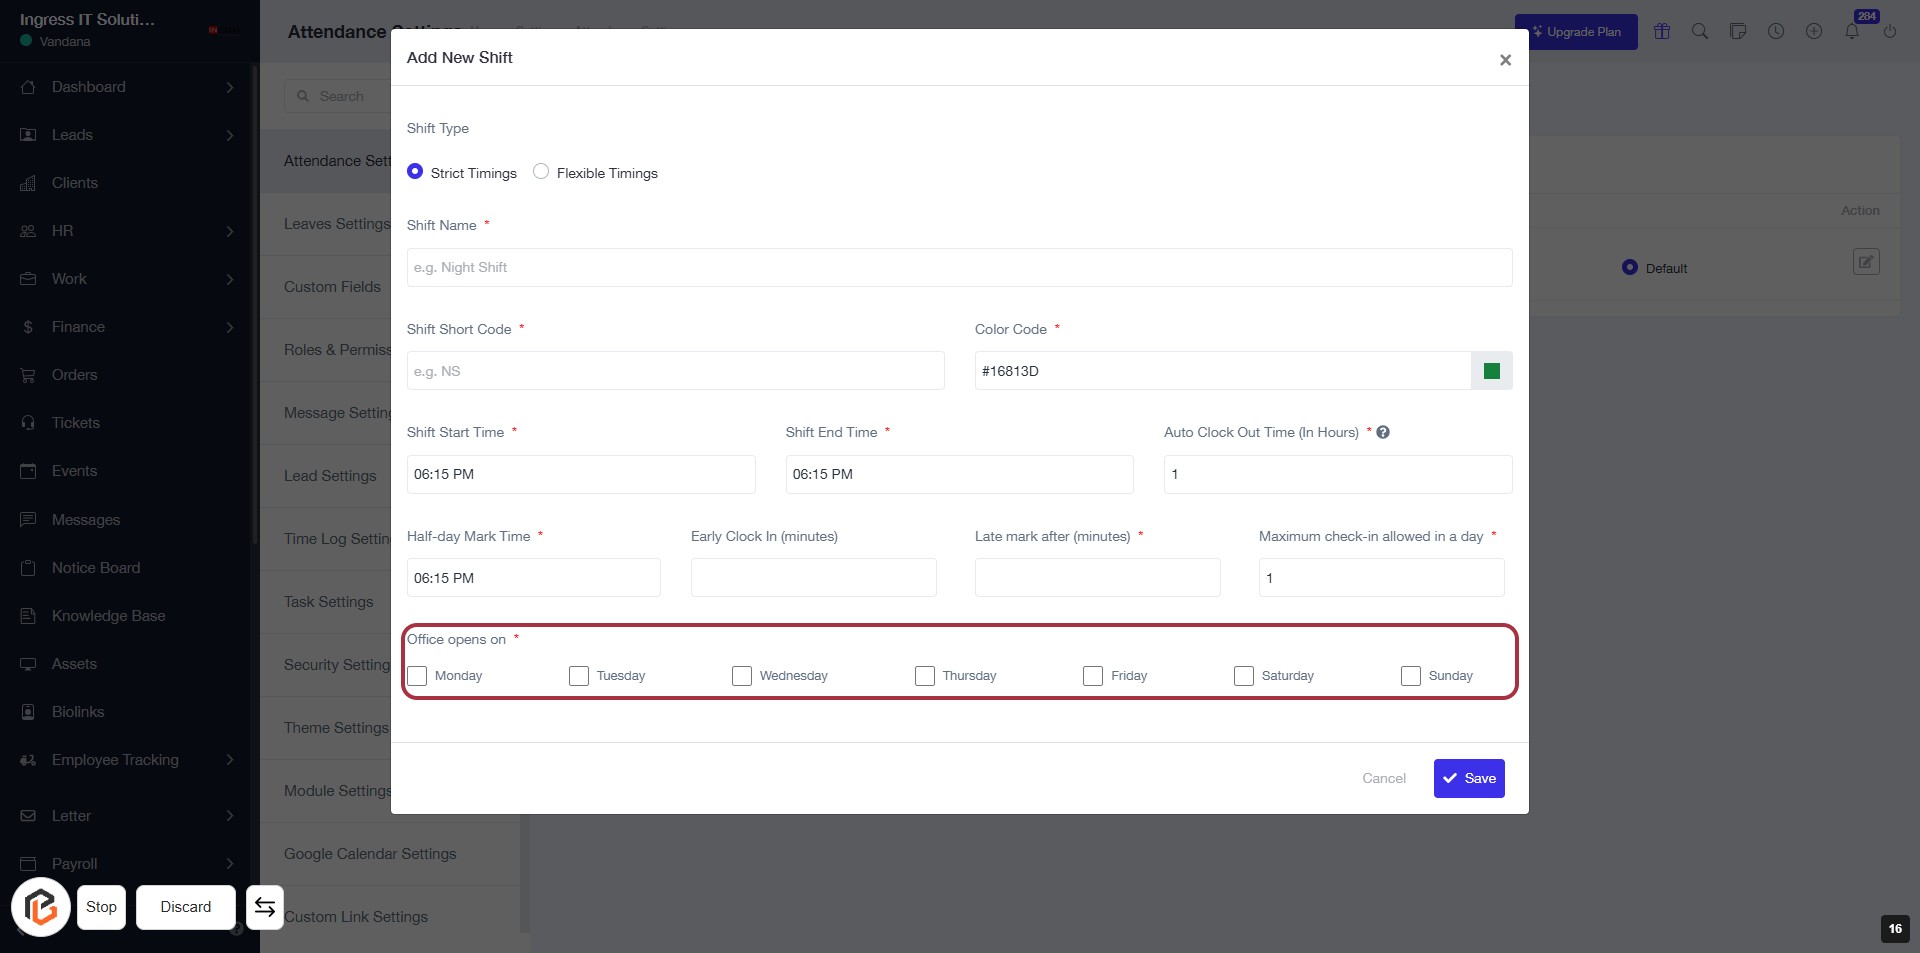
STEP 16: Select "Office opens on" Days
- Click on the "Office opens on" section.
- Select the days of the week when the office is open by checking the corresponding boxes (Monday to Sunday).
- Ensure that the fields marked with an asterisk (*) are filled out as they are required.
STEP 17: Click on "Save" to Finalize Shift Settings
- Ensure all required fields marked with '*' are filled out.
- Review the shift details including Shift Name, Start/End Time, and Color Code.
- Click the Save button to save your new shift settings.
- Confirm that the dialog closes, indicating successful saving.