Step-by-Step Guide to Creating and Managing Offer Letters in Your Recruitment Dashboard
13 mins read · Updated 29 Sep, 2025
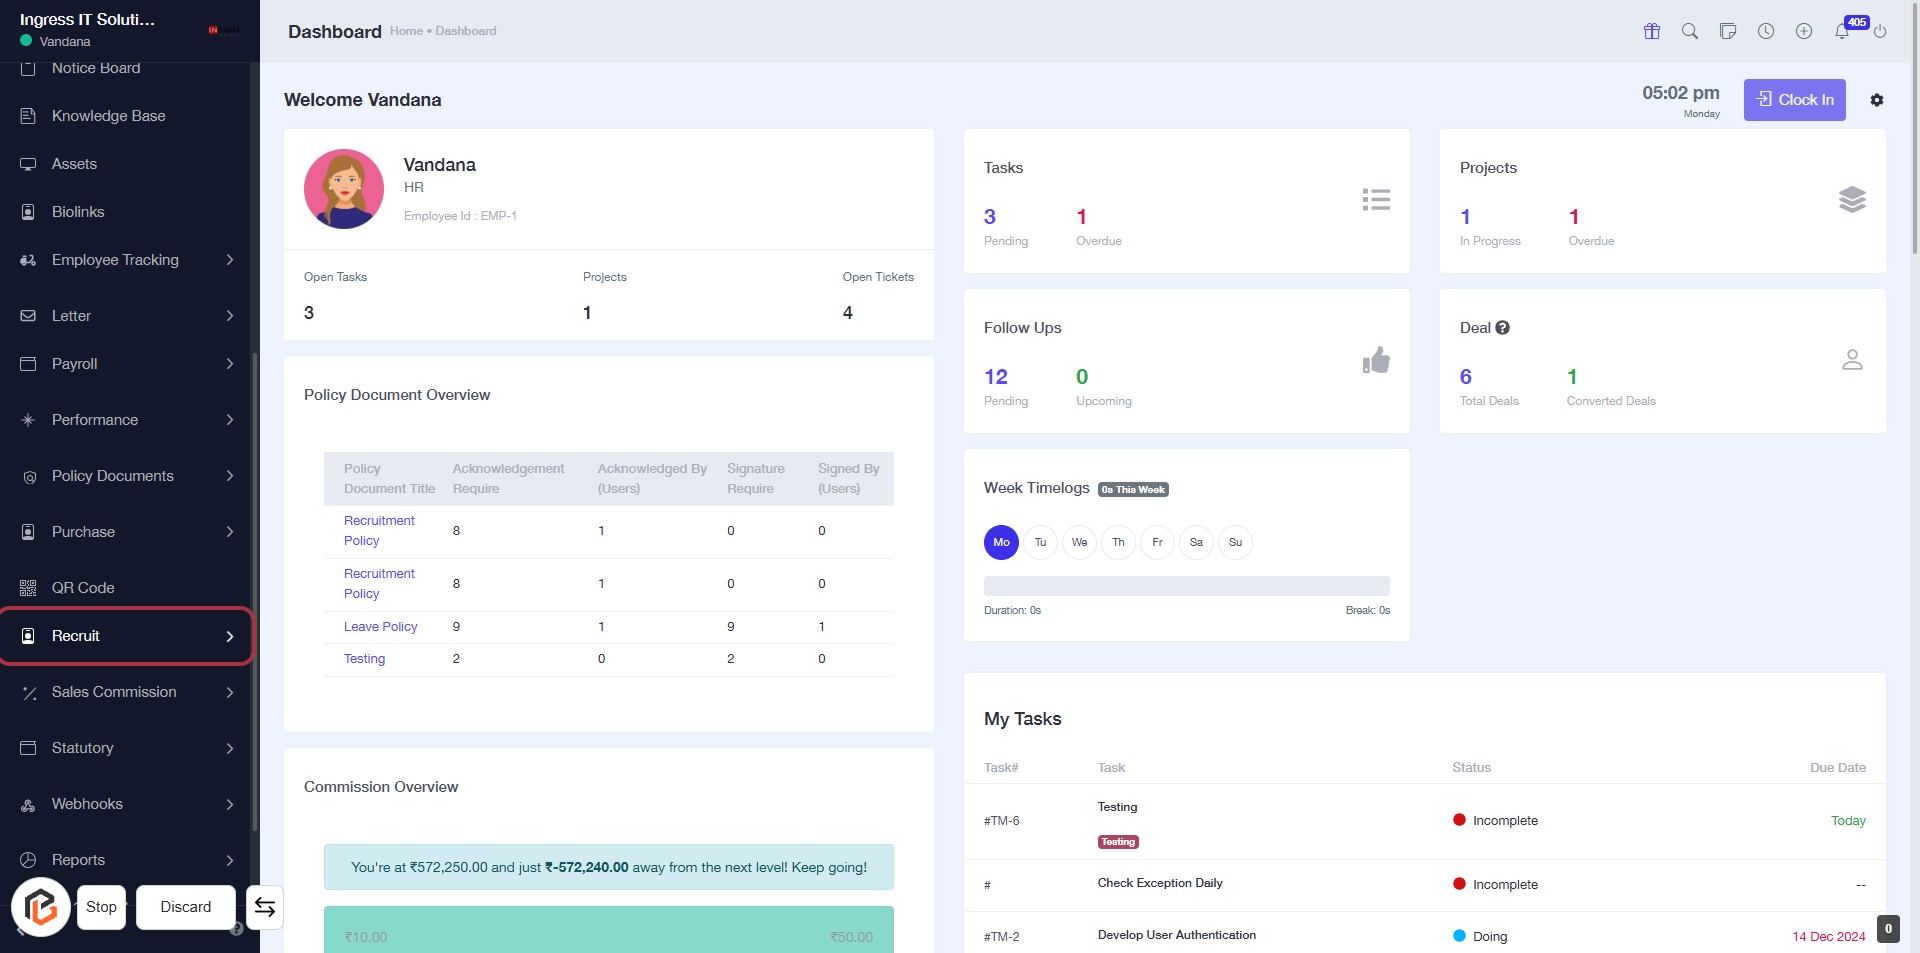
STEP 1: Click on "Recruit" to Access Recruitment Section
- Navigate to the left sidebar of the dashboard.
- Click on the "Recruit" link highlighted in red.
- This will direct you to the recruitment section for further actions.
- Ensure you are logged in to access this feature.
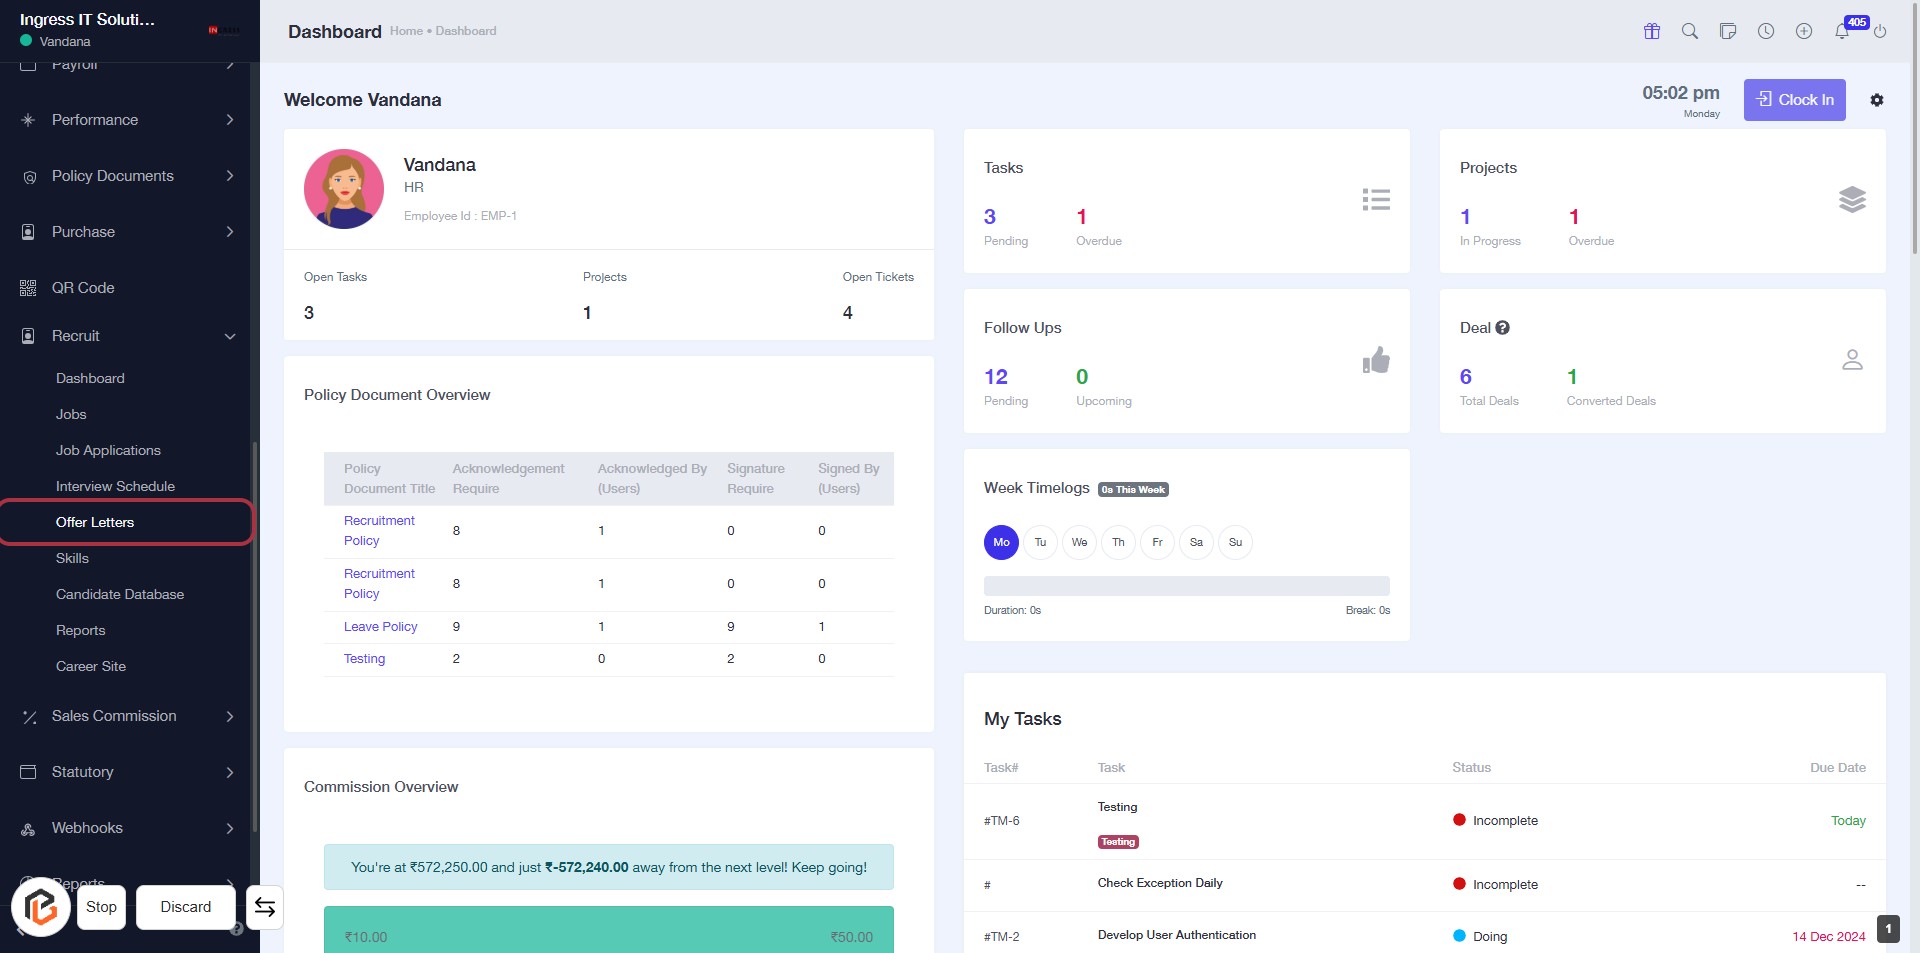
STEP 2: Click on "Offer Letters"
- Navigate to the "Offer Letters" section in the sidebar menu.
- Click on the "Offer Letters" link to access the relevant documents.
- Ensure you review the "Policy Document Overview" for any necessary details.
- Prepare to proceed to the next step by clicking "Add Offer Letter" once you're in the section.
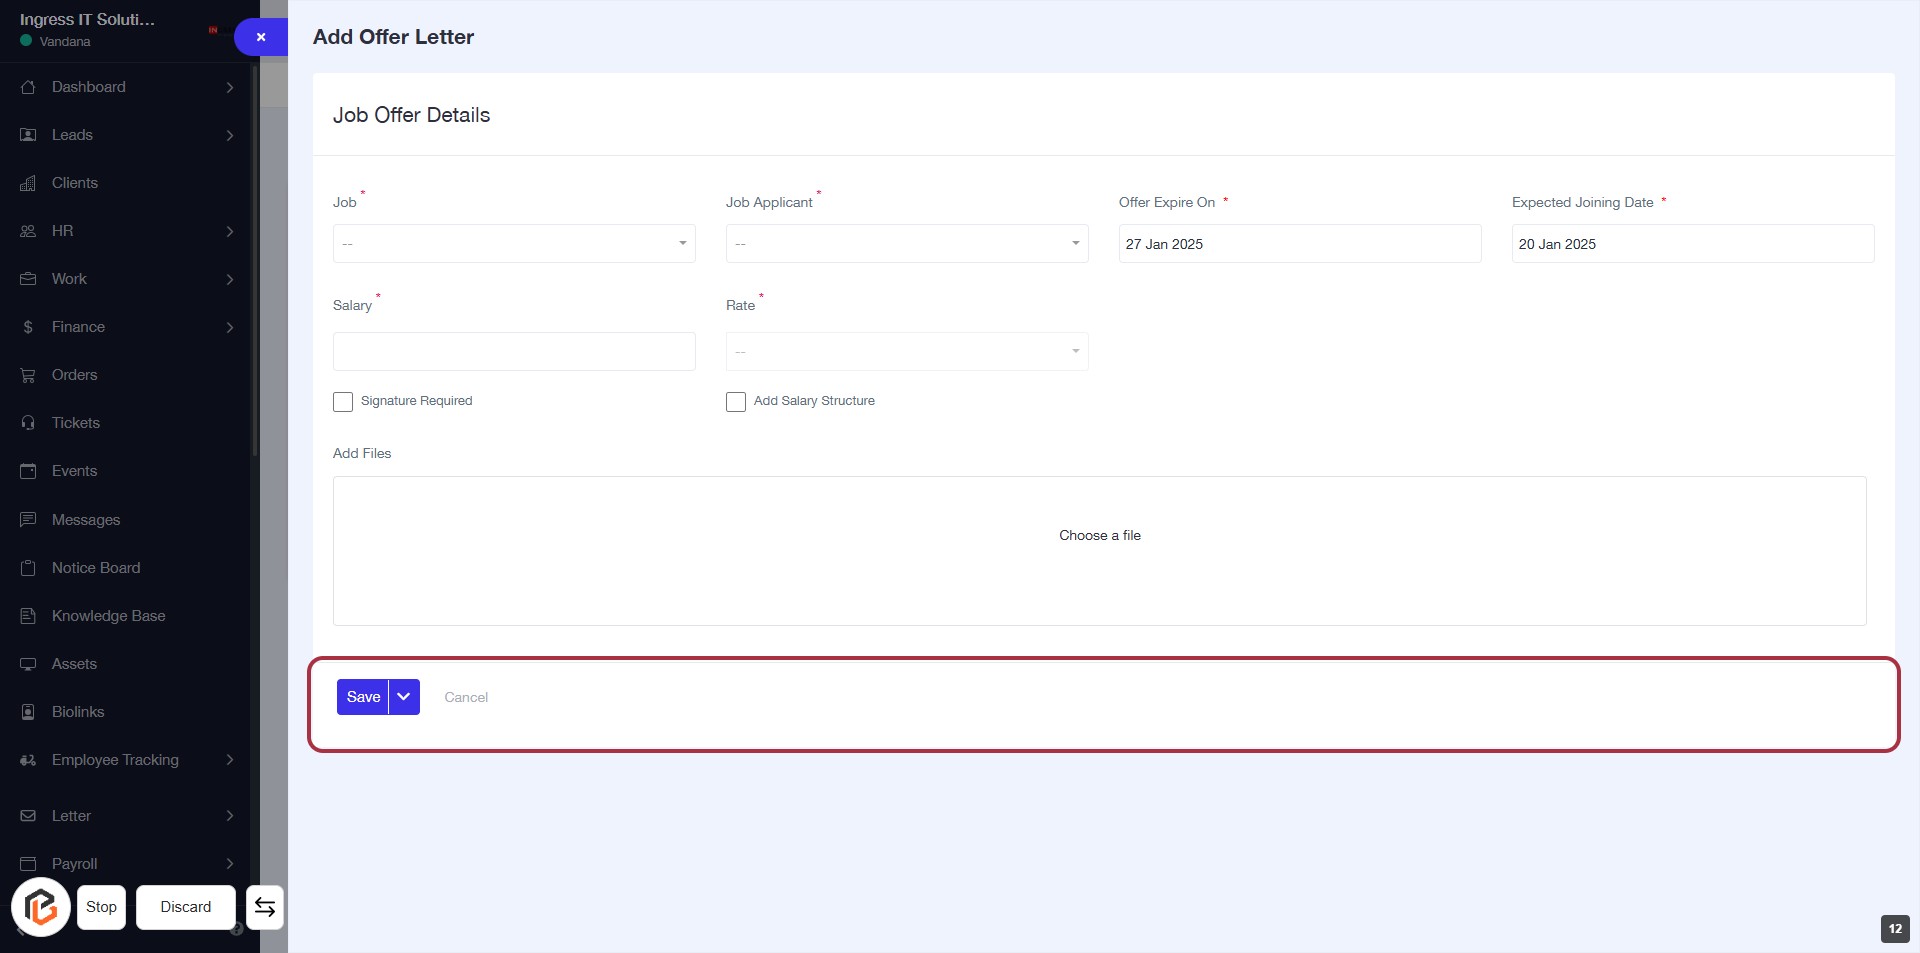
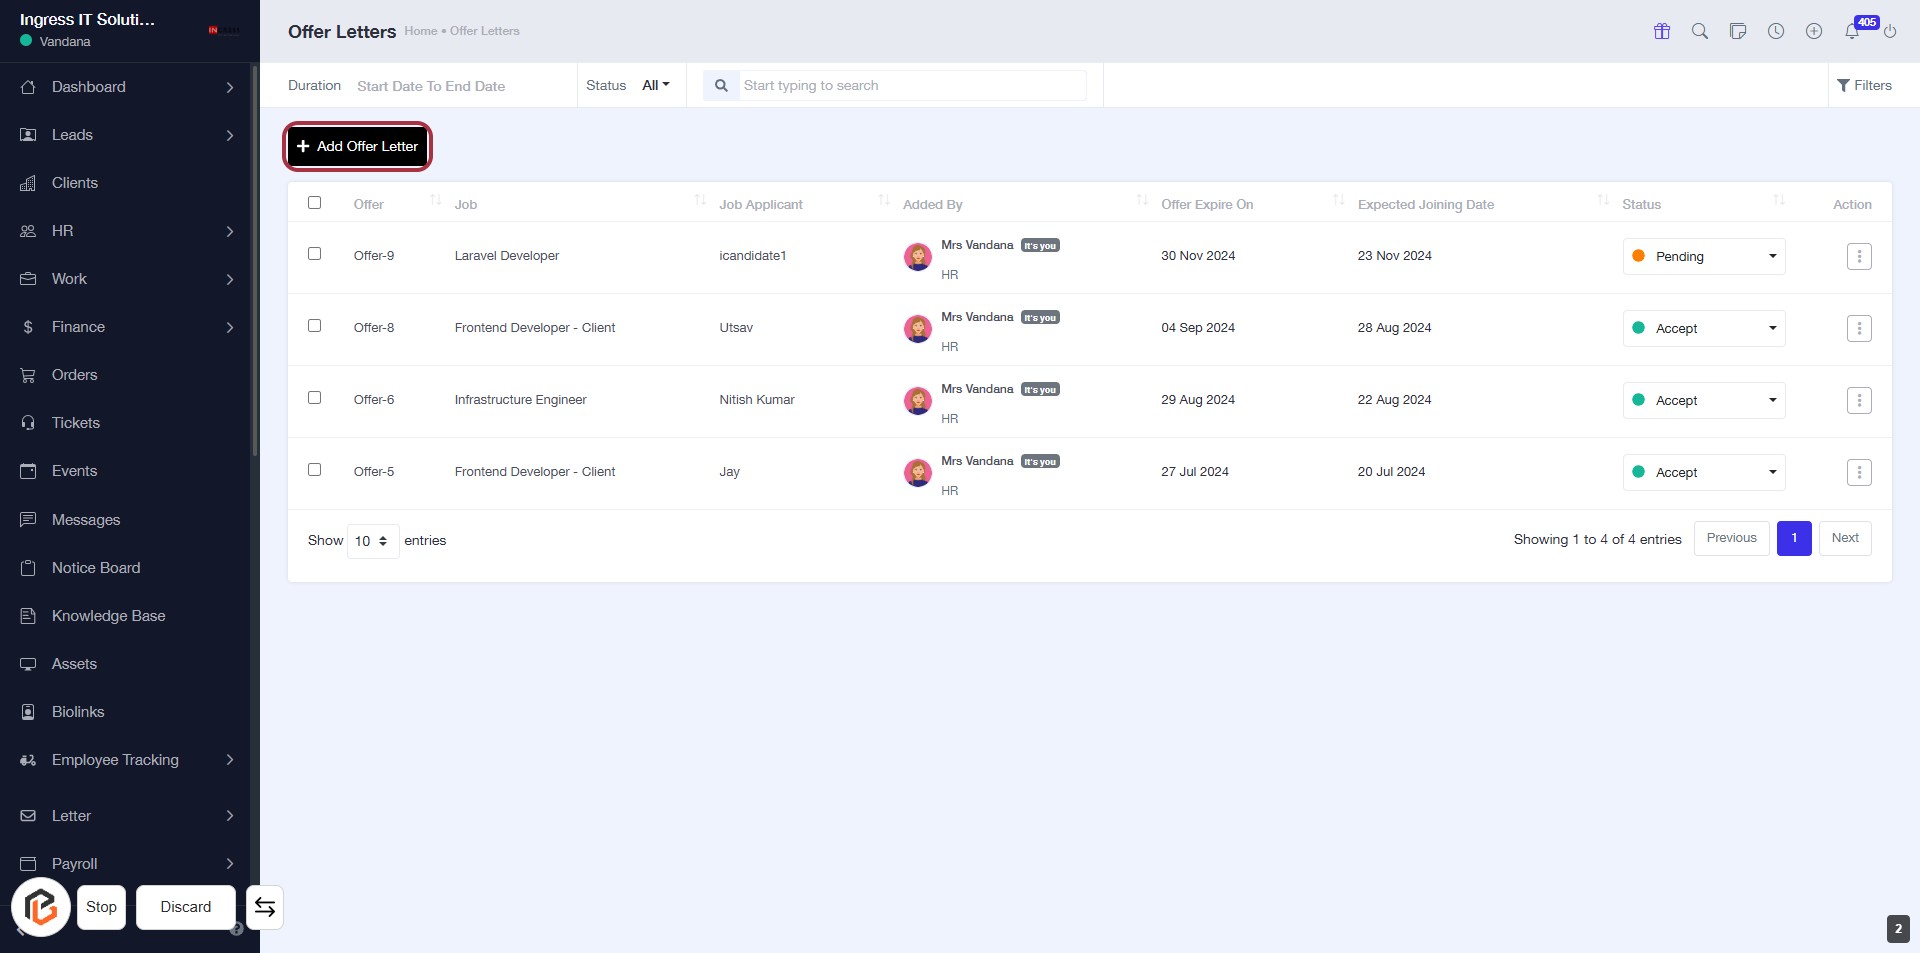
STEP 3: Click on "Add Offer Letter"
- Navigate to the "Offer Letters" section.
- Click on the Add Offer Letter link highlighted in red.
- Ensure you have the necessary details ready for the new offer letter.
- After clicking, proceed to the next step to Select "Job".
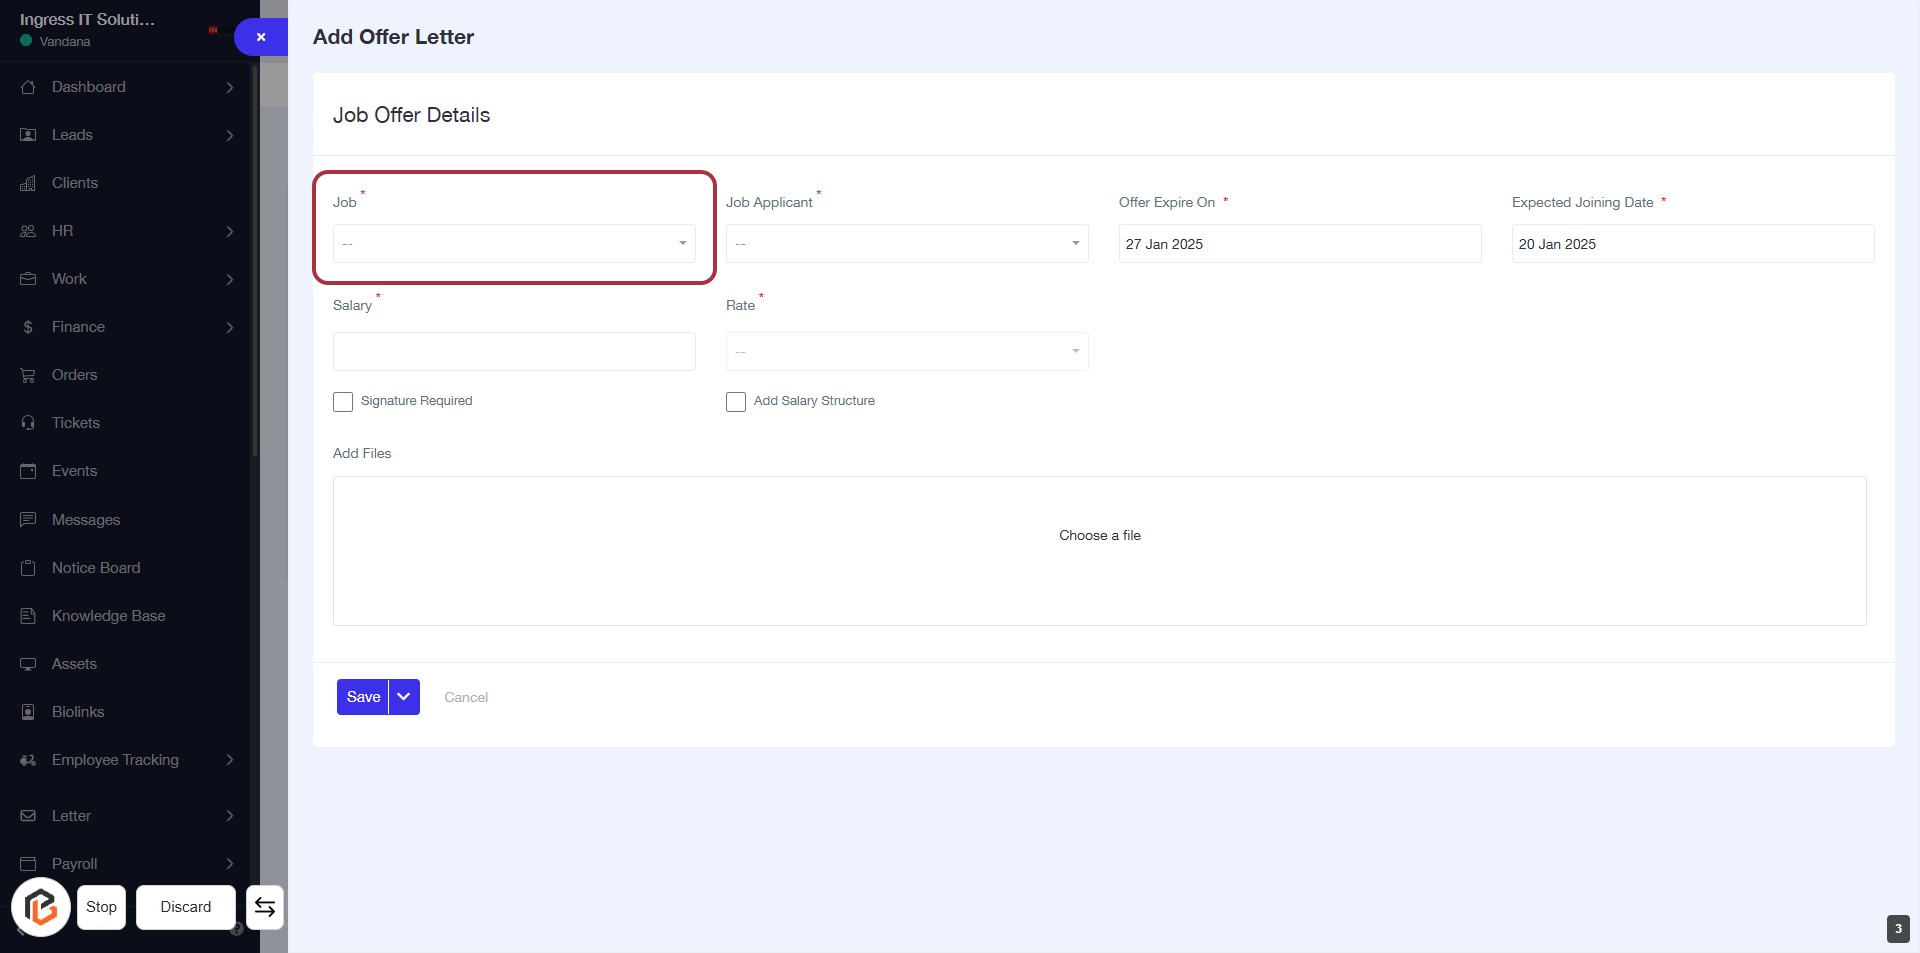
STEP 4: Select Job from the Offer Letter Form
- Click on the "Job" field in the Job Offer Details section.
- This field is mandatory, indicated by the asterisk (*).
- A dropdown will appear; select the appropriate job title from the list.
- Ensure all required fields are filled before proceeding to the next step.
STEP 5: Select "Job Applicant"
- Click on the "Job Applicant" field highlighted in red.
- Ensure to fill in the required information marked with an asterisk (*).
- This section is crucial for identifying the candidate for the job offer.
- After selecting, proceed to the next step to enter the "Offer Expire On" date.

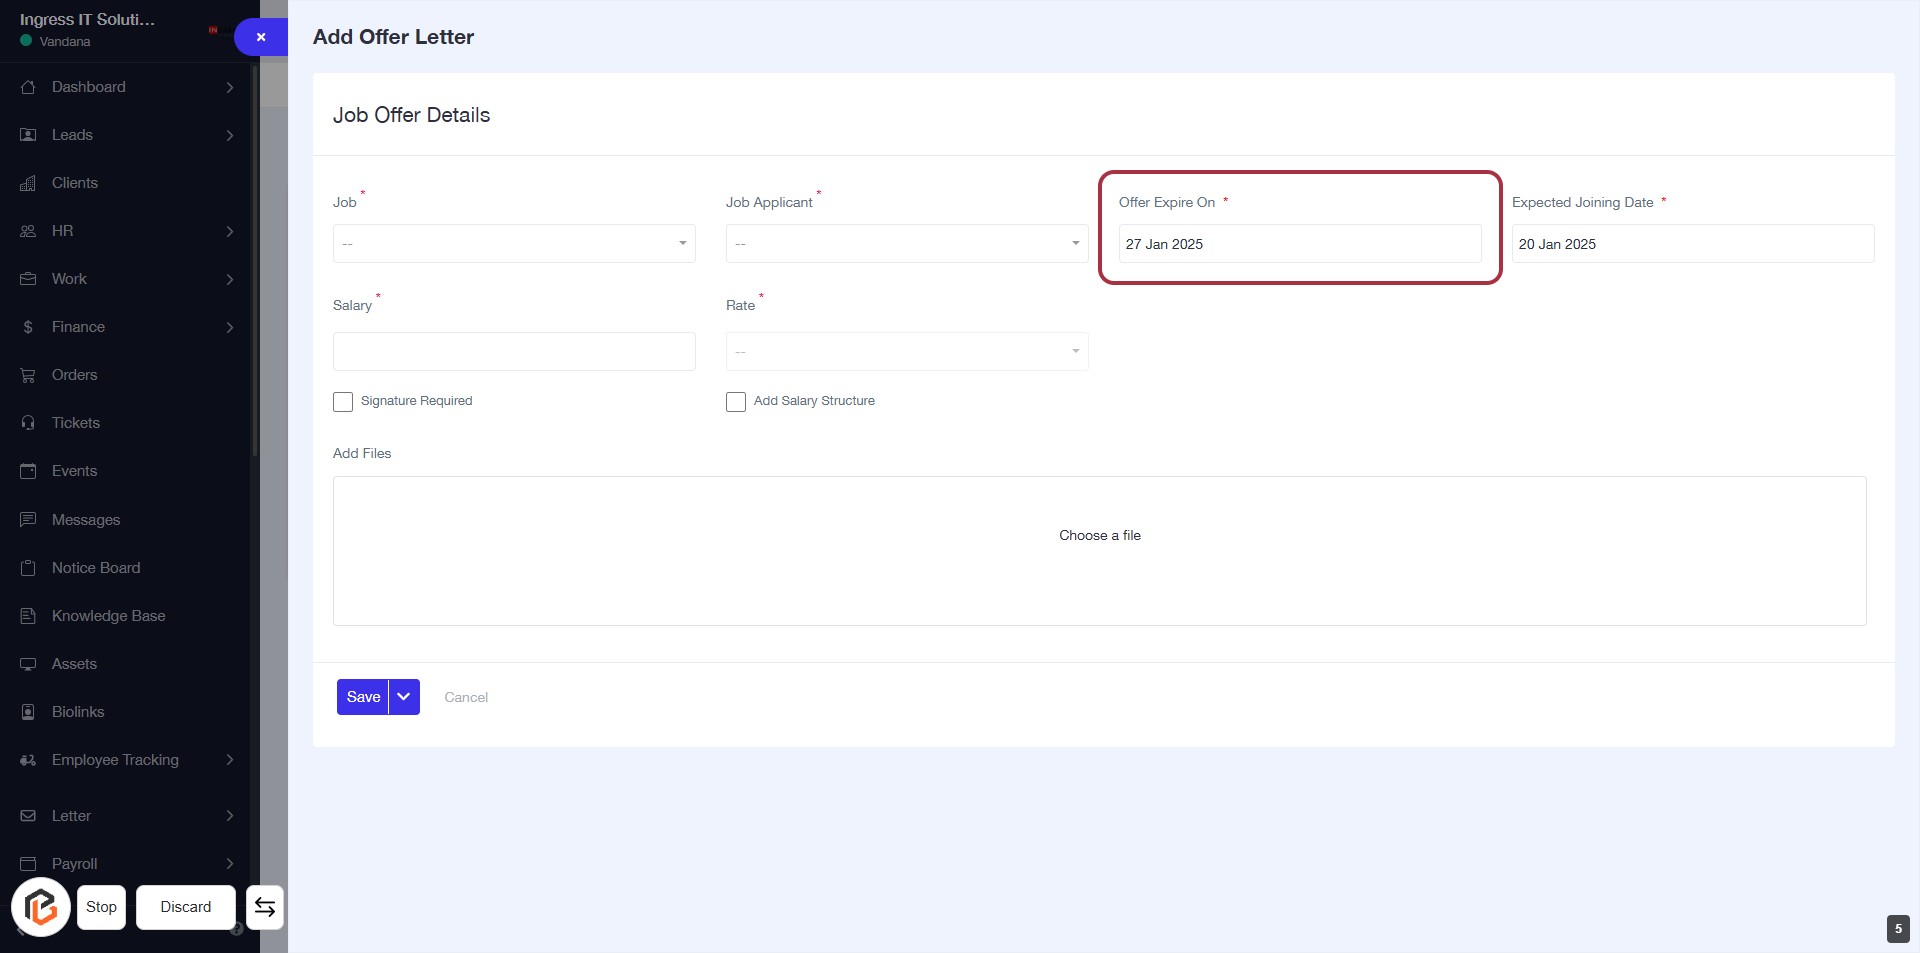
STEP 6: Enter "Offer Expire On"
- Click on the "Offer Expire On" field (marked with a red border).
- This field is mandatory (indicated by the asterisk '*').
- Input the expiration date for the job offer.
- Ensure the date format is correct before proceeding to the next step.
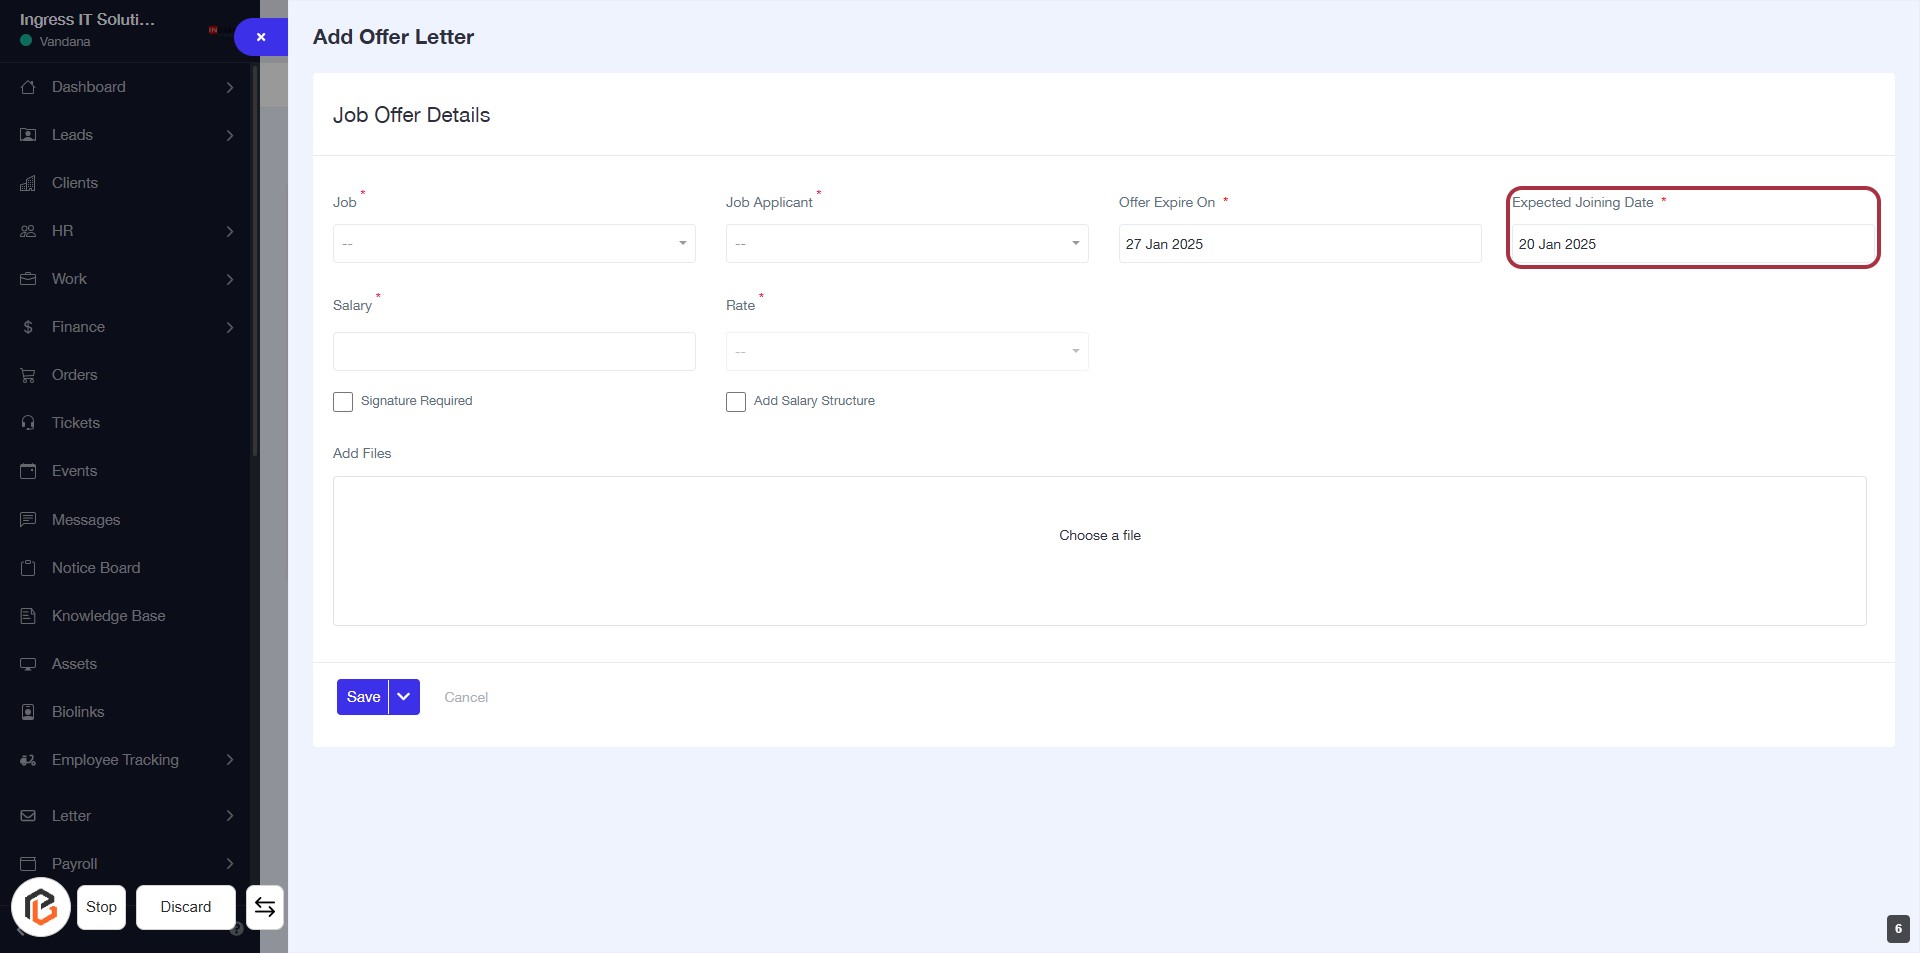
STEP 7: Enter "Expected Joining Date"
- Click on the "Expected Joining Date" field (marked with a red border).
- Ensure to fill in the date as it is a required field (indicated by the asterisk *).
- Review other fields for accuracy before proceeding to the next step.
- After entering the date, continue to "Enter Salary."
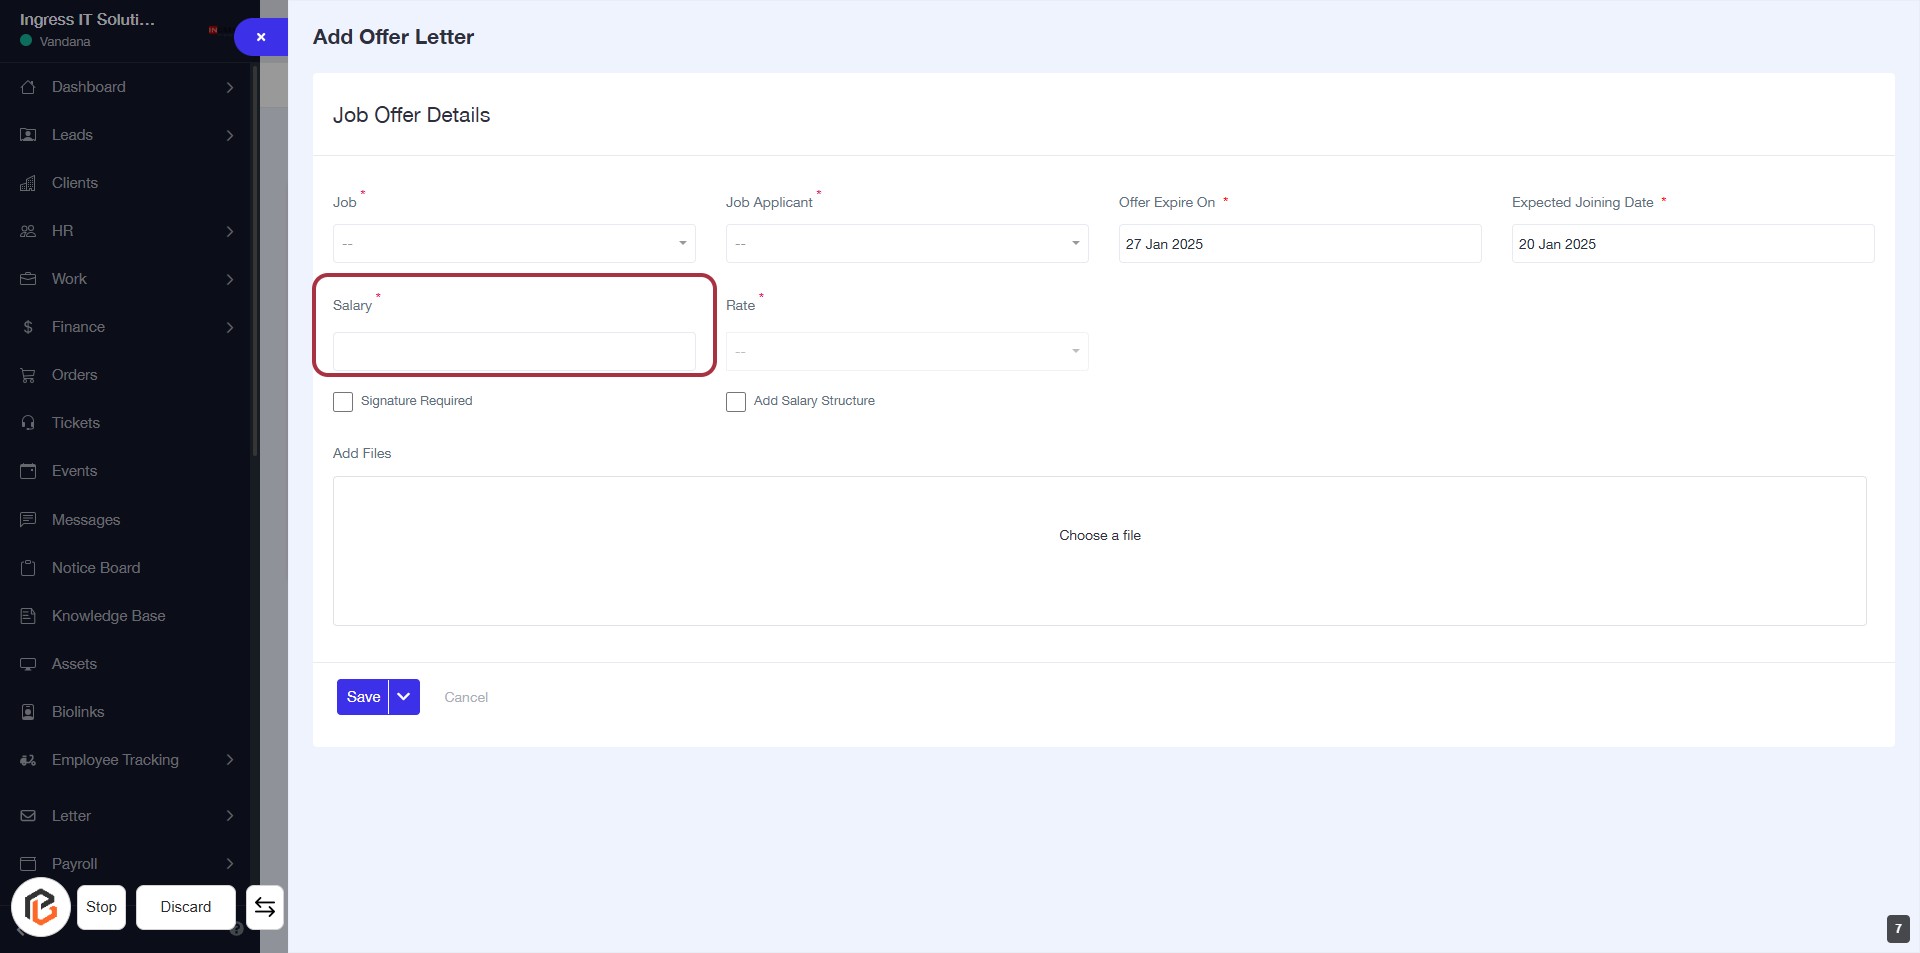
STEP 8: Enter "Salary"
- Click on the "Salary" field (marked with a red border) to input the salary amount.
- Ensure to fill in the required information as indicated by the asterisk (*).
- After entering the salary, proceed to the next step by selecting the "Rate" field.
STEP 9: Select "Rate"
- Click on the "Rate" field highlighted in red.
- Ensure to fill in the required information as indicated by the asterisk (*).
- Review other fields such as "Job Applicant," "Offer Expire On," and "Expected Joining Date" for completeness.
- Proceed to the next step to check "Signature Required" if applicable.

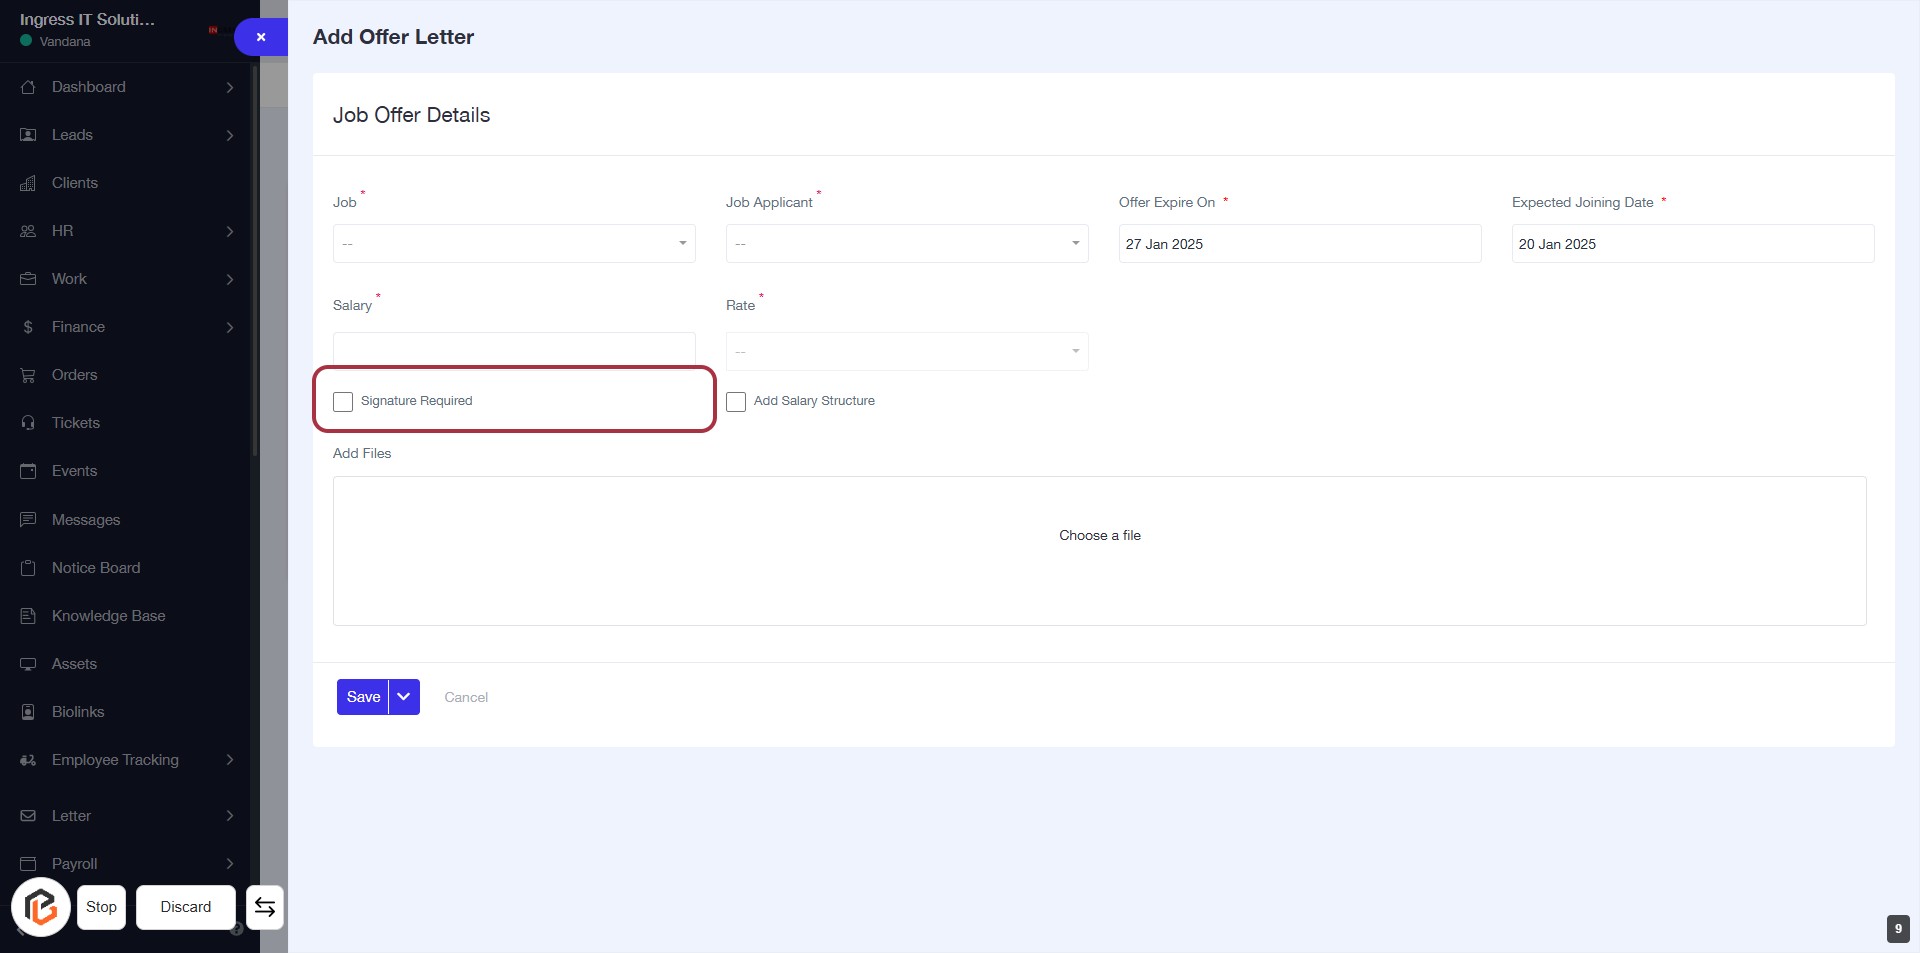
STEP 10: Click "Signature Required" Checkbox
- Locate the "Signature Required" checkbox in the Job Offer Details section.
- Click on the checkbox to select it if a signature is required.
- Ensure all other mandatory fields marked with an asterisk (*) are filled out before proceeding.
- After making your selection, continue to the next step.
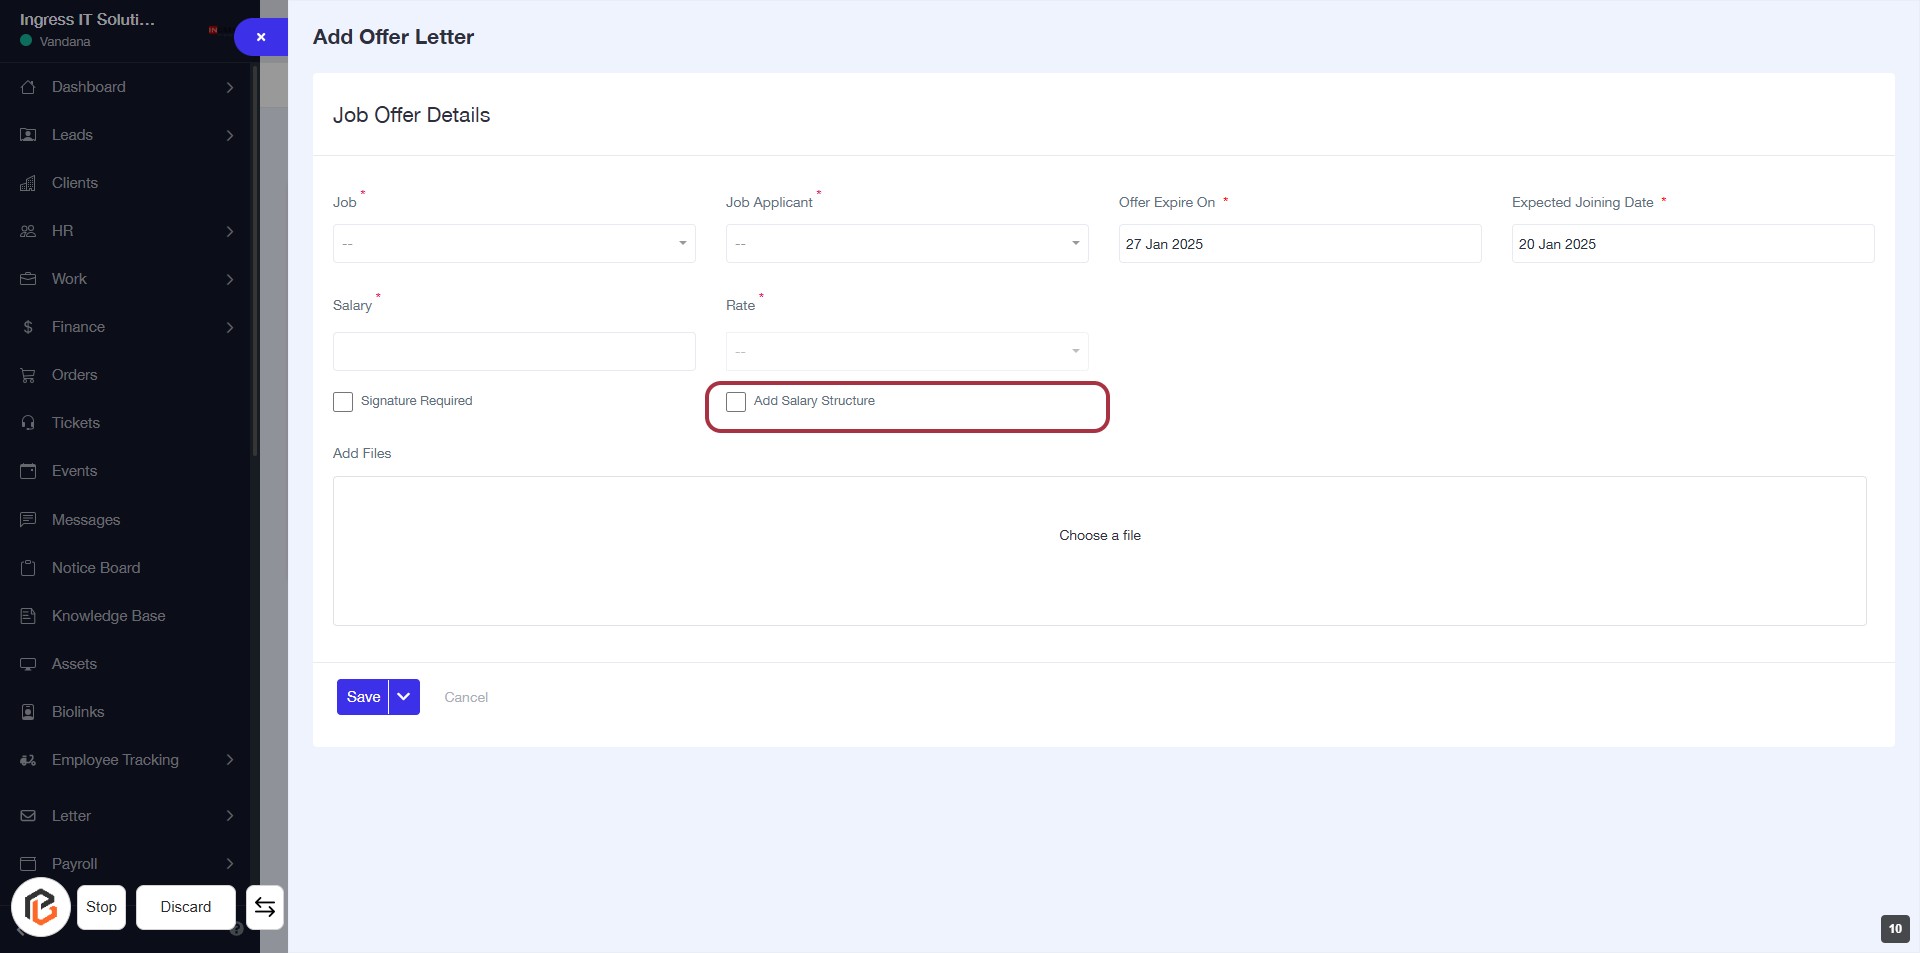
STEP 11: Click "Add Salary Structure" Checkbox
- Locate the "Add Salary Structure" checkbox in the Job Offer Details section.
- Click on the checkbox to select it.
- Ensure that the checkbox is marked, indicating that you want to include a salary structure.
- Proceed to the next step to upload files related to the salary structure.
STEP 12: Click "Add Files" to Upload Documents
- Locate the "Add Files" section highlighted in red.
- Click on the "Add Files" area to open the file upload dialog.
- Select the files you wish to upload from your device.
- Ensure all required fields are filled out before proceeding.
- After uploading, continue to the next step by clicking the "Save" button.

STEP 13: Click "Save" to Finalize Job Offer Letter
- Ensure all required fields marked with * are filled out.
- Review the Job Offer Details section for accuracy.
- Click the "Save" button located at the bottom of the form to finalize your entries.
- If needed, you can also click "Cancel" to discard changes.