Step-by-Step Guide: Adding an Article to the Knowledge Base
8 mins read · Updated 29 Sep, 2025
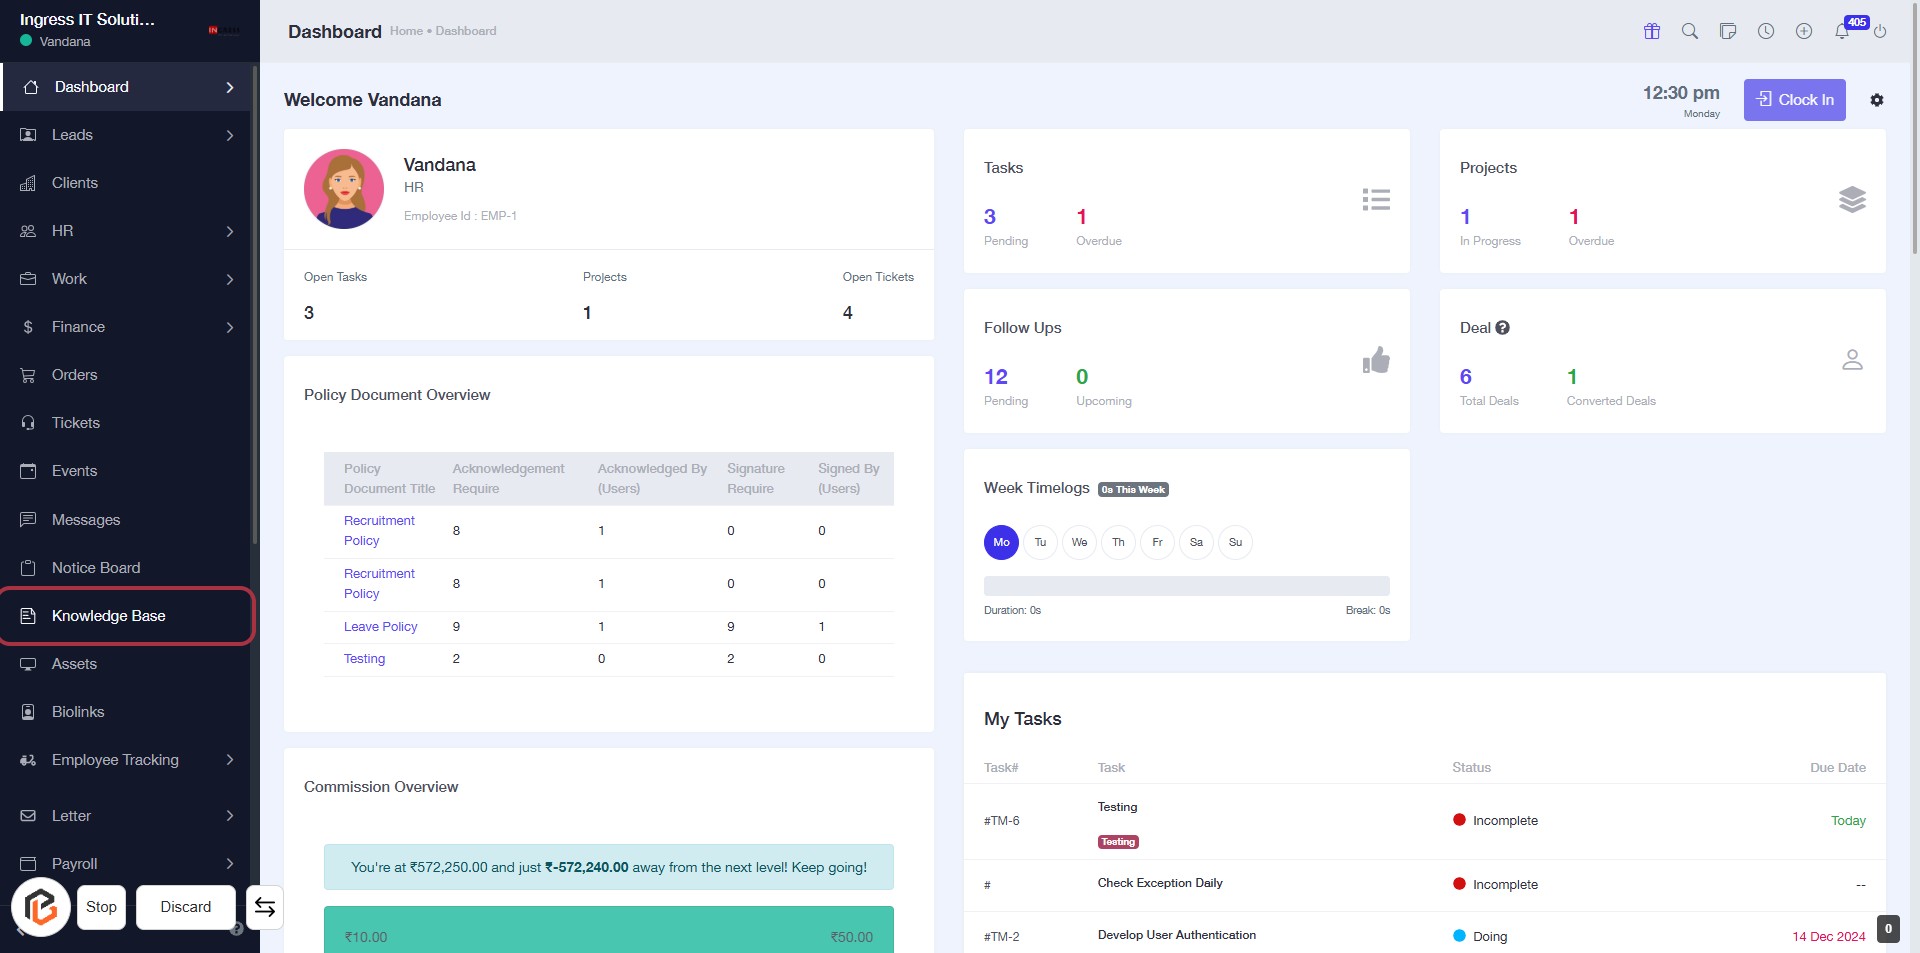
STEP 1: Click on "Knowledge Base"
- Navigate to the left sidebar of the dashboard.
- Locate the "Knowledge Base" option.
- Click on the "Knowledge Base" link to access the relevant section.
- Next, look for the "Add New Article" button to proceed with adding content.
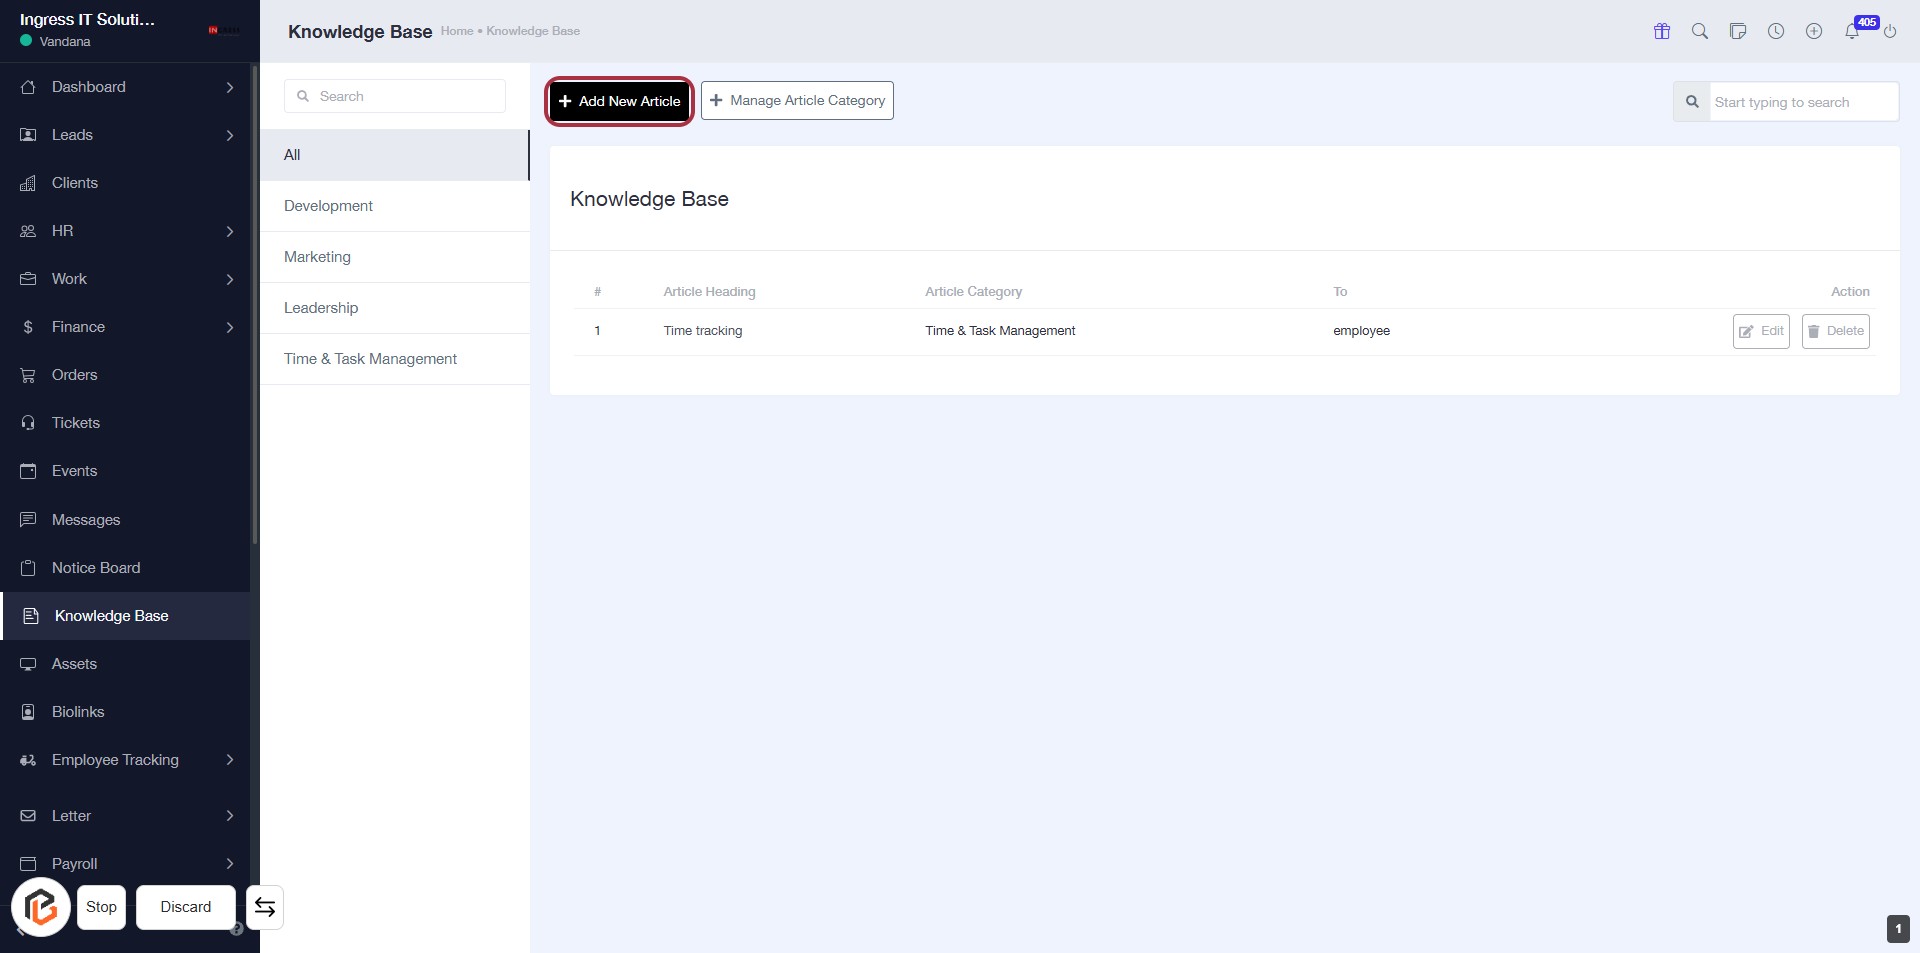
STEP 2: Click on "Add New Article"
- Navigate to the Knowledge Base section.
- Click on the Add New Article link highlighted in red.
- Ensure you have the necessary details ready for the new article.
- After clicking, proceed to the next step to Select "For Employees/For Clients".
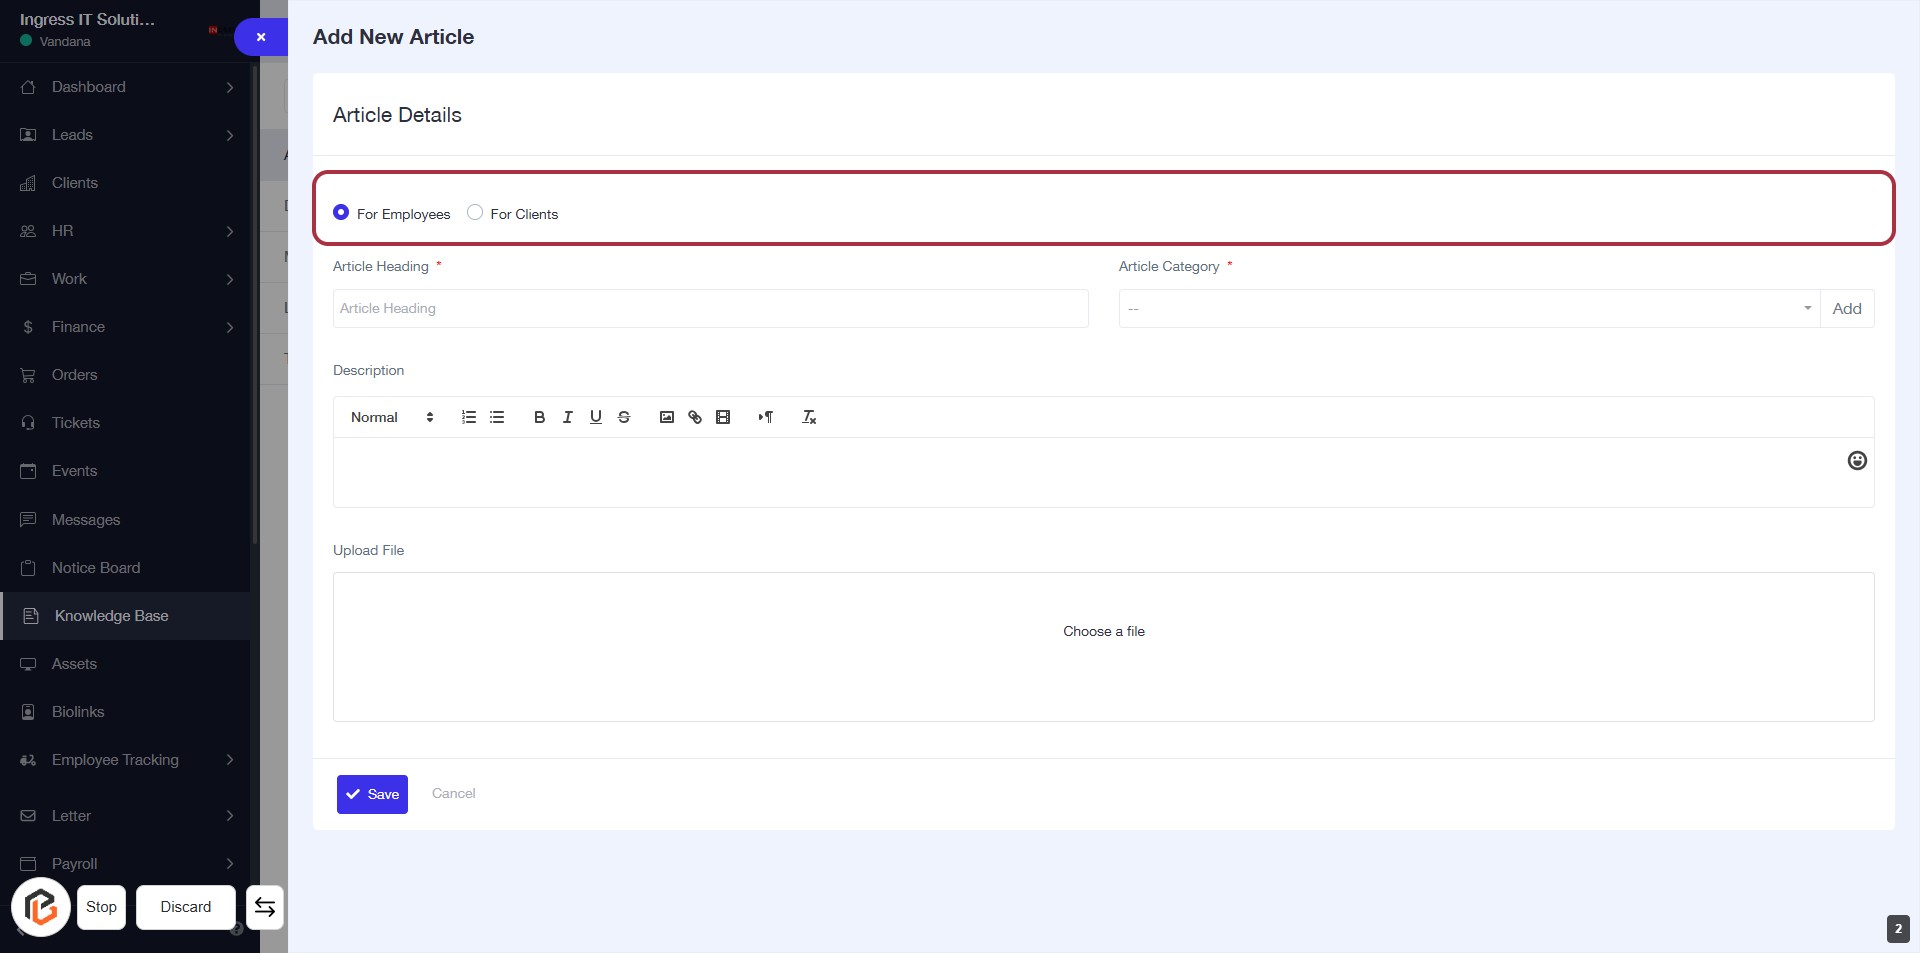
STEP 3: Select "For Employees"
- Click on the option labeled "For Employees" to specify the audience for the article.
- Ensure that you have selected the correct option as this will determine the visibility of the article.
- Proceed to the next step to enter the "Article Heading."
STEP 4: Enter Article Heading
- Click on the "Article Heading" field (marked with a red border).
- This field is mandatory (indicated by the asterisk *).
- Ensure to provide a concise and relevant title for the article.
- After entering the heading, proceed to the next step to select the "Article Category".

STEP 5: Select Article Category
- Click on the "Article Category" field highlighted in red.
- Choose an appropriate category from the dropdown list.
- Ensure the field marked with an asterisk (*) is filled, as it is required.
- Proceed to the next step by writing the description of the article.

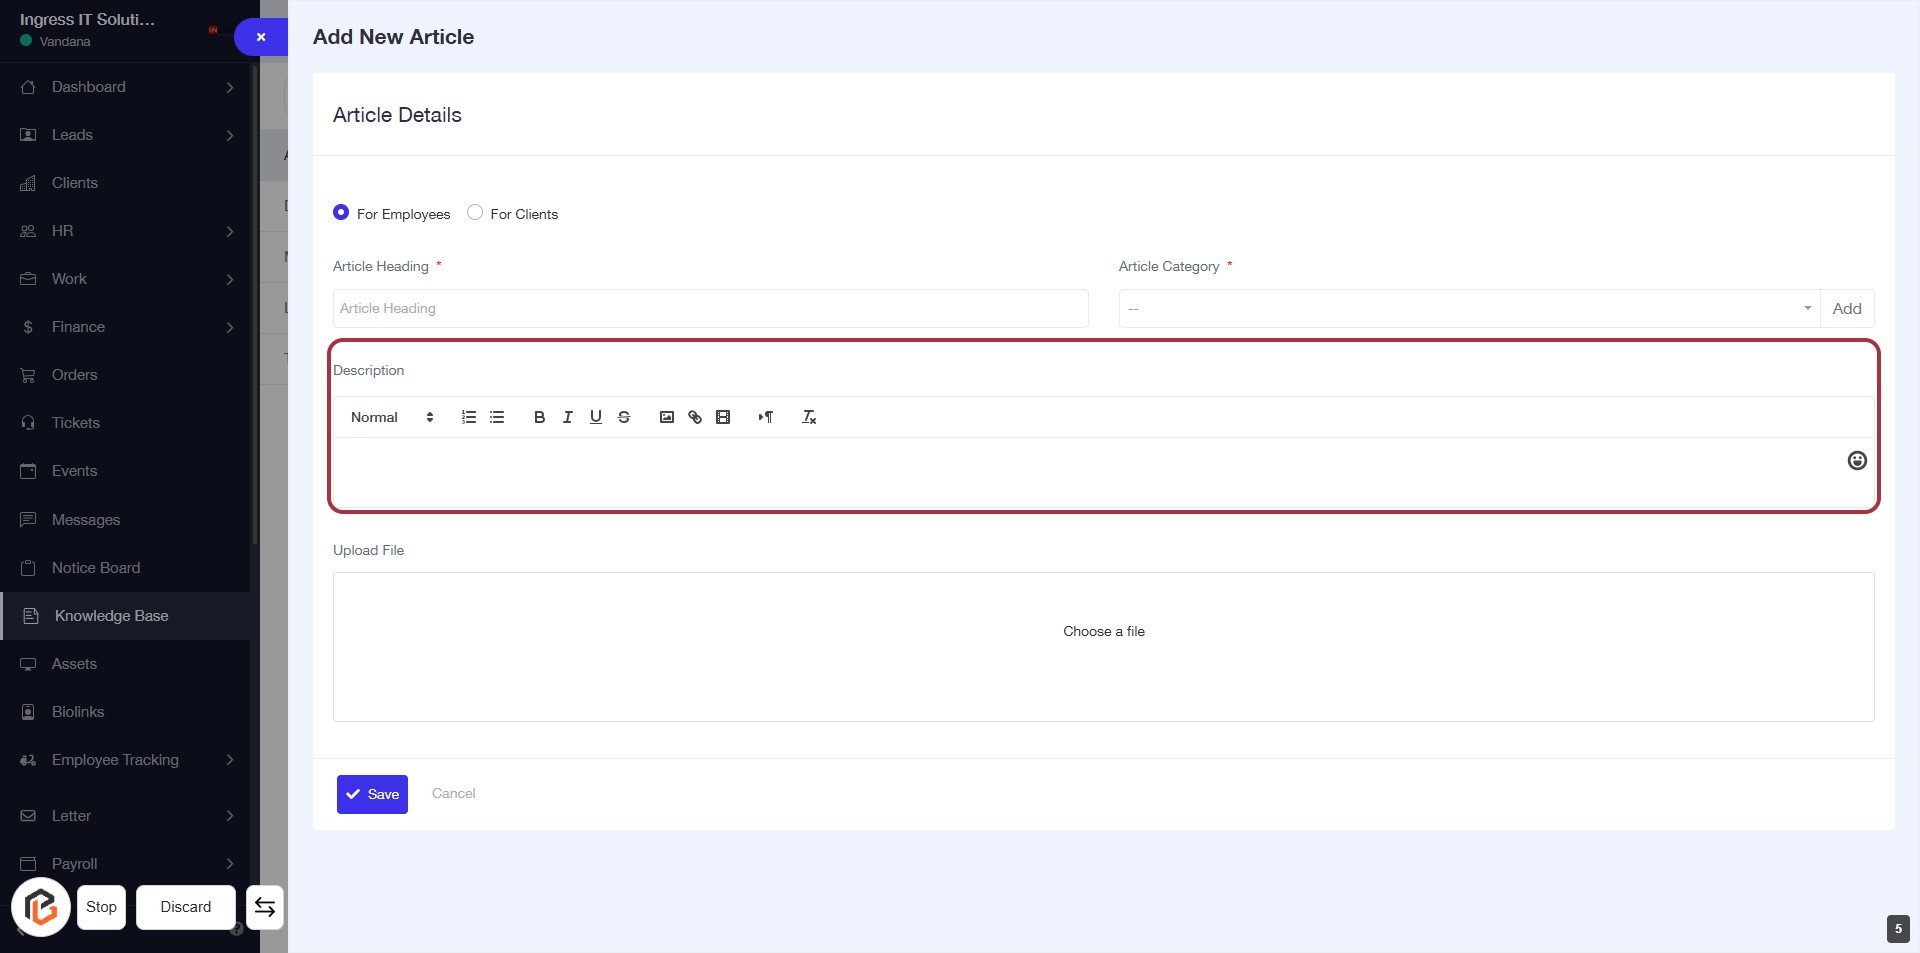
STEP 6: Fill Description for the Article
- Click on the "Description" field to enter the article details.
- Use the formatting options (Normal, Bold, Italics, etc.) to style your text.
- Ensure to provide a comprehensive description relevant to the article.
- After completing, proceed to the next step by clicking on "Upload File."
STEP 7: Click on "Upload File"
- Locate the "Upload File" section highlighted in red.
- Click on the "Upload File" area to open the file selection dialog.
- Choose the desired file from your device.
- Ensure the file is appropriate for the article you are creating.

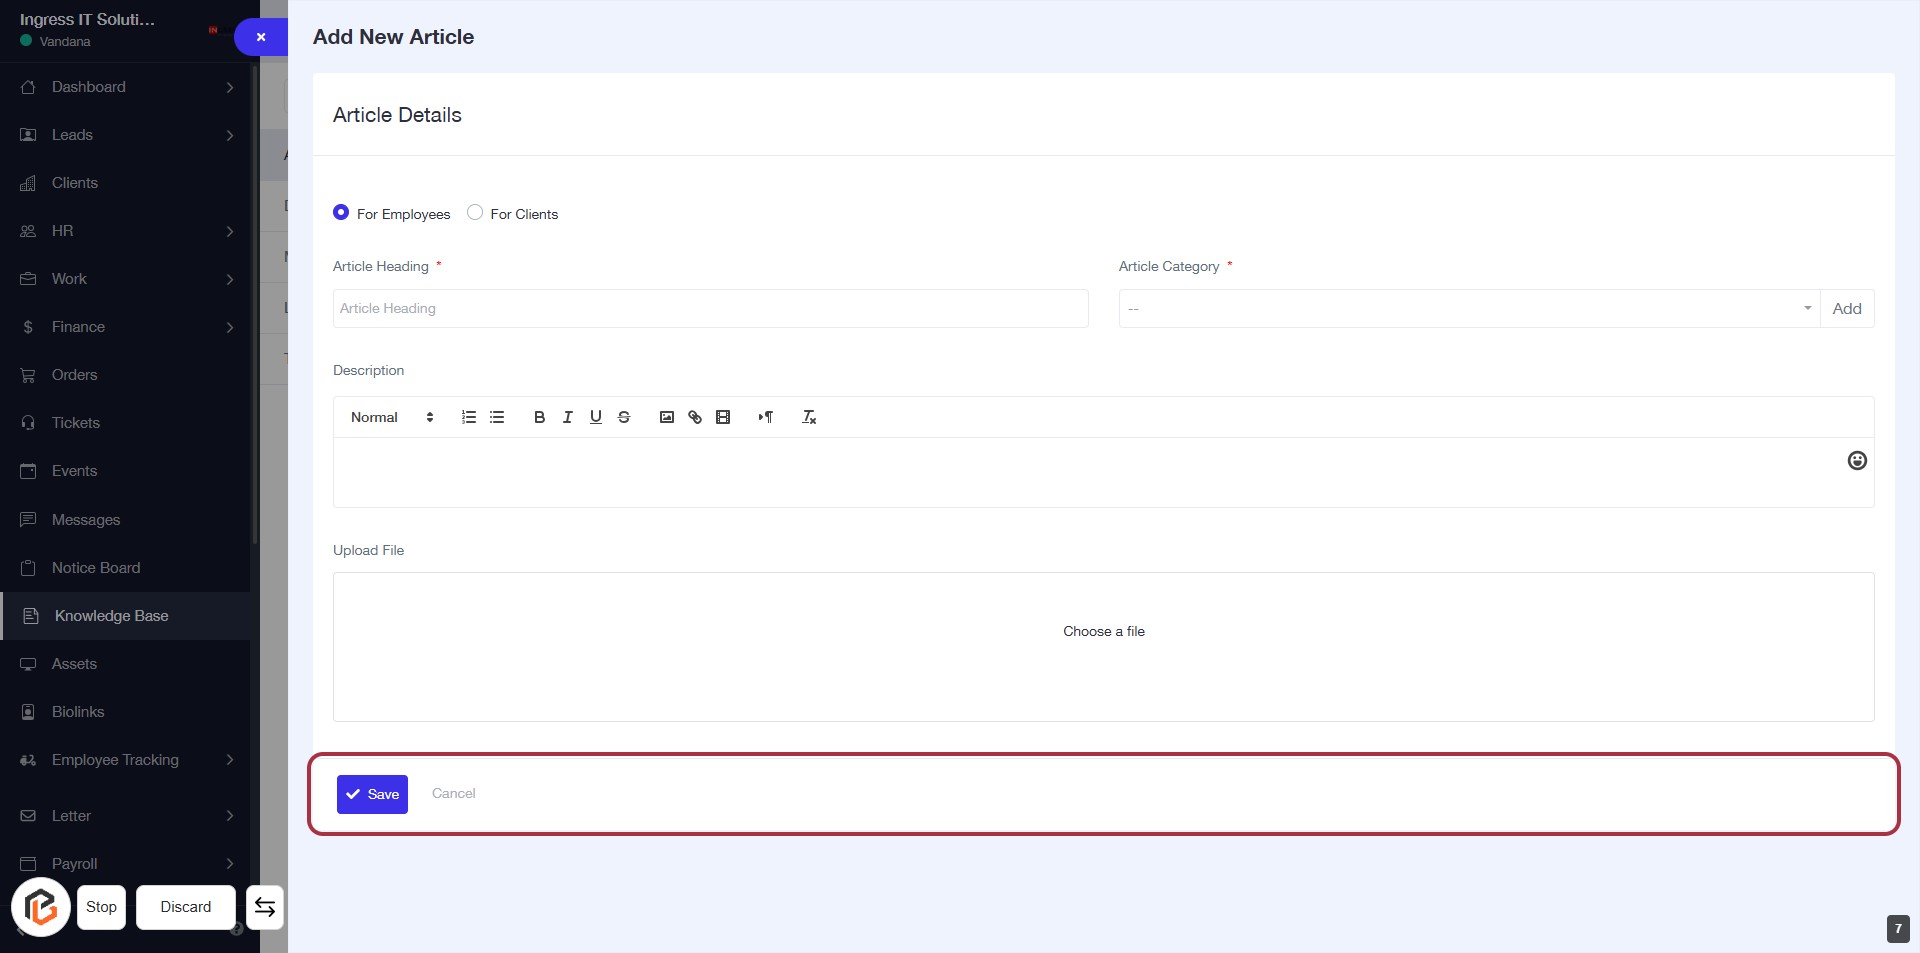
STEP 8: Click on "Save" to Submit Your Article
- Ensure all required fields (marked with *) are filled out: Article Heading, Article Category, and Description.
- Review your uploaded file to confirm it's correct.
- Click the Save button at the bottom of the form to submit your article.
- If needed, you can click Cancel to discard changes.