Step-by-Step Guide to Managing Bank Accounts in Your Financial Overview
14 mins read · Updated 29 Sep, 2025
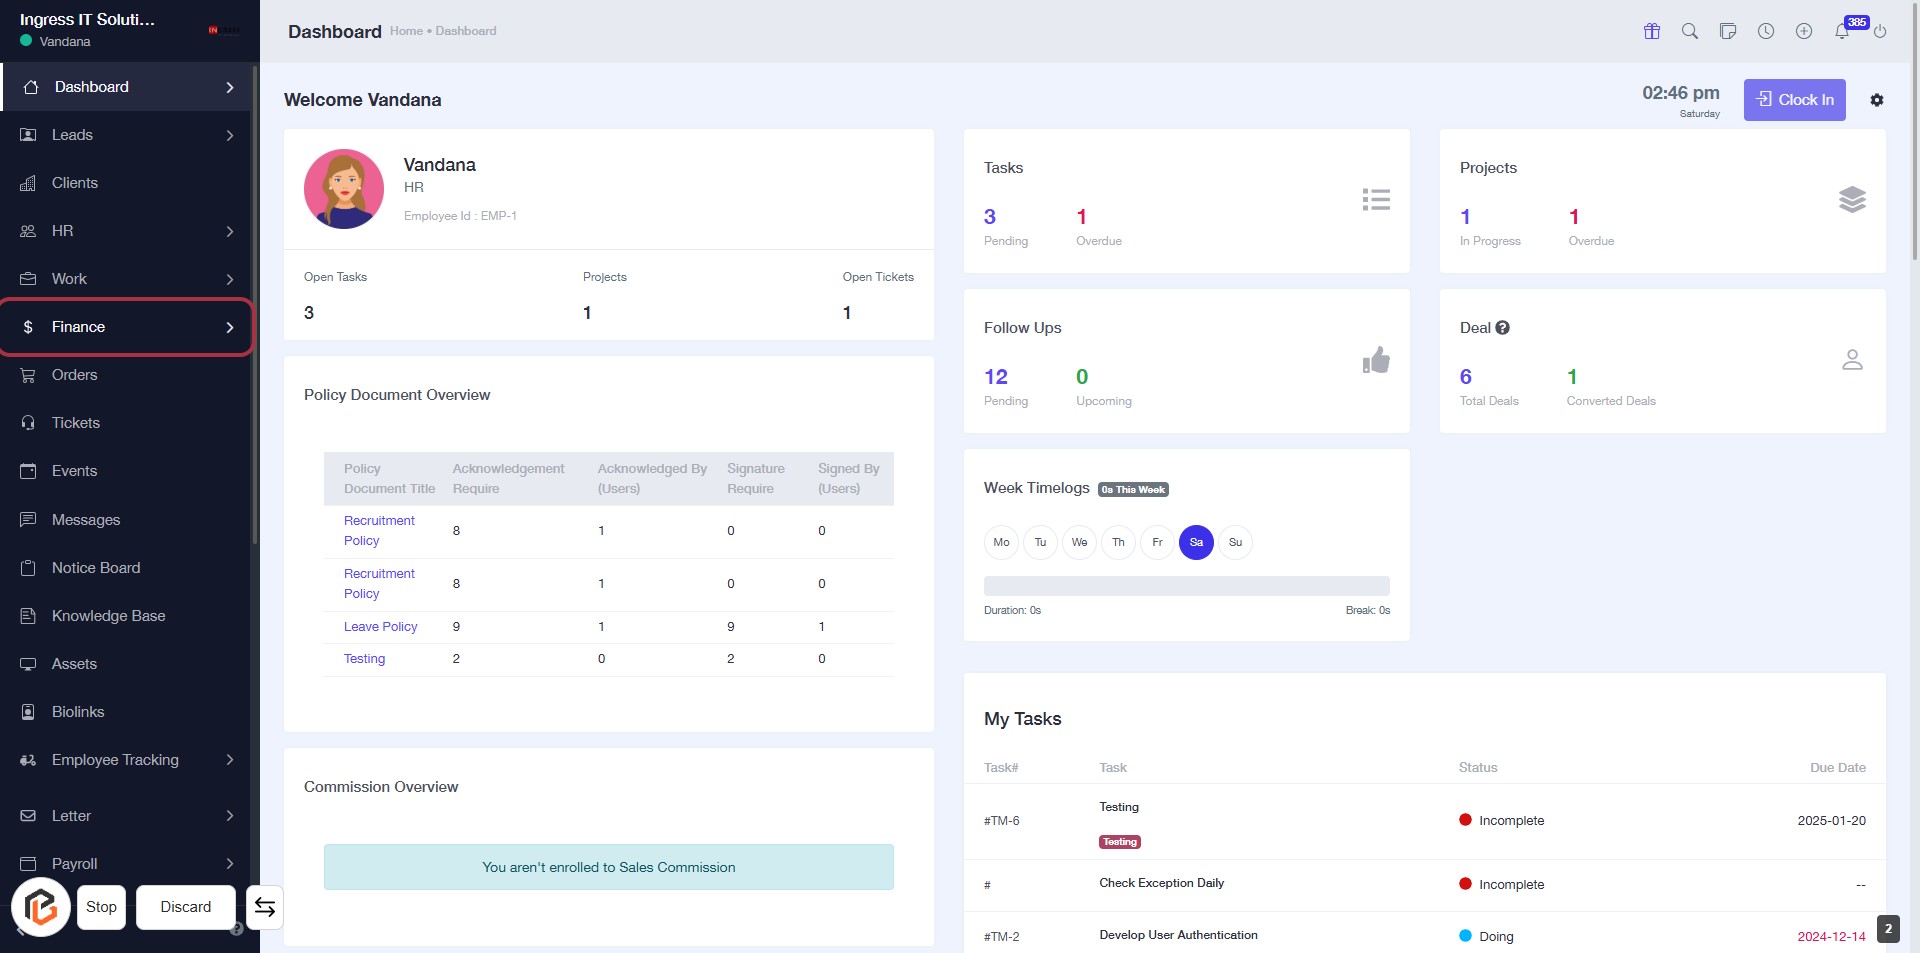
STEP 1: Click on "Finance" to Access Financial Overview
- Navigate to the sidebar menu on the left.
- Click on the Finance link highlighted in red.
- This will direct you to the financial overview section, where you can manage financial documents and tasks.
- Ensure to review any pending tasks or documents listed in this section.
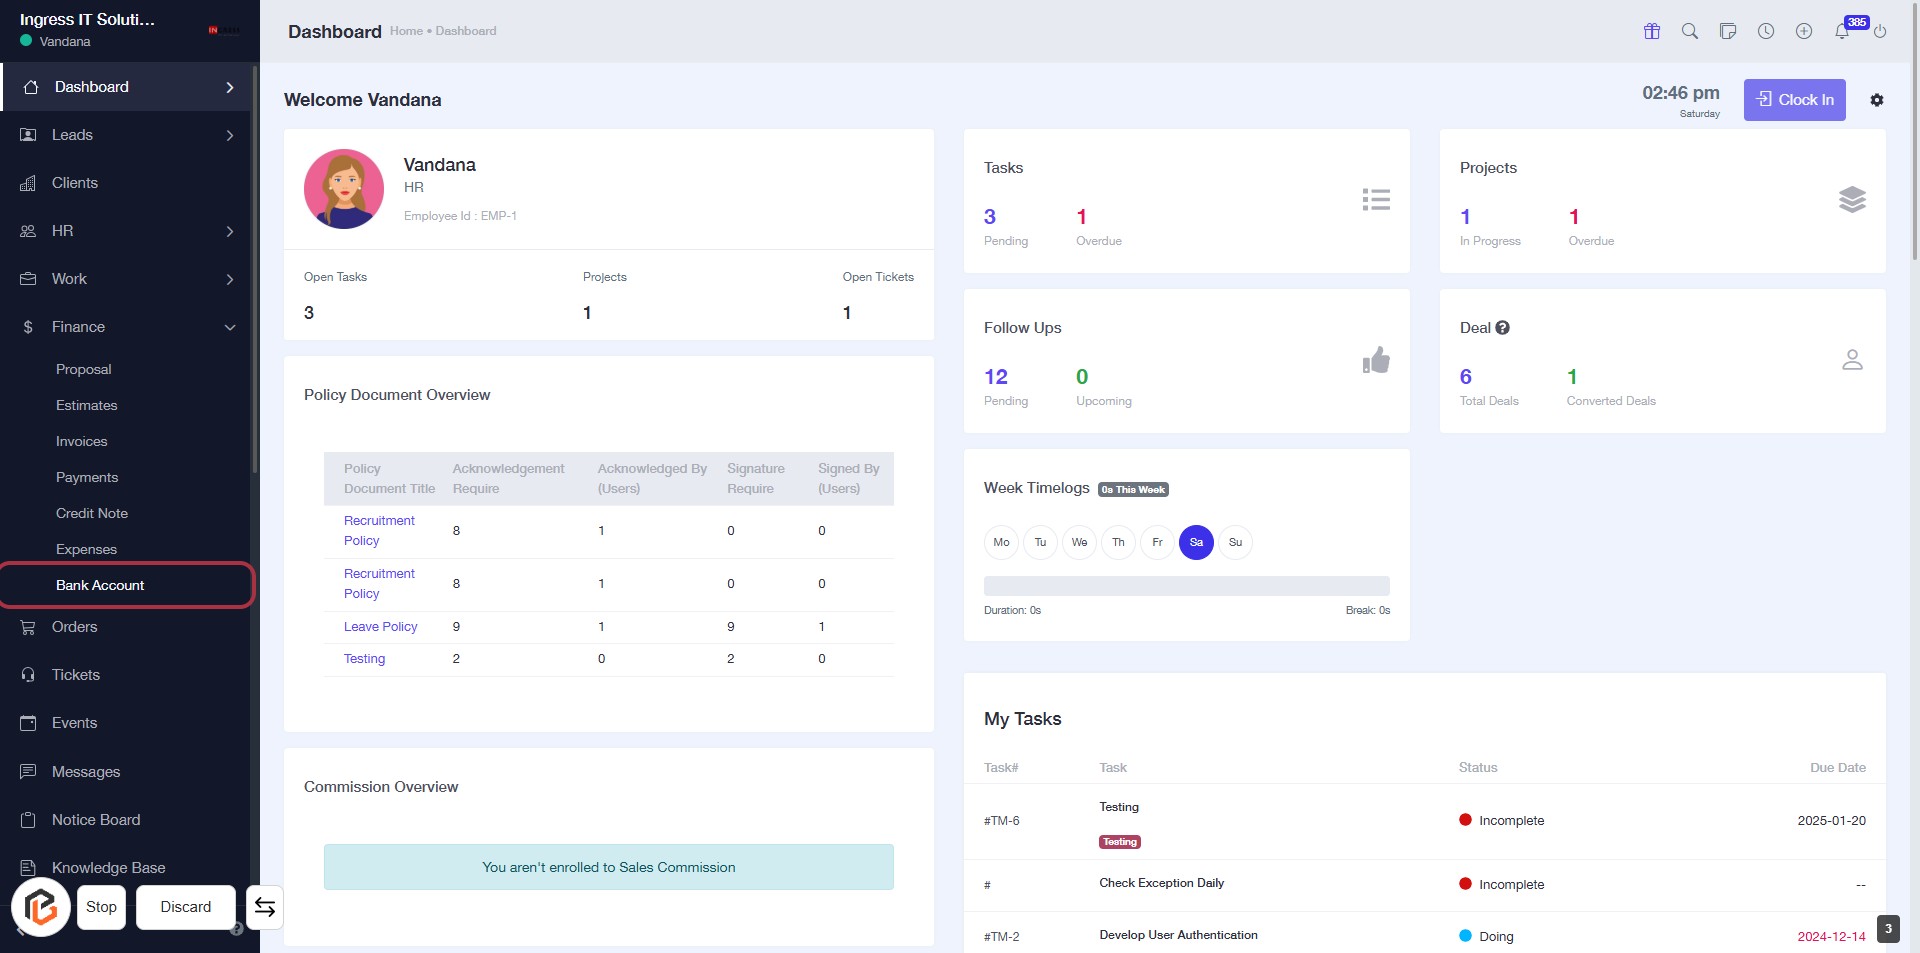
STEP 2: Click on "Bank Account" to Access Bank Details
- Navigate to the left sidebar and locate the "Bank Account" option.
- Click on the "Bank Account" link to view your bank account details.
- Ensure you are on the dashboard page to access the relevant information.
- After this step, proceed to click on "Add Bank Account" for further actions.
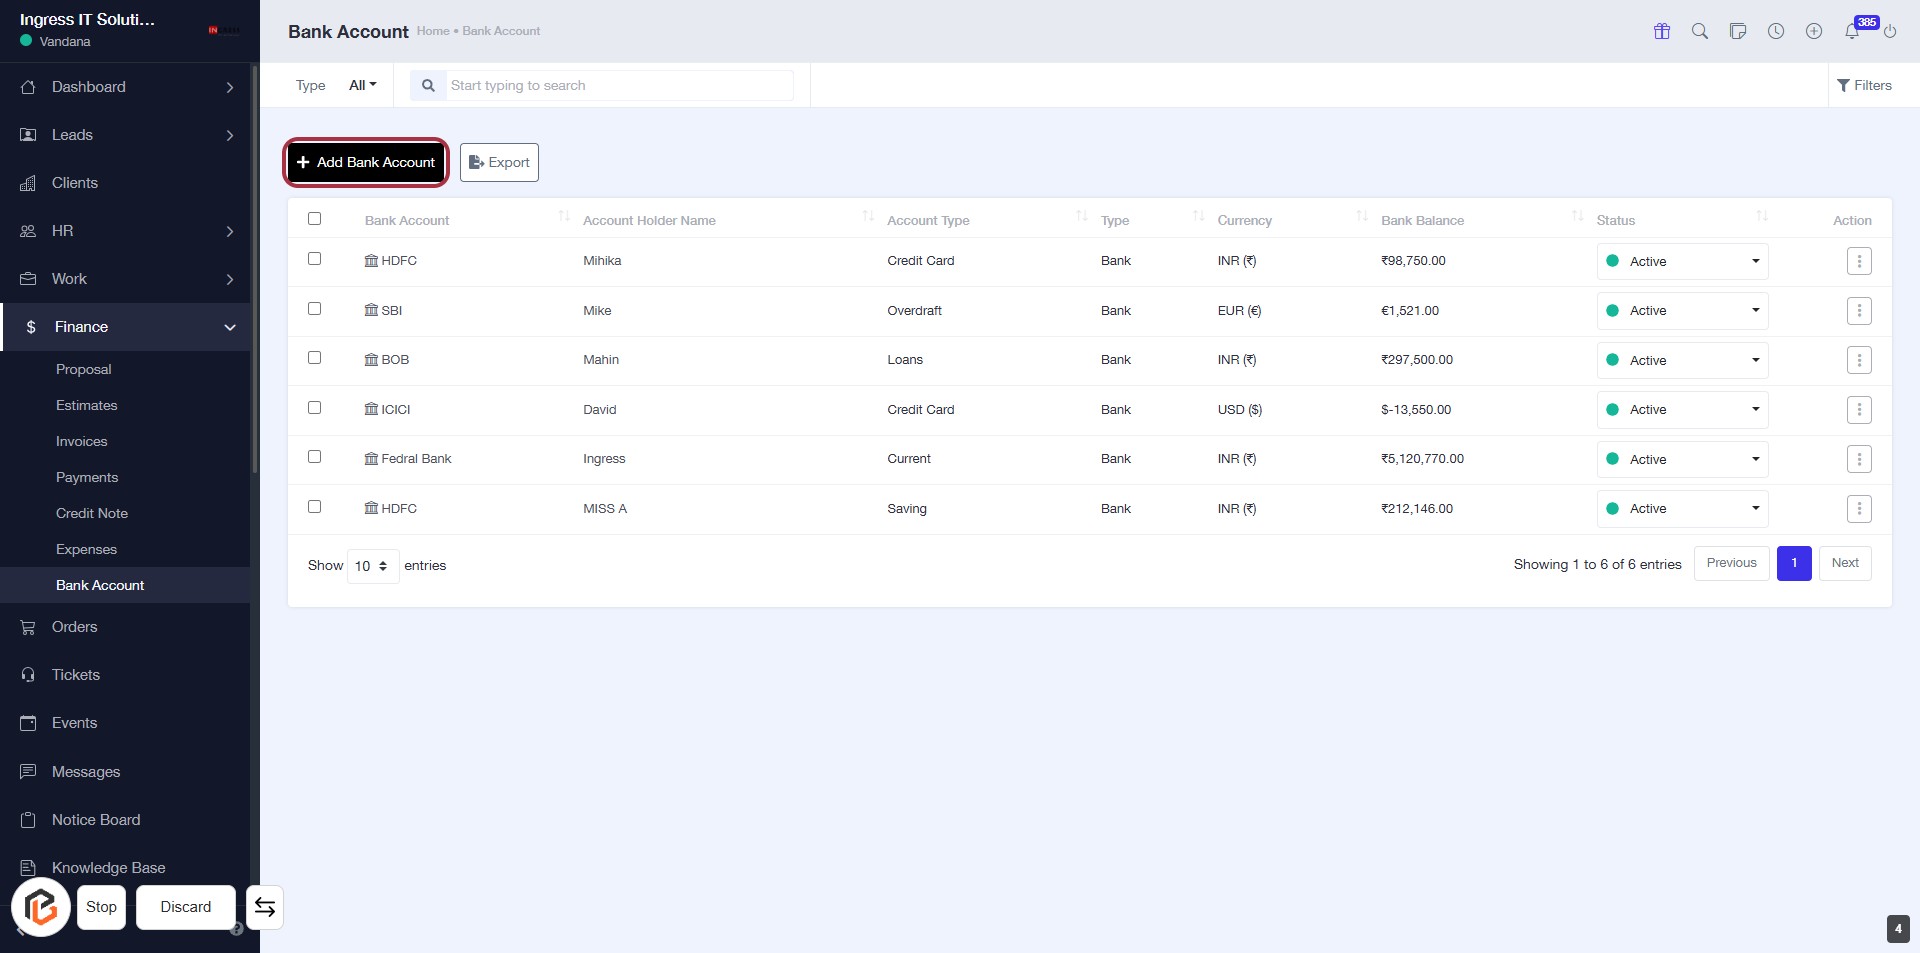
STEP 3: Click on "Add Bank Account"
- Navigate to the "Bank Account" section.
- Click on the Add Bank Account link highlighted in red.
- Ensure you have the necessary information ready for the new bank account.
- After clicking, proceed to the next step to Select "Type" for the account.
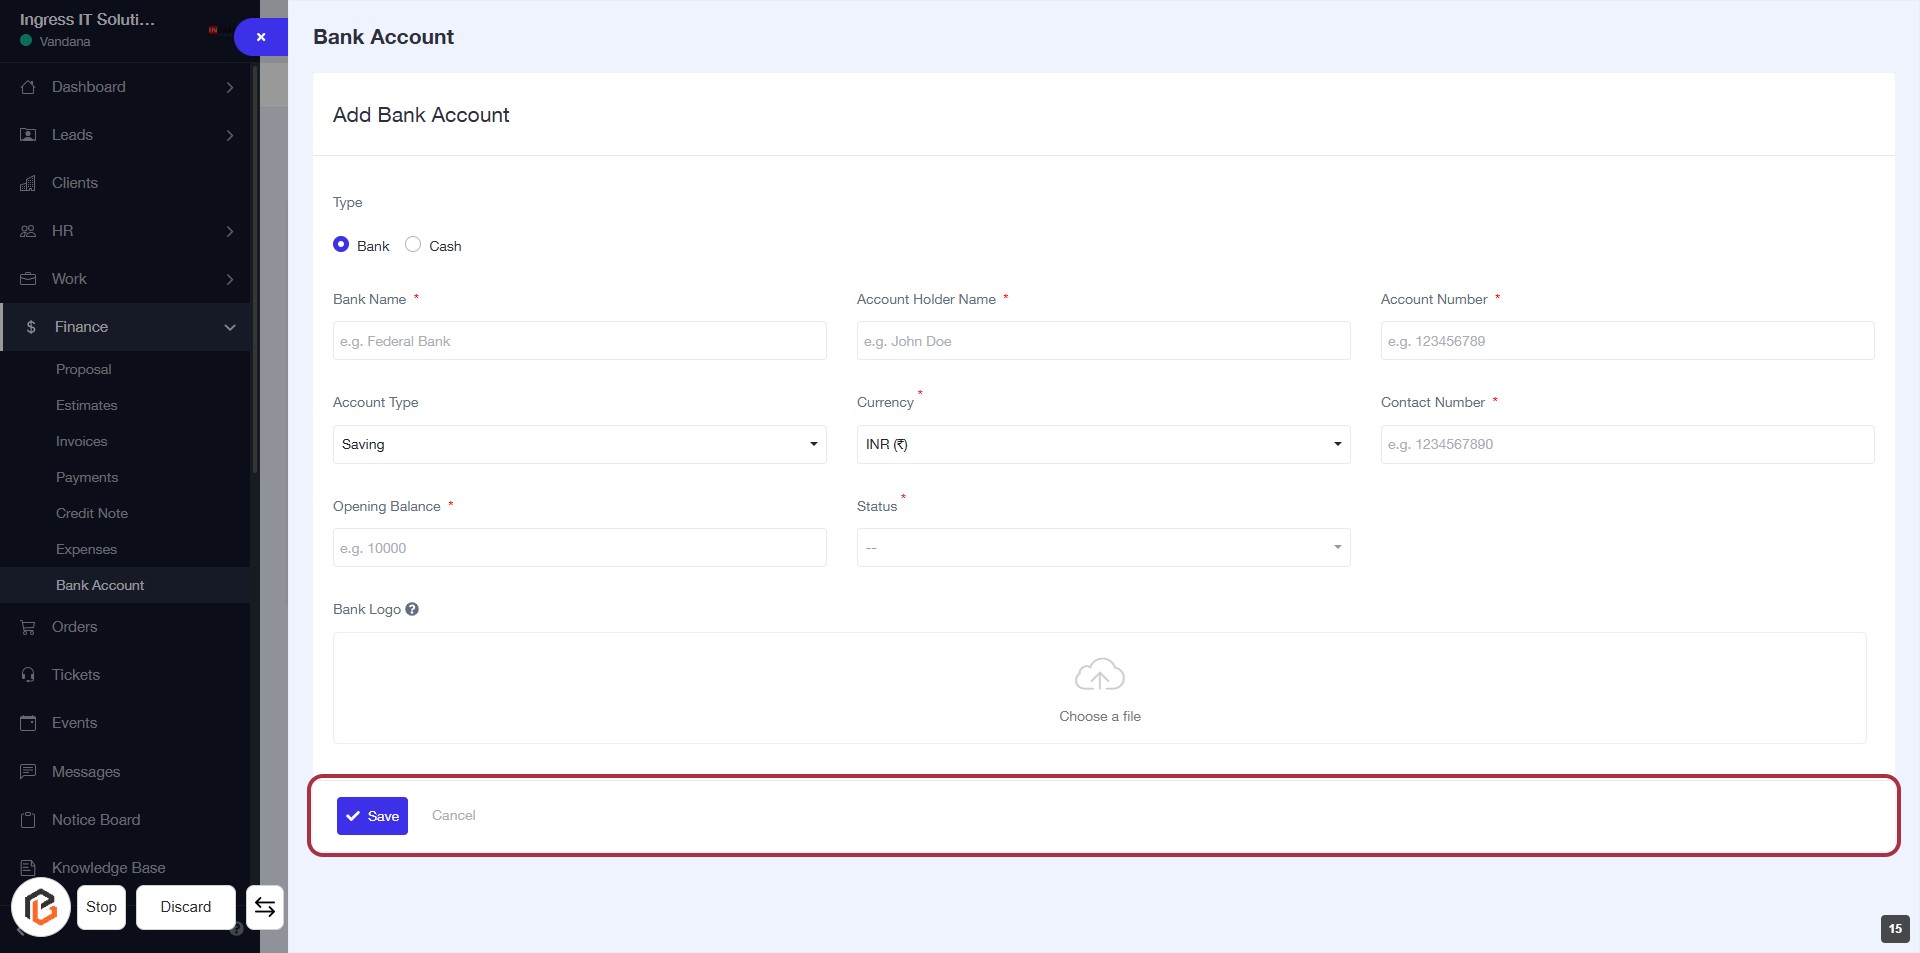
STEP 4: Select "Type" for Bank Account
- Click on the "Type" section to choose between "Bank" or "Cash."
- Ensure to select one option, as this is a required field.
- Proceed to the next step to enter the "Bank Name."

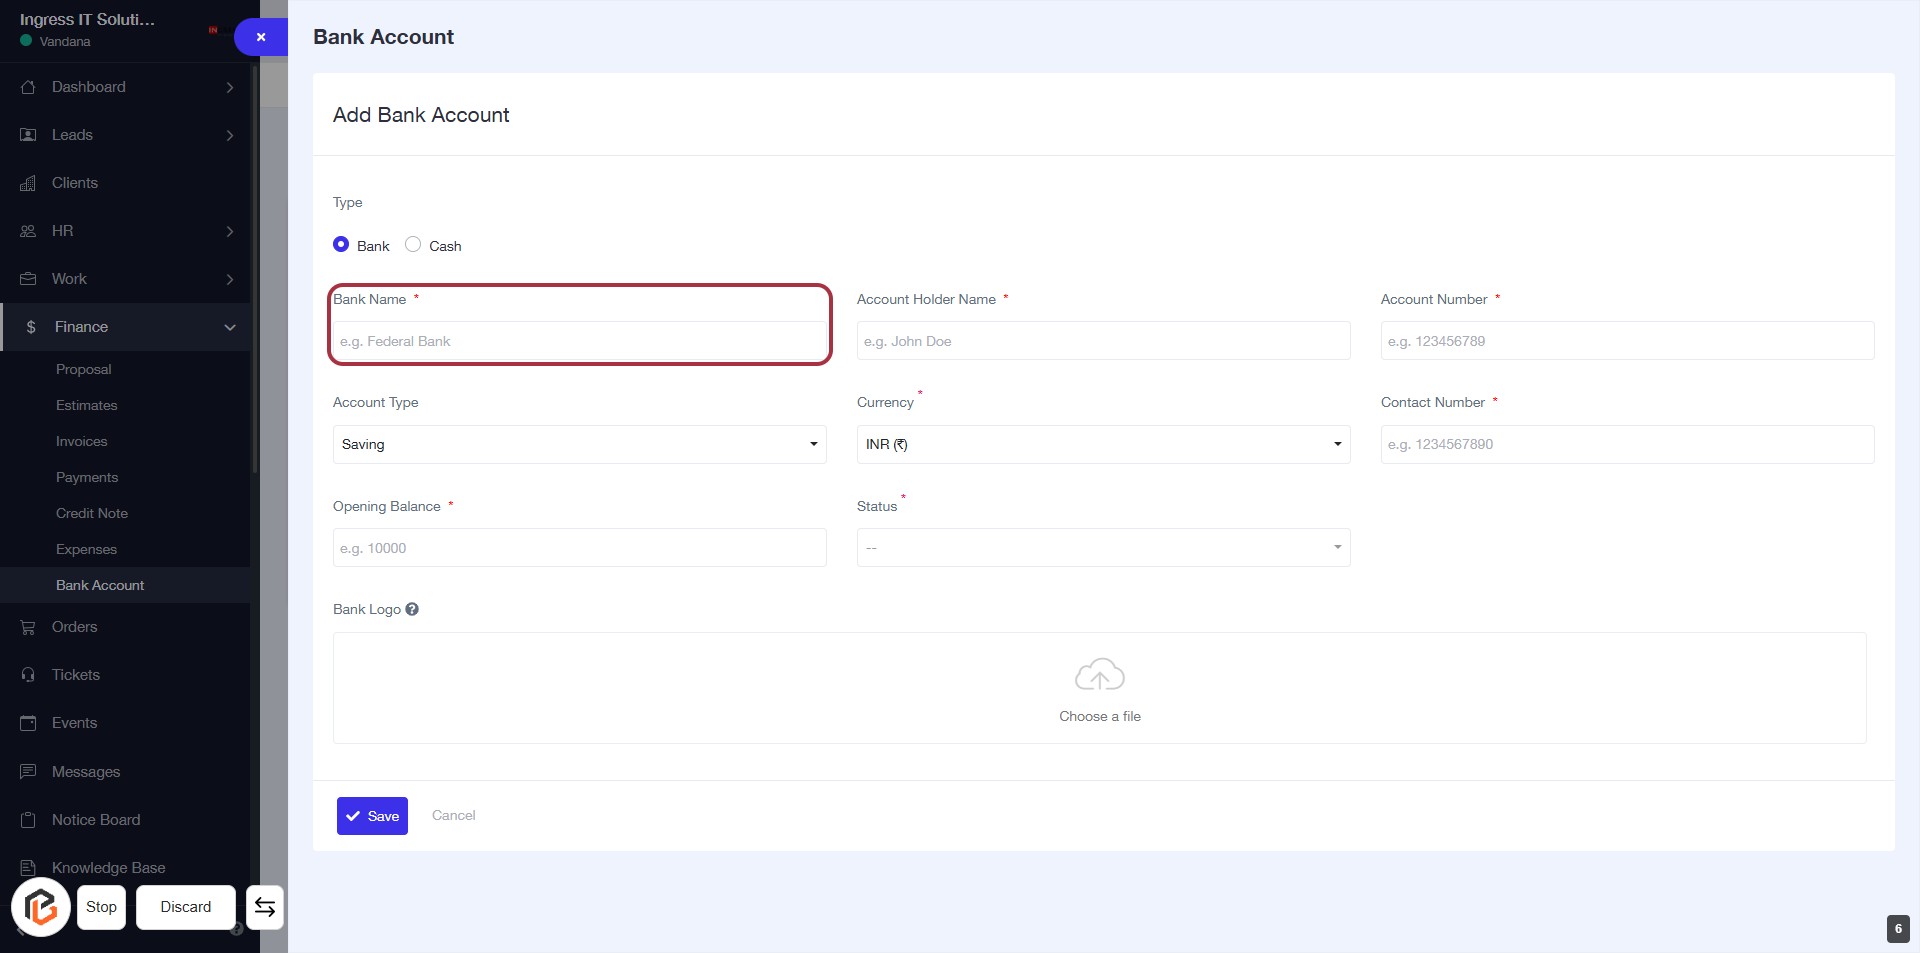
STEP 5: Enter "Bank Name"
- Click on the highlighted area labeled "Bank Name" (marked with a red border).
- Ensure to fill in the required field, indicated by the asterisk (*).
- The example provided is "e.g. Federal Bank" for reference.
- Proceed to the next step by entering the "Account Holder Name."
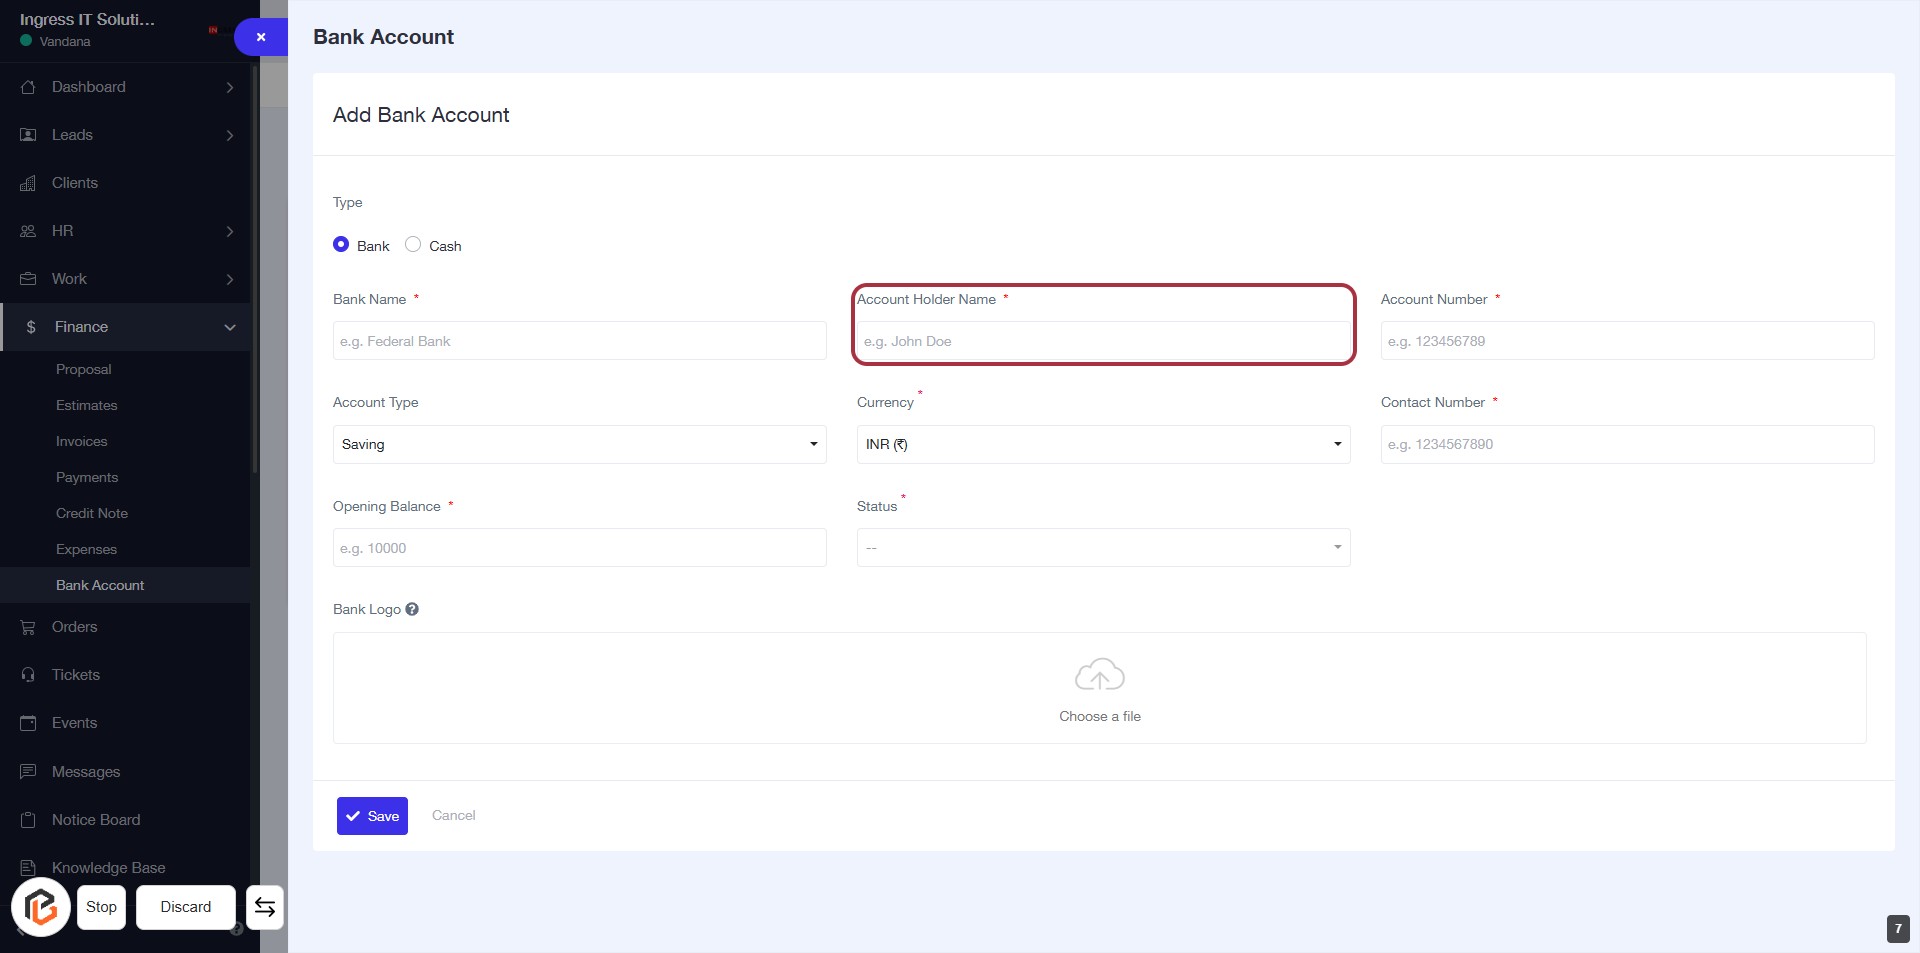
STEP 6: Enter "Account Holder Name"
- Click on the "Account Holder Name" field to input the name associated with the bank account.
- Ensure to fill this field as it is marked with an asterisk (*), indicating it is required.
- Follow the placeholder example: "e.g. John Doe" for guidance.
- After entering the name, proceed to the next step to add the "Account Number."
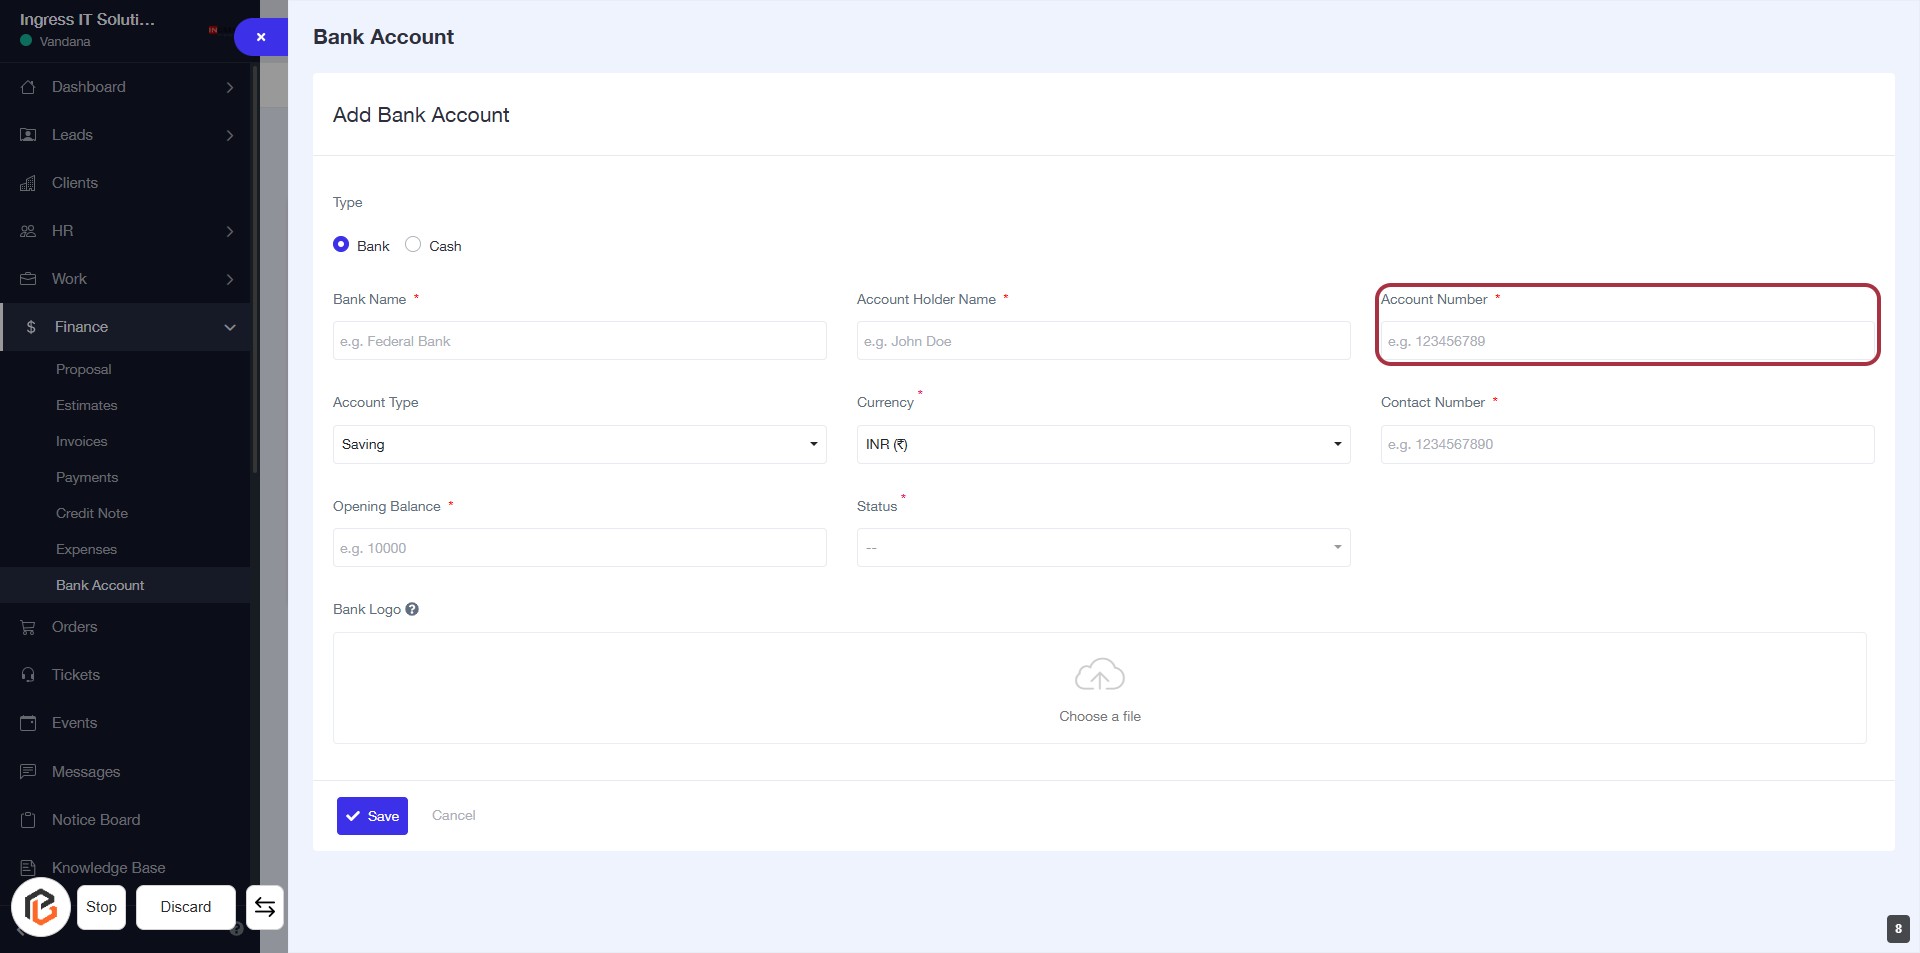
STEP 7: Add "Account Number"
- Click on the highlighted area labeled Account Number.
- Ensure to fill in the required field marked with an asterisk (*).
- Input the account number as per the format provided (e.g., 123456789).
- Proceed to the next step by selecting Account Type.
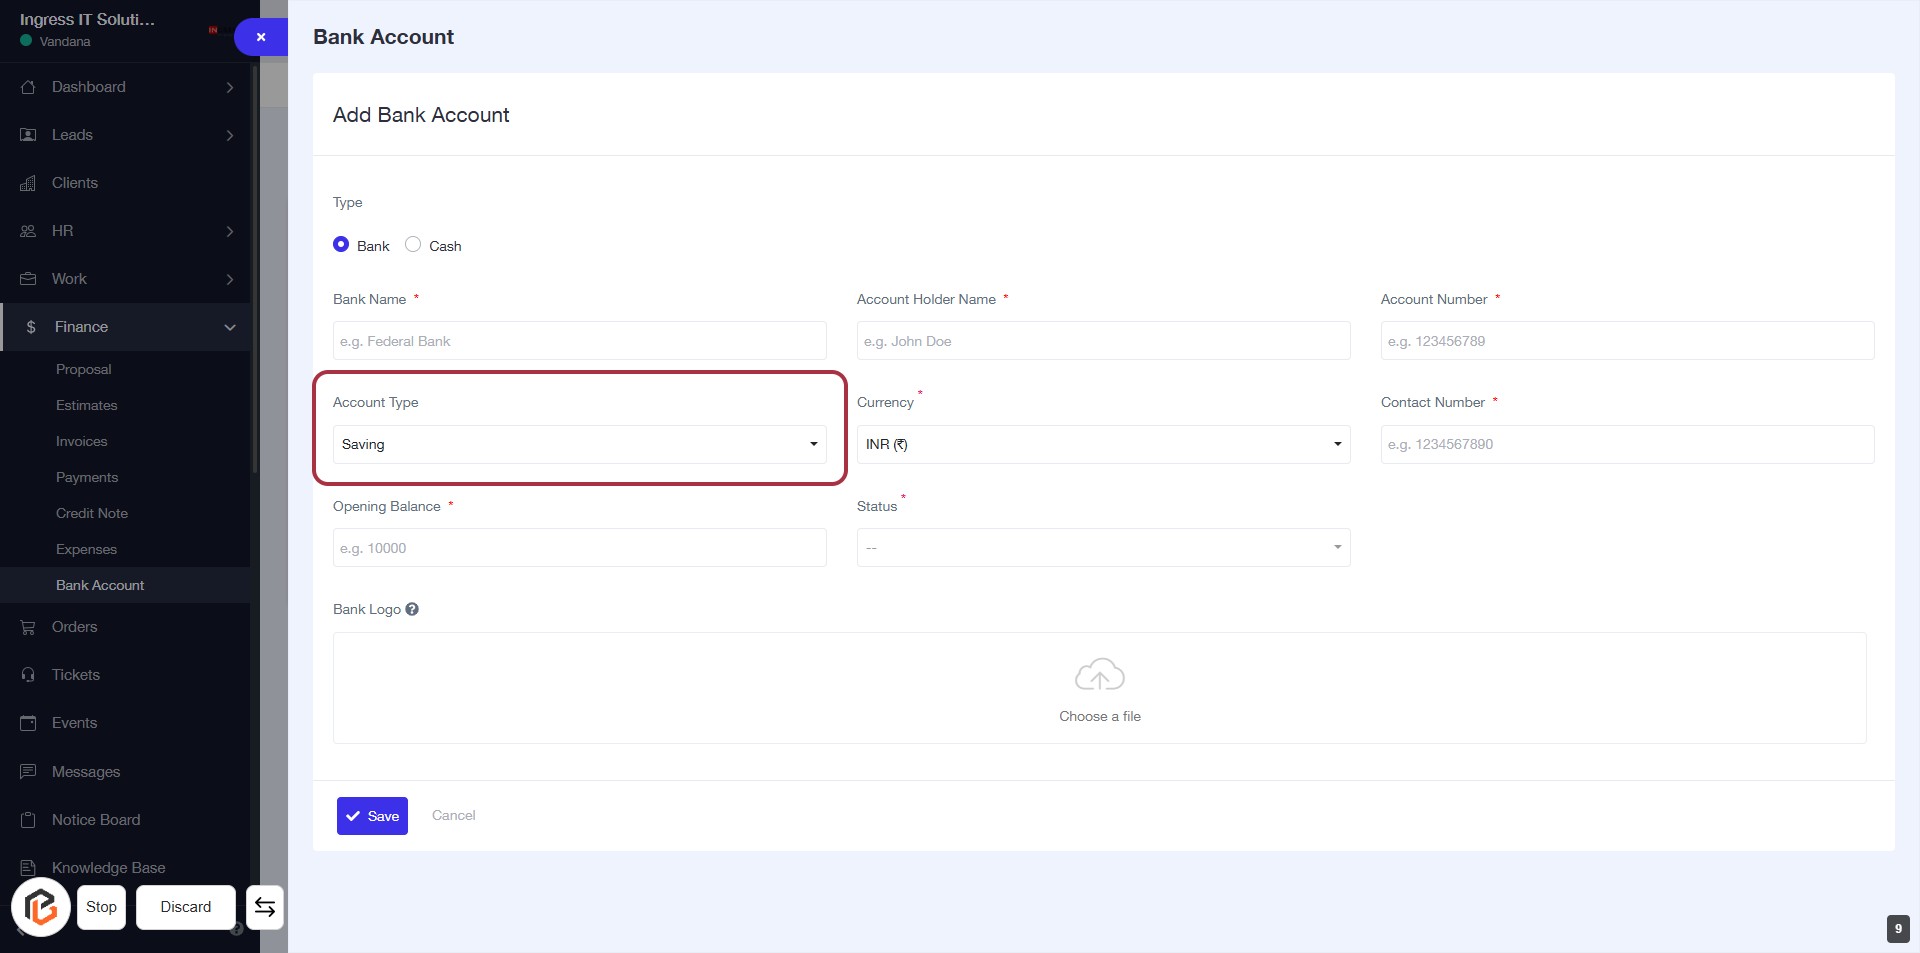
STEP 8: Select "Account Type"
- Click on the "Account Type" field highlighted in red.
- Choose the appropriate account type from the dropdown (e.g., Saving).
- Ensure that all required fields marked with an asterisk (*) are filled out.
- Proceed to the next step by selecting "Currency."
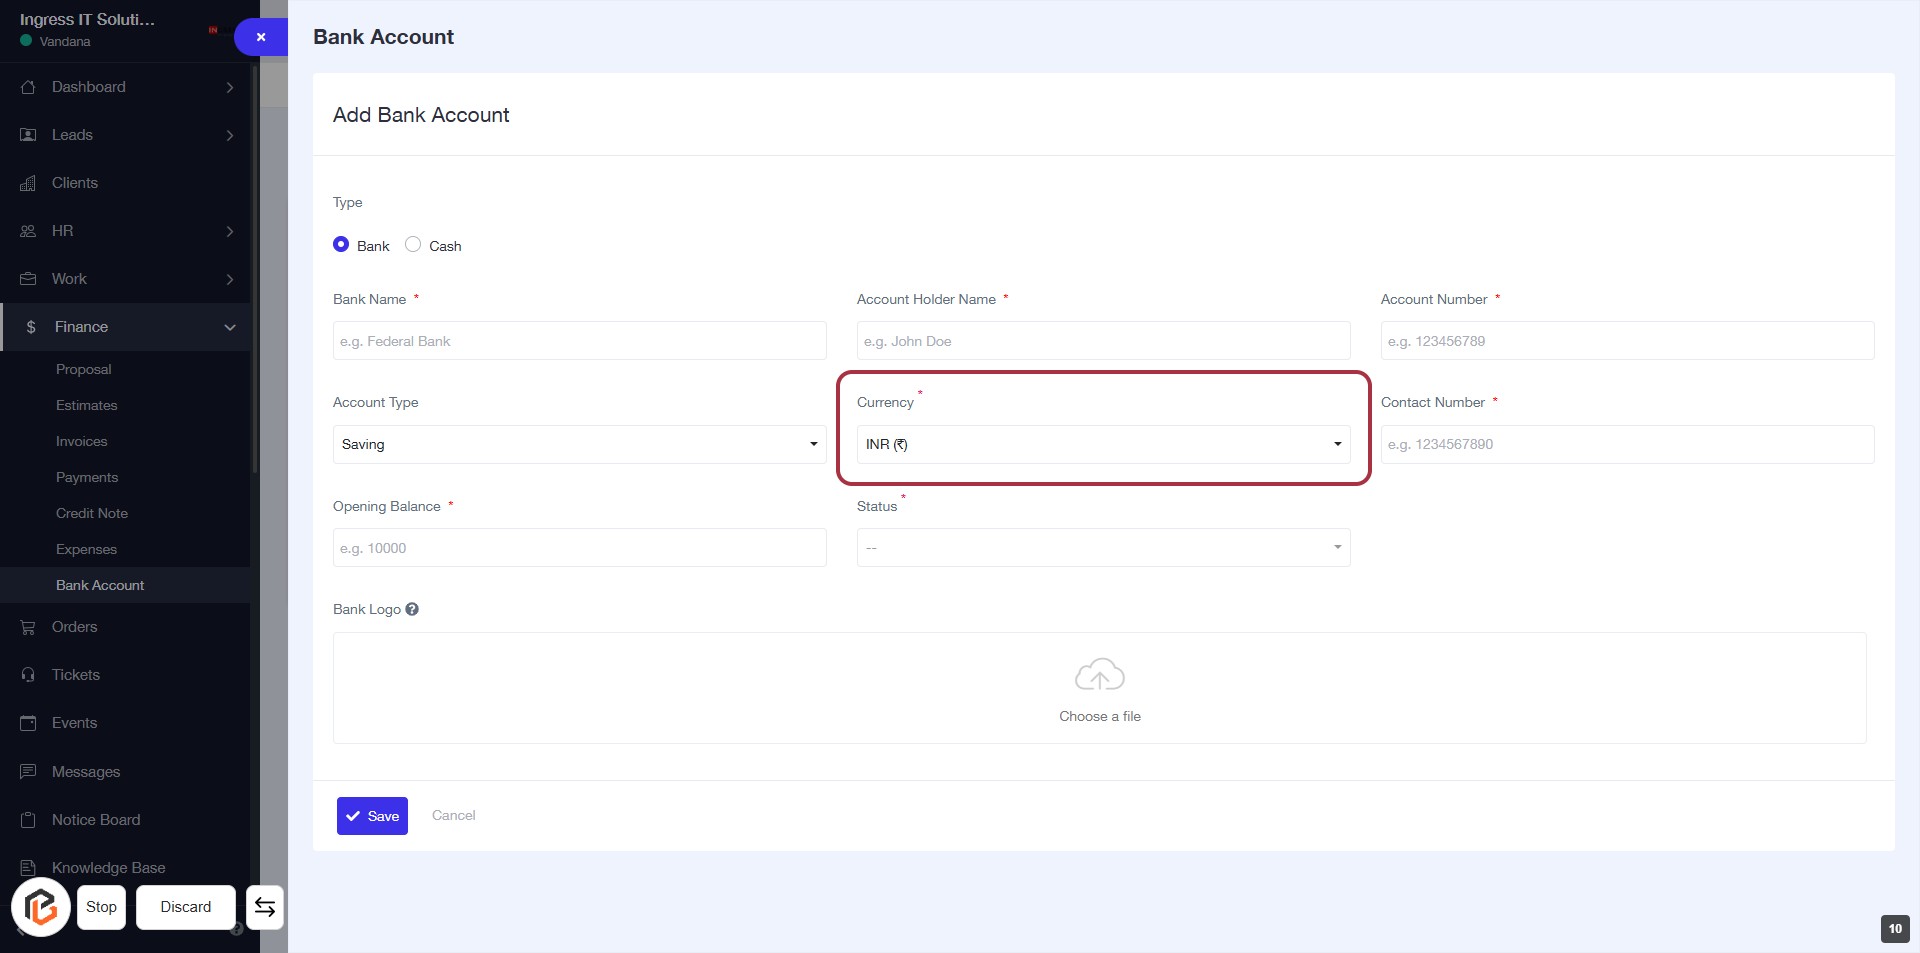
STEP 9: Select "Currency"
- Click on the "Currency" dropdown to choose the appropriate currency for the bank account.
- Ensure that the field marked with an asterisk (*) is filled, as it is a required input.
- Review other fields in the form to confirm all necessary information is provided before proceeding.
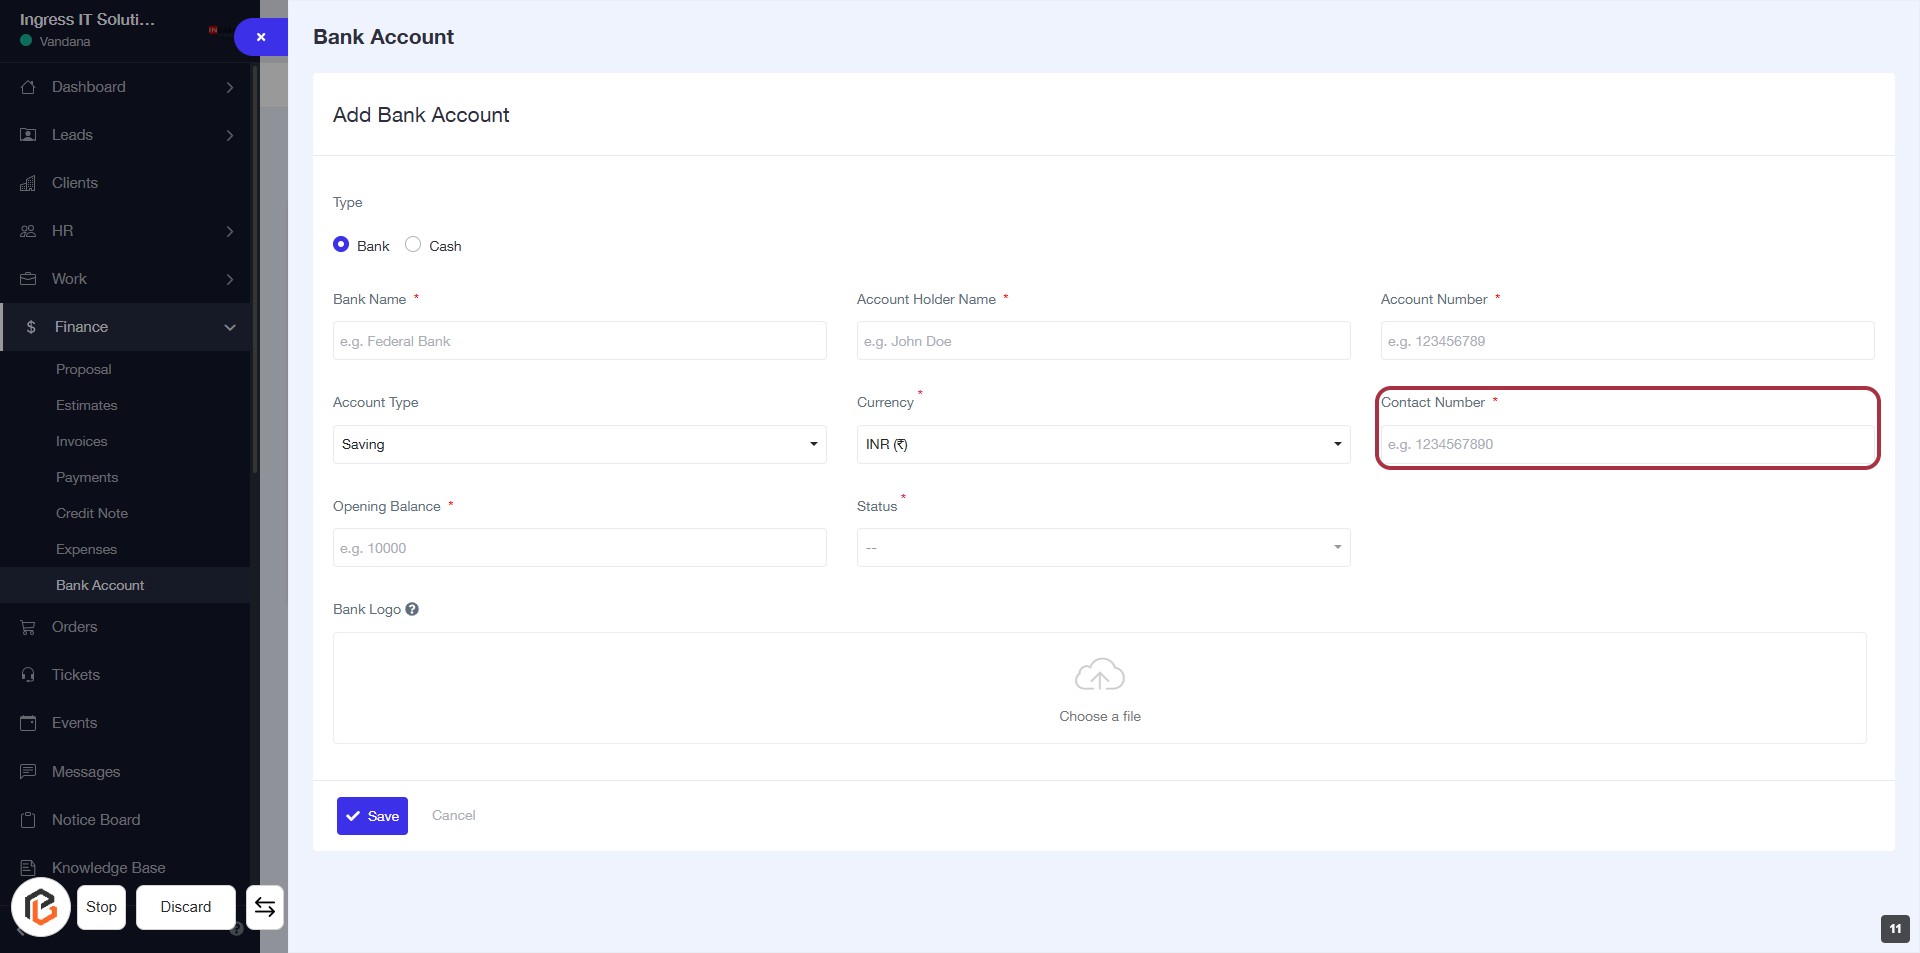
STEP 10: Add "Contact Number"
- Click on the "Contact Number" field to input your contact details.
- Ensure to fill in the required field marked with an asterisk (*).
- The format for the contact number is typically numeric (e.g., 1234567890).
- After entering, proceed to the next step to enter the "Opening Balance."
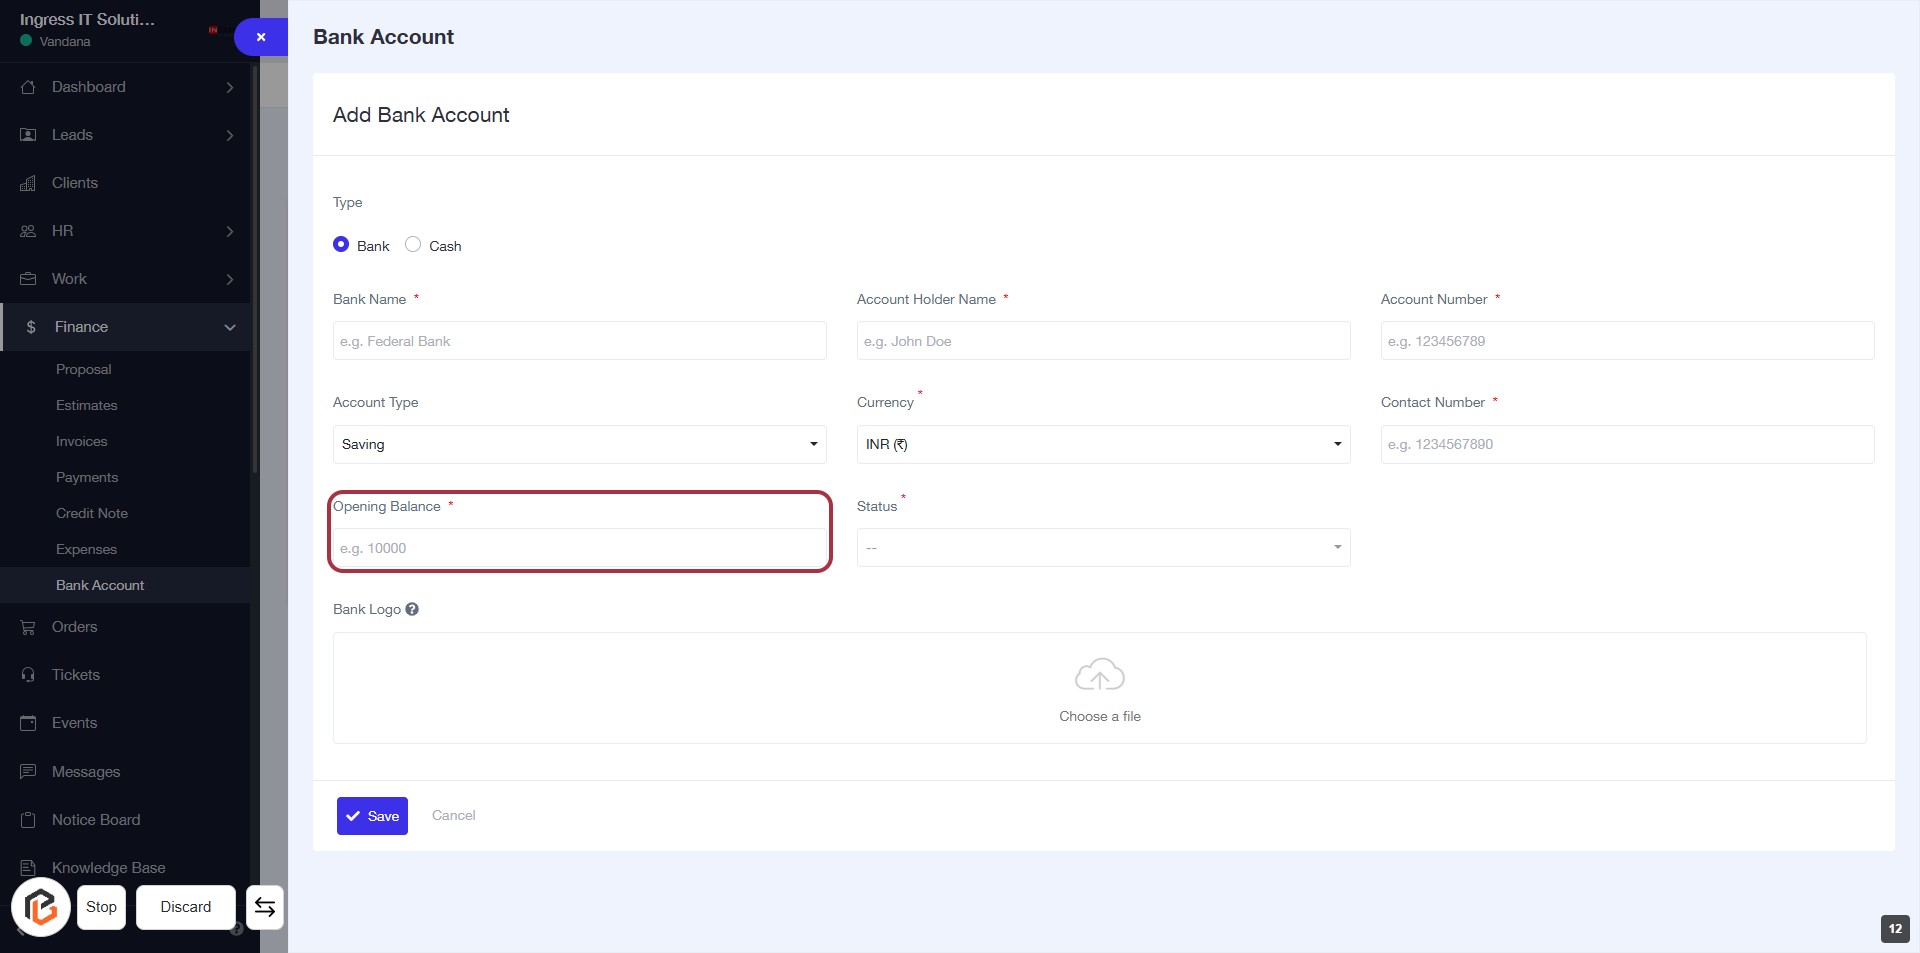
STEP 11: Enter "Opening Balance"
- Click on the "Opening Balance" field to input your balance.
- Ensure to enter a valid numeric value as this field is mandatory (indicated by the asterisk *).
- Review other required fields: Bank Name, Account Holder Name, Currency, Account Number, and Contact Number.
- Proceed to the next step by selecting "Status".
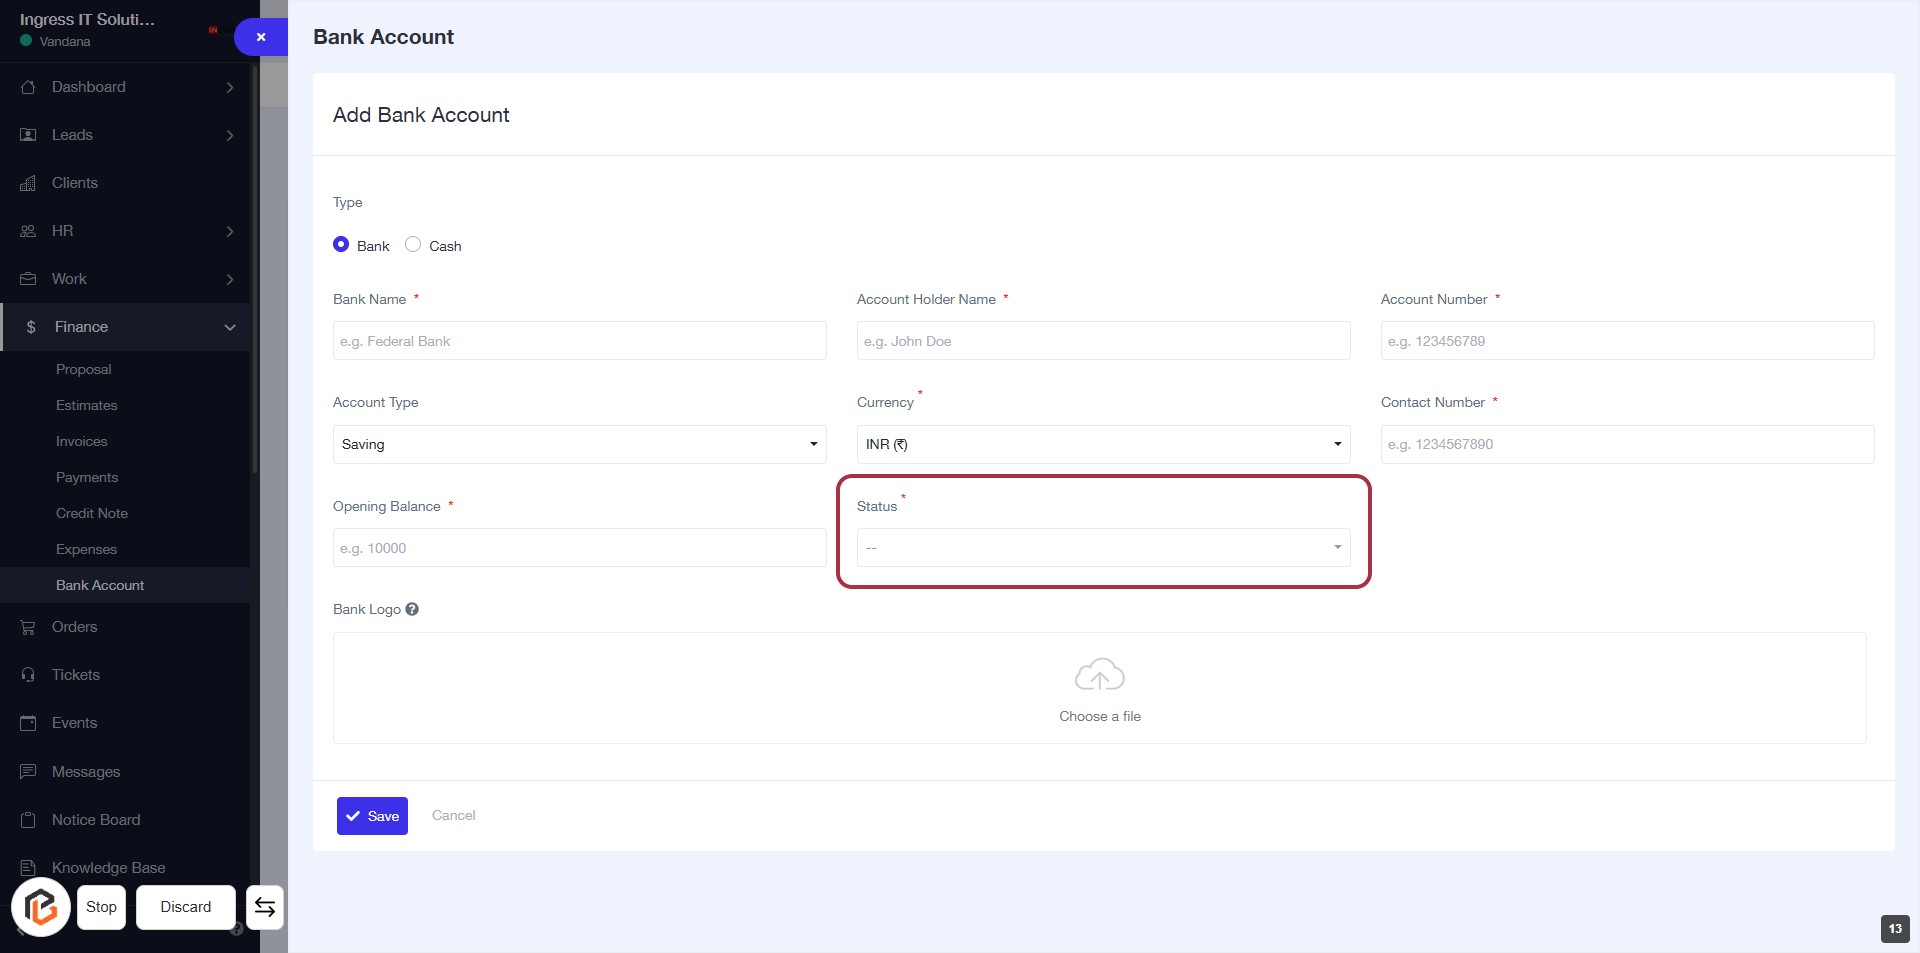
STEP 12: Select "Status"
- Click on the "Status" dropdown to choose the appropriate status for the bank account.
- Ensure that the field marked with an asterisk (*) is filled, as it is required.
- Review other fields for completeness before proceeding to the next step.
STEP 13: Upload Bank Logo
- Click on the highlighted area labeled "Choose a file" to upload the bank logo.
- Ensure the file meets any specified requirements (e.g., format, size).
- Review other required fields in the form, marked with an asterisk (*), to ensure all necessary information is provided before proceeding.
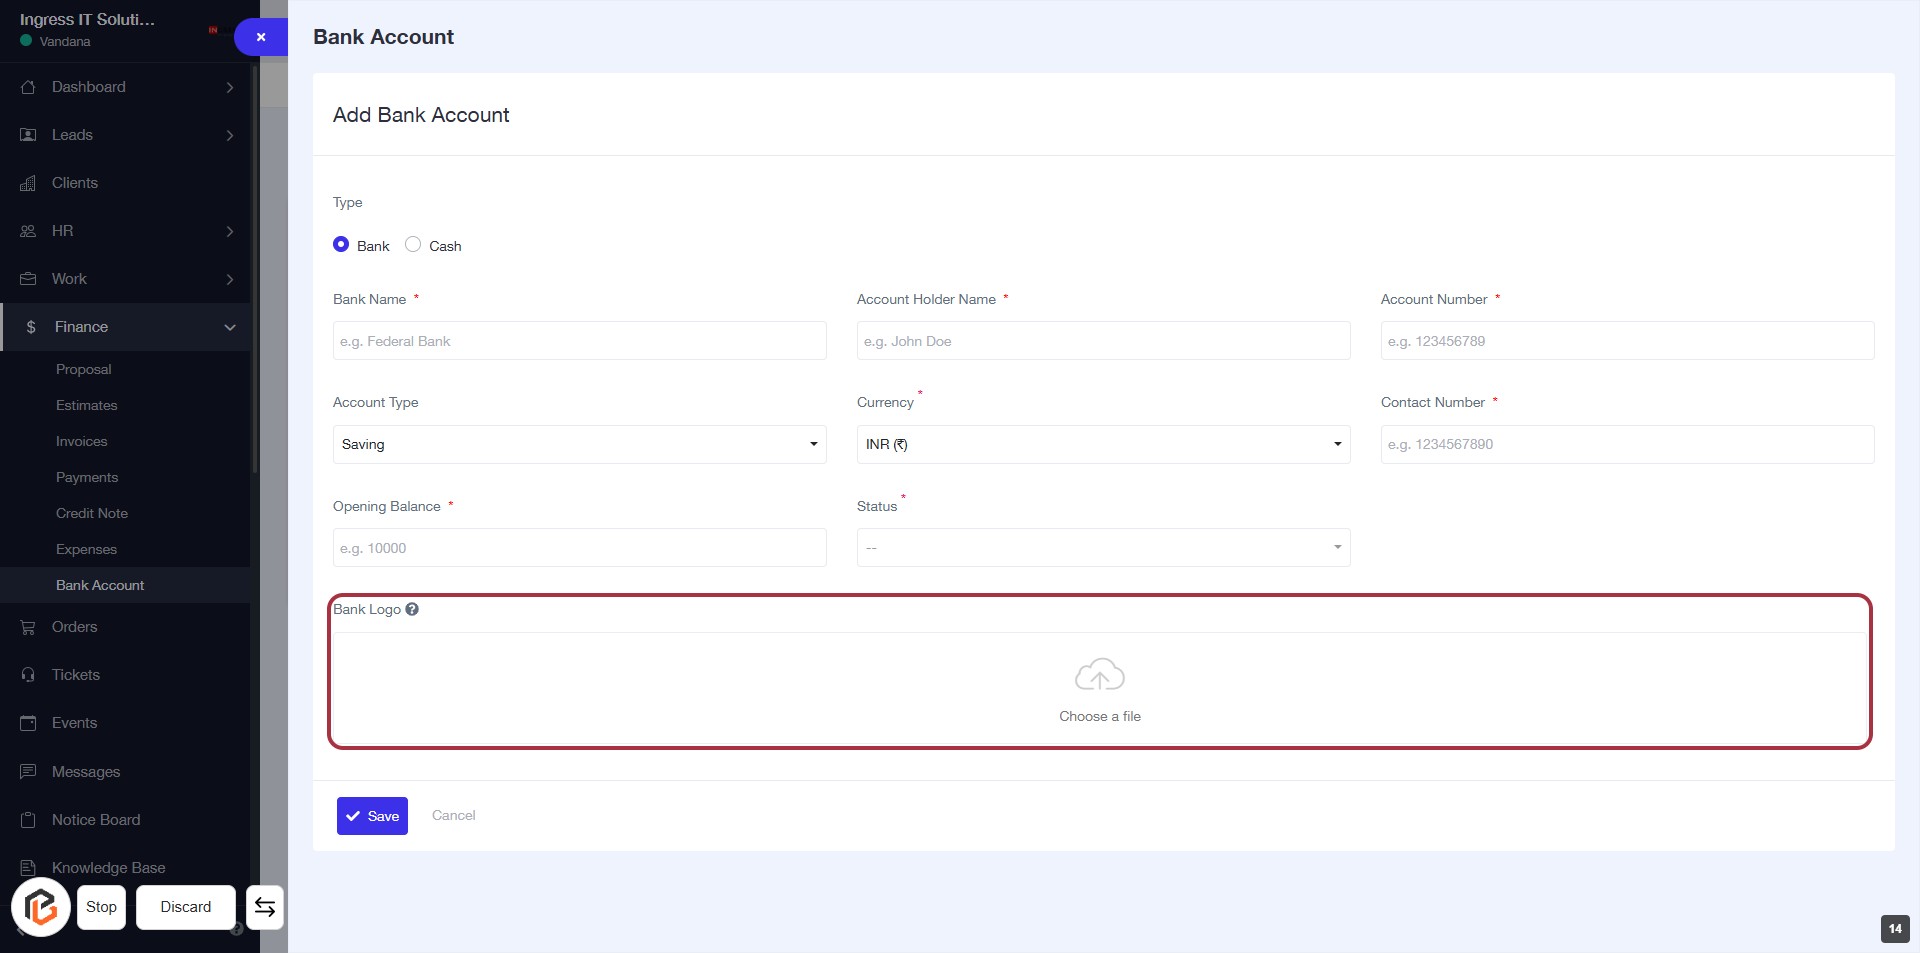
STEP 14: Click on "Save" to Finalize Bank Account Details
- Ensure all required fields marked with '*' are filled out.
- Review the information entered for accuracy.
- Click on the Save button to save the bank account details.
- If you wish to cancel, click on the Cancel button instead.